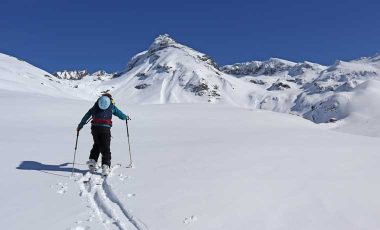
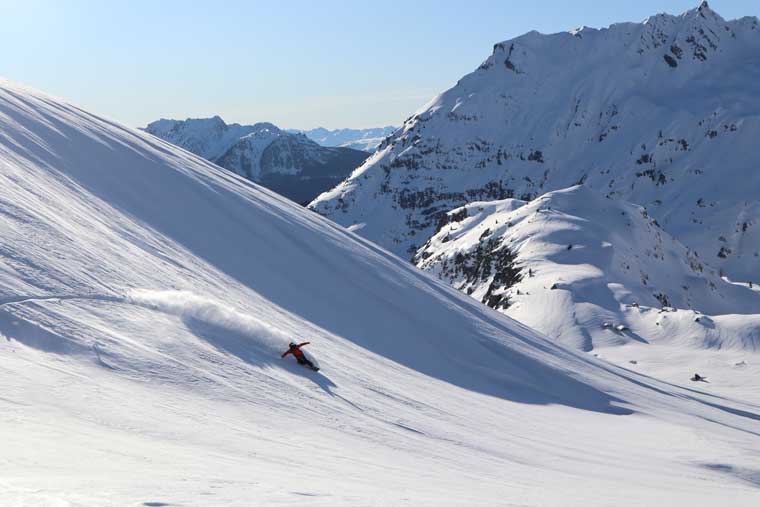
The lure of the backcountry and all its wild, untouched terrain, is irresistible to many snowboarders. Once you’ve had a taste of riding untouched, deep, dry, power, it’s hard to go back to the groomers with all their busy routes and patchy coverage. Riders go great lengths to find powder stashes – anything for just another turn in perfect, fresh snow.
If this sounds like you, then our guide to splitboarding for beginners is a great place to start your journey to safely taking your riding further afield.
If you’re totally new to splitboarding then read our introduction to splitboarding article which covers terminology, gear, clothing and most importantly, safety. All these things are also covered in this splitboarding guide for beginners, but in more detail. This guide builds on these basics to enable budding backcountry explorers to further understand how to go about splitboarding, what to pack, and some basic skills needed.
I’ve worked closely with ISIA and ISDT Qualified Snowboard Instructor, Owain George of TDC Snowboarding, to take you through everything that a beginner splitboarder should consider before setting foot into the backcountry.
- Splitboarding safety
- What is splitboarding?
- How does splitboarding work?
- How to prepare for splitboarding
- What to pack for splitboarding
- How to splitboard snowboard
A word about splitboarding safety
Before we go any further, I can’t stress enough that splitboarding, snowboarding, ski touring or any kind of backcountry exploration during the winter can be a very high risk activity that can result in death. The dangers of avalanches are very real and should never be underestimated.
For this reason, it is imperative that:
- You hire a guide or instructor to go splitboarding until you (and they) are happy that you have enough experience and a healthy respect for the mountains to self-guide an excursion.
- You partake in an avalanche safety course.
- You practice avalanche rescue drills regularly.
- You never go splitboarding with someone who isn’t trained in avalanche rescue and safety.
- You’re not afraid to cancel or back out of a tour if you are at all unsure about the conditions.
What is splitboarding?
Splitboarding is the snowboarding equivalent of ski touring – travelling across, up and down snowy terrain. It combines the convenience of covering flat or uphill terrain on skis, with the joy and weightlessness of riding downhill through deep powder on a snowboard. Splitboarding enables snowboarders to access and ride backcountry terrain that would otherwise only be reachable via helicopter or snowmobile, if at all.
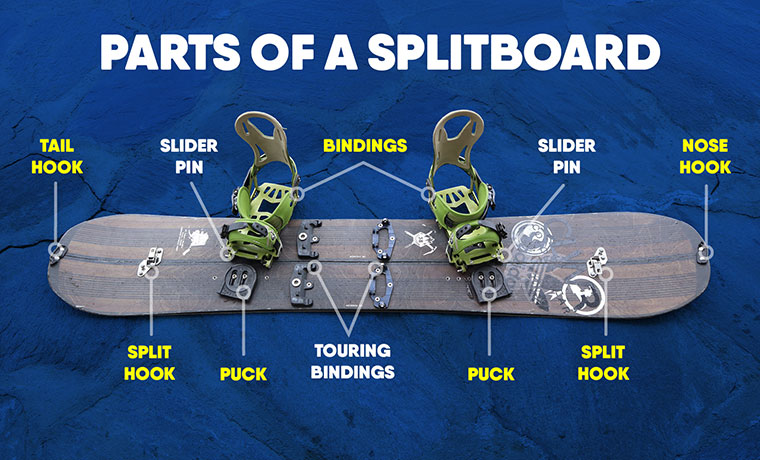
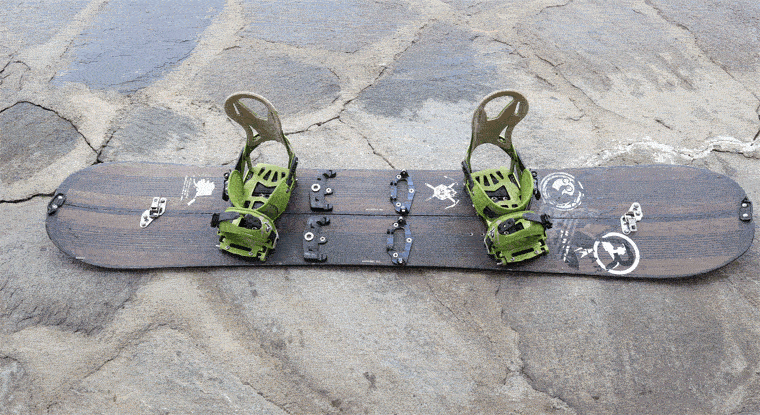
What is a splitboard?
The act of splitboarding involves the use of a splitboard: a snowboard that splits in half to form skis for the uphills. The skis then connect back together to form a board for riders to use on the downhills. To make this possible, the board features special bindings and binding attachments that can be moved from snowboard position to ski position easily.
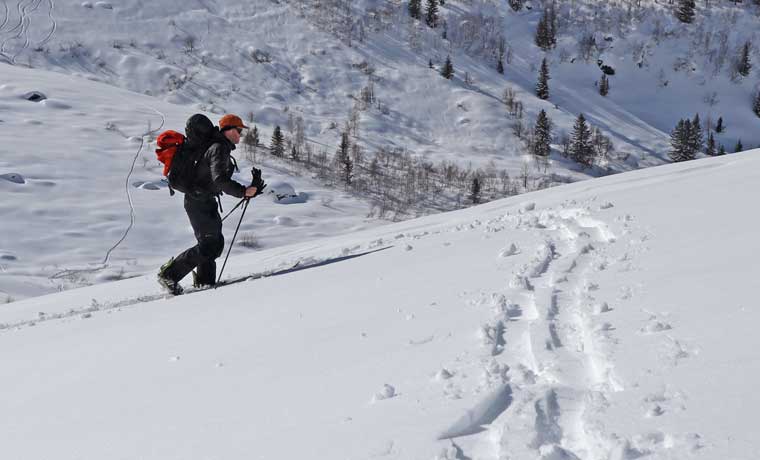
How does splitboarding work?
Splitboarding (and ski touring) is only possible with the use of skins. These are sticky sheets of Nylon or Mohair that go on the bottom of your skis. They provide glide and traction to allow you to move uphill on snow without sliding backwards.
Splitboarding works by:
Converting a board into skis and attaching skins to the bottoms of the skis.
- Travelling cross-country and uphill on skis to a planned destination.
- Removing the skins and converting the skis back to a board,
- Snowboarding down the mountain (either back to the start of the tour or to another destination).
- Repeating the above process as many times as your route requires.

How to prepare for splitboarding
Fitness
Fitness is a key component to preparing for splitboarding that is easy to overlook. It’s also one of the first things you should think about when planning a trip. If you’re not in shape then not only will it be darn-right miserable, but there’s also the danger of injury. In the middle of the backcountry you don’t want to be risking injury – least of all from a lack of training.
Cardio fitness and endurance is essential for those long ascents. But you’ll also need to do some strength, balance and mobility training to ensure that you can deal with challenging downhills and physically demanding uphill kick turns.
For more information on this read our guide to snowboard fitness as well as our guide to training for hiking.
Weather
As with any trip into the wilderness, it is essential that you have a good idea of what the weather conditions are likely to be during your expedition. Keep a close eye on any weather fronts that are coming in and what impact they may have on your trip. You may need to alter your packing list if it’s likely to be blazing sunshine. Or add a hot drink and some extra layers if it’s looking windy and snowy etc.
Don’t be afraid to pull the plug on a tour if the weather changes at the last minute.
Avalanche forecast
If you’re reading this article then you’ll only be splitboarding in the backcountry with a guide. They will be constantly assessing the snowpack, weather and avalanche risks leading up to your trip. However, it’s also good to start doing this yourself from the get-go. It will help you to learn more in the long-run about the snow conditions and associated risks of touring in certain areas/conditions.
A great place to start is to seek out an app like this one that is local to the area in which you intend to be in.
Route planning
Again, your guide will have a route planned that is safe and appropriate for your level. However, you should also know the route that your guide intends to take you. This is important for two reasons: it helps you learn to route plan and improves your navigation, and it also means you can identify where you are if something should happen to your guide, or you need to alert the rescue services.
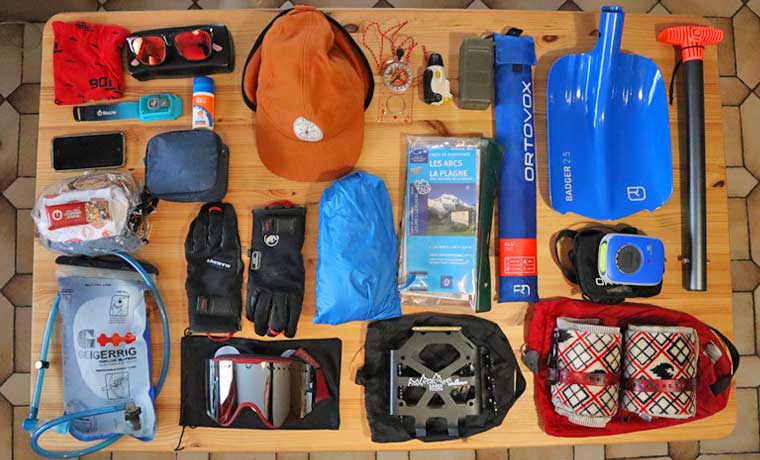
What to pack for splitboarding
There’s quite a lot of gear you’ll need to take splitboarding with you. So, you’ll need a comfortable hiking day pack that is around 25-35 litres. Ideally, a touring specific day pack should be used as it offers features like helmet storage, snowboard/ski carrying points and pole attachment points.
Here’s a quick splitboard packing checklist:
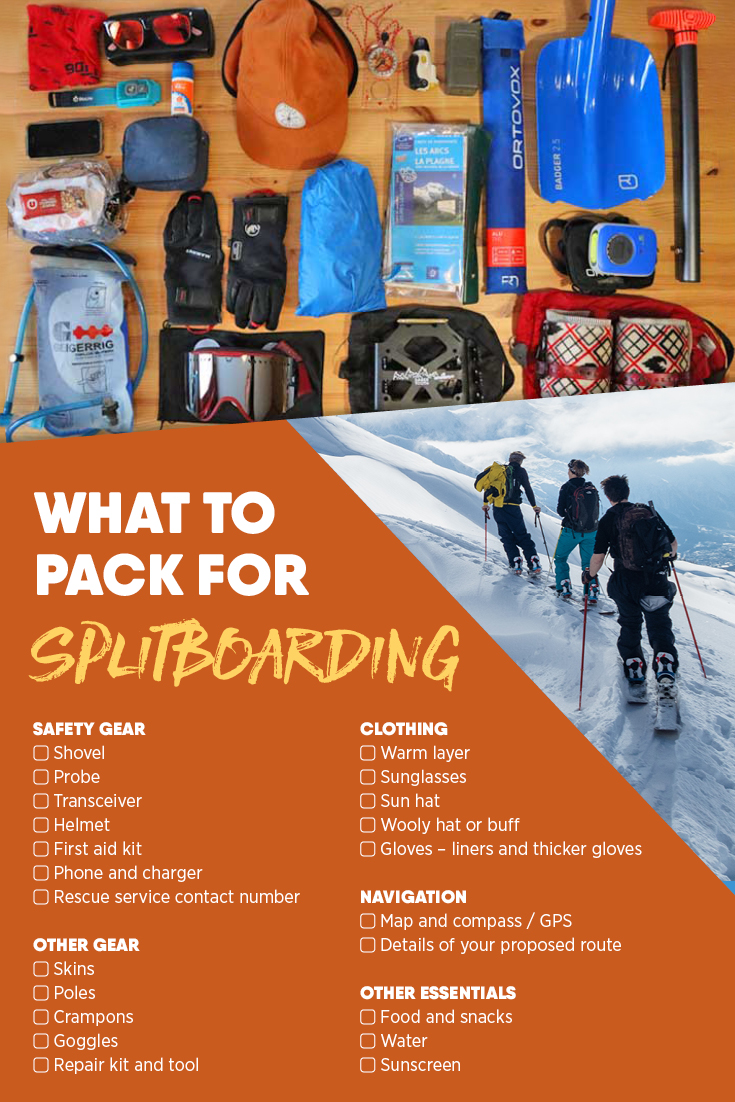
Share this image on your site
How to splitboard
Aside from being an advanced snowboarder, splitboarding requires a few extra skills for it to be a success. Like any new skill, these should be practiced to improve efficiency. This section takes you through how to splitboard, and explains the basic skills needed.
How to set up a splitboard for touring
One of the major downsides of splitboarding versus ski touring is that it takes a little more time and effort to convert a board to skis and back again. If you ever find yourself touring with skiers then you will want to make sure you are as quick at making the switch as possible. Being quick is also important if you are in challenging weather conditions. The less time it takes, the less likely you are to get cold.
Here’s how to set up a splitboard for touring:
- Disconnect the bindings from the board: undo the slider pin and slide the bindings off the pucks.
- Undo the split hooks, tail hook and nose hook,then part the board.
- Attach the skins to the bottoms of the two parts of the board (let’s call them skis!).
- Place the skis down so that the outside edges are next to each other.
- Attach the bindings to the skis: fix the slider pin to the front touring brackets.
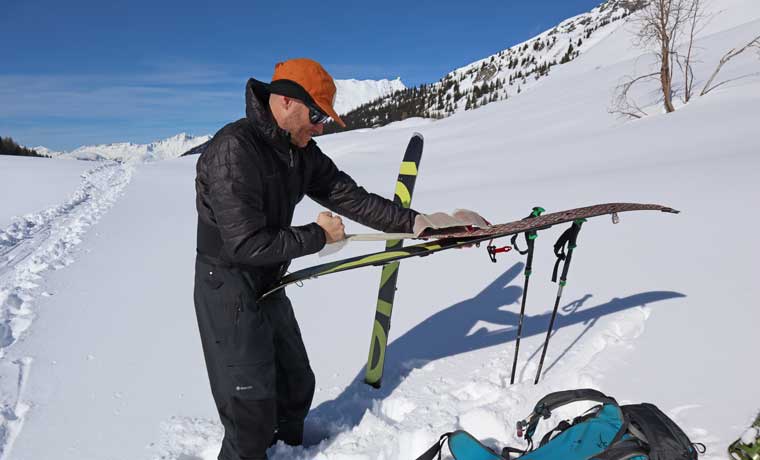
How to put skins on your splitboard
As soon as you’ve split your board into skis, place the skis into the snow so that they are sticking up and ideally with the bottoms facing into the sun. This helps prevent snow from sticking to the bottom and melts off any snow that is already there. Then you can put then skins on the skis one at a time.
Here’s how to put skins on your splitboard:
- Identify the correct skin for the correct ski (they will be shaped the same at the ends).
- Hook the skin over the front end of the ski and peel off a small amount of the skin from the backing, placing it carefully onto the ski.
- Once the position is correct, place the other end of your ski into your stomach so that the ski is suspended out in front of you (see above image). From here the ski is at a good angle to slowly pull the rest of the skin onto the ski whilst maintaining tension.
- Be sure to flatten the skins thoroughly onto the skis and ensure that both edges of the skis are not covered by the skins.
- Some skins have a hook at their tail end. If so, this should be hooked onto the tail of the skis.
The more you do this, the easier and quicker it will become. You may find that other techniques work better for you, so try a few things.
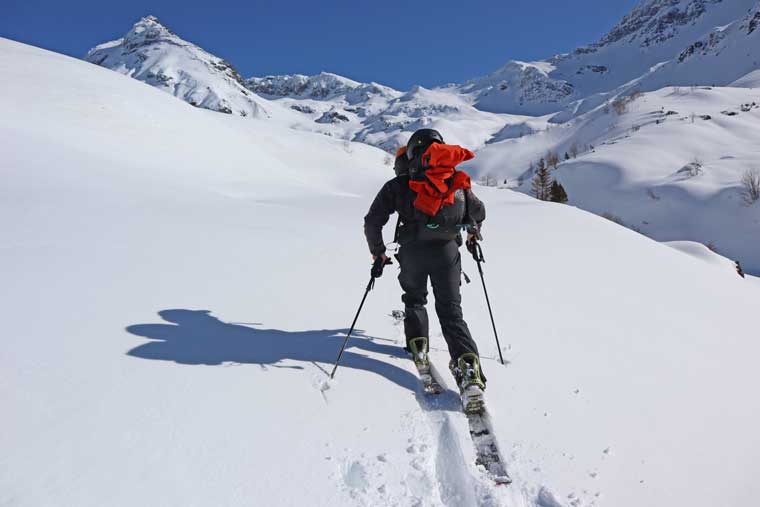
Splitboard skinning
Splitboard skinning is the practice of travelling uphill or traversing flat terrain on your board that has been split into skis. As mentioned, the success of this is dependent upon having skins on the bottoms of the skis.
Splitboard skinning is much like cross-country skiing. The aim is to glide across the snow, lifting the ski off the snow as little as possible. So instead of picking up your foot as you take a step forward, you need to drive your knee forward then push your hip forward. At the same time, your back heel with lift off the ski and your weight will transfer into your front foot causing the ski to glide forward. Practice this on the flat before you take to the backcountry.
How to move uphill on a splitboard
Once you have got the hang of splitboard skinning on the flat, you can start moving uphill. There are a couple of ways to do this:
Switchbacks with kick turns
Travelling uphill using switchbacks or zig-zags is an energy efficient way of making good ground. This method means that skinning is done across the slope on a less steep upward angle. To change direction (to switchback on oneself) a kick turn is needed. This can be a little tricky to master so some practice is needed before you set off.
Lift up the heel riser on your binding
When tackling steep sections of terrain more directly, shifting your bindings into uphill mode is recommended. Doing so puts your feet in a more flat position and takes the strain off your calves and Achilles tendon. It’s also a more efficient way of climbing, preventing your heel from stepping all the way back into your binding each time you take a step.
There will be times when you may need to adopt both methods to travel uphill in the most efficient way.
How to do kick turns
This is a little complex to explain, so watch this video instead!
Splitboarding is one of the most wonderful ways to ride on exceptional snow. It takes you out into the middle of nowhere with breathtaking scenery. It’s a truly magical experience that, when done properly, is as safe as it is fun. However, it is also a high risk activity when not done under the right guidance. Be sure to know your limits and never be afraid of turning round if you are unsure.
Thanks to Owain George for his input and guidance on creating this guide. For more inspiration and information about him and the guiding that he does in France, check him out on Facebook and Instagram.
