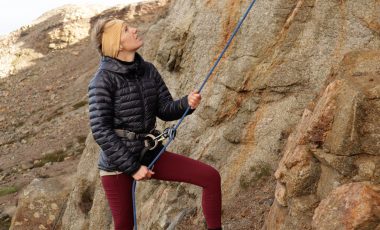
This article will answer the question, what is belaying? It will stress how important belaying is in rock climbing – how it is the most important skill in roped climbing – followed by a step-by-step guide on how to belay safely. It will focus on top rope belaying, but what you’ll be reading is largely transferable to lead belaying.
But first an analogy (bear with me – it should be helpful!)
If climbing is the buzz of getting ready for a night out, the drinking, the dancing, the giving yourself over to the moment, then belaying is the bouncer telling you to get down from that table, or the sensible friend telling you it’s time to go home and ordering you a taxi before you hurt yourself.
What I’m trying to say is that belaying lacks the fun of climbing itself, of the sense of liberation and the joy of going higher and higher up the rock. But as we all need sensible friends and people looking out for our safety, so climbing needs belaying.
- What is belaying? A belaying definition
- Why is belaying so important?
- Belaying devices
- Step-by-step guides on how to belay safely
- Belay certification
What is belaying? A belaying definition
Belaying in the simplest terms is the means by which a stationary non-climber prevents a climber from falling to the ground. It cannot completely stop a climber from falling, but it does turn it into a safe fall … and even an enjoyable one, if you like swinging from a rope!
Belaying depends on five key elements that together make up a belay system:
- The belayer: the person who’s in charge of the belay system, and responsible for controlling one end of the rope. The belayer does not climb while belaying.
- The climber, who doesn’t need to think about belaying … just climbs!
- The rope that connects the climber to the belayer.
- The anchor, which is a technical climbing term for a secure attachment of the rope to the rock, usually at the top of the route.
- The belay device, which is a mechanism that helps the belayer ‘catch’ the climber by creating more friction on the rope or locking it in place with a braking device.
That is the standard system, needing two people, specialist climbing equipment and the knowledge of how to use it. However, there are two exceptions to mention. Both involve belaying while climbing on your own. The first is self belaying or rope soloing, but it’s an advanced skill beyond the remit of this article. If you wish to learn more, I recommend watching Pete Whittaker’s remarkable rope solo of El Capitan:
Without a partner: Pete Whittaker rope solos El Capitan in under 24 hours – YouTube.
The second is auto belaying and, in contrast to rope soloing, takes almost no skill and is available at most indoor climbing centres. It’s a clever piece of kit that looks like a large blue smartie at the top of the route. Due to its inbuilt braking mechanism, anytime you fall or reach the top, you just let go and you’ll be gently lowered to the ground as if by magic. Ask one of the instructors to show you how to use it the next time you go indoor climbing.
Why is belaying so important?
Learning how to belay, with proper belay technique, is the most crucial skill in roped climbing, and unless you only wish to boulder (or emulate Alex Honnold and free solo) it is something that must be mastered. The reason is due to the high consequence of making an error. If the climber slips while attached to the rope she will fall, but it will be safe, with little chance of injury. But if the belayer makes a mistake, and doesn’t catch the climber, then the consequences can be fatal.
The belayer must therefore learn how to belay correctly, and also concentrate while doing so. But that doesn’t mean it’s difficult and exhausting, and that all belayers are tense with fear of making a mistake. To explain through another analogy, belaying is like driving a car in that at first it will seem daunting and you’ll wonder how you can both relax and concentrate at the same time, but you’ll learn to do so. Also, while the consequence of an error is high in both belaying and driving, once you know how to do it, the risk of making an error is low.
Belaying devices
There are a range of belaying devices on the market, and the main types and brands are helpfully described here: Belay Device Types for Climbing and Mountaineering.
To avoid being overly confusing, we’ll only look at the two most popular types, each of which will be discussed in step-by-step guides below:
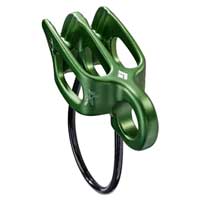
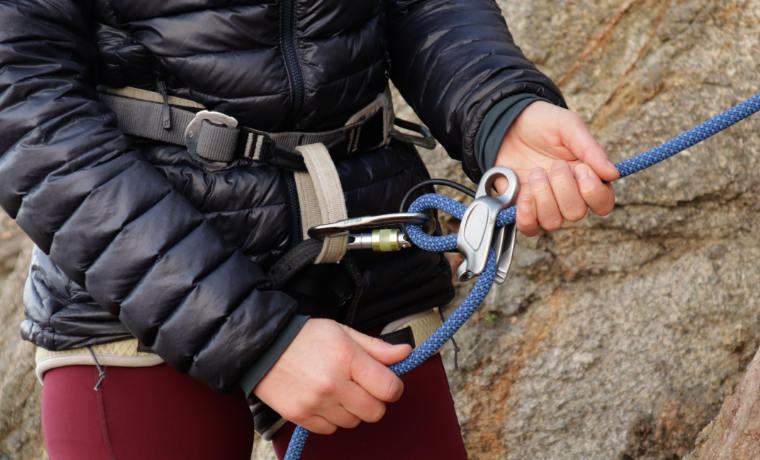
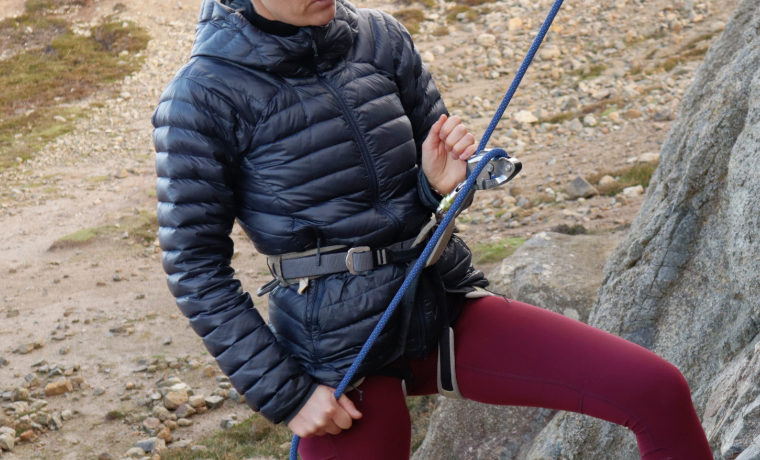
Tubular ATC belay device
This is a metal tube, a few inches in diameter, that is divided into two openings and comes with a wire attachment loop. The belayer is easily able to catch a falling climber when using the device because of the friction created as the rope is shaped into a tight s-bend.
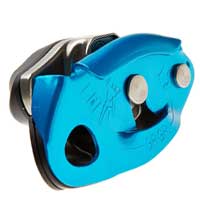
Assisted braking Grigri device
This is heavier, larger and more expensive than an ATC, but has the advantage of automatically locking the rope in place when the climber falls. It is so effective that the belayer barely needs to hold the rope to catch the falling climber. But that being said, the belayer should still never let go of the rope.
Continue reading to learn how to belay with a Grigri and an ATC.
Step-by-step guides on how to belay safely
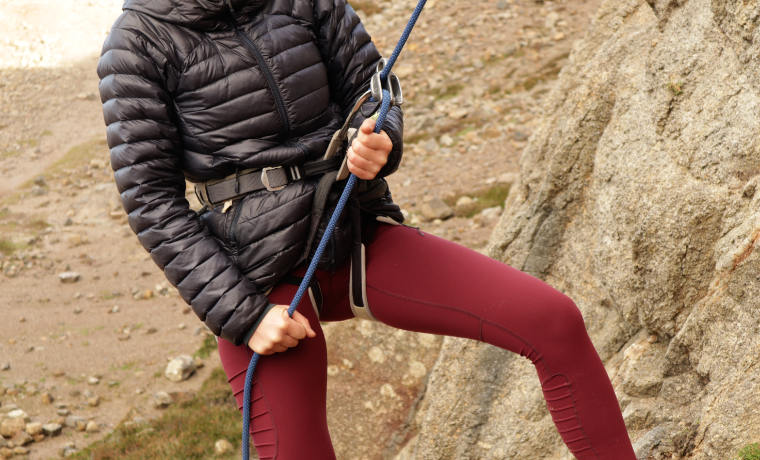
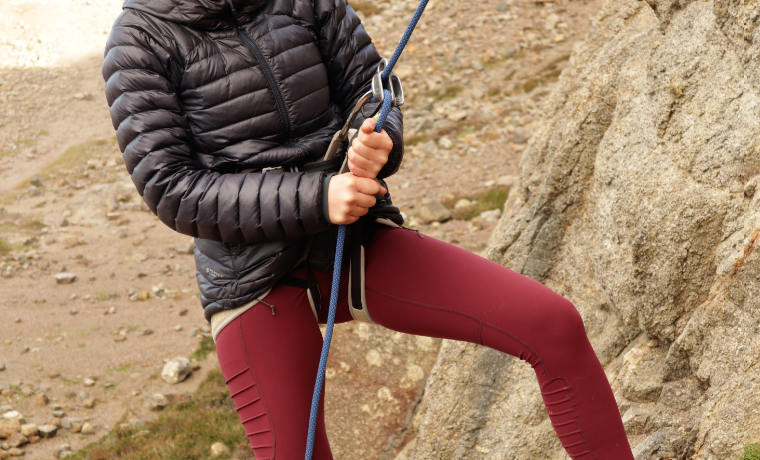
The following two guides are based on top rope belaying, where the rope is already anchored at the top of the route. In indoor climbing, this is done for you by the instructors who work there; a rope will already be dangling from the top of your chosen route, and once you know how to belay and have been certified (see below) you simply tie yourself in and begin.
However, when outdoors, you will need to have an experienced climber with you to set up the anchor at the top, either by climbing up herself or walking to the top of the crag and lowering the rope. But once set up, the process of top rope belaying is the same as indoors, just with the need of sun cream or, more likely in the UK, a down jacket!
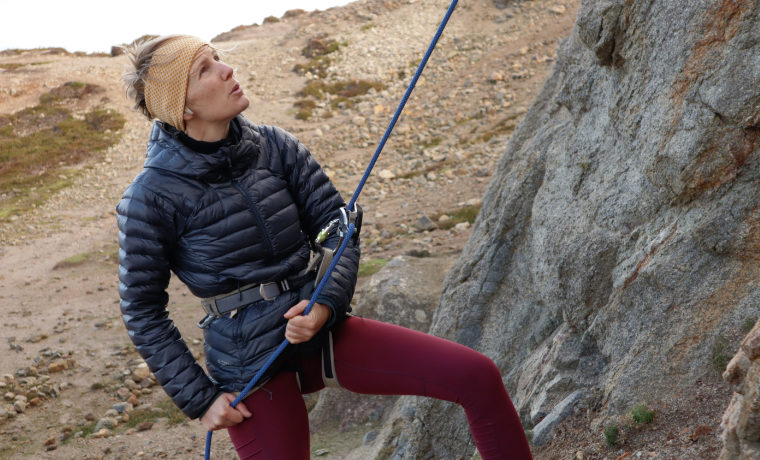
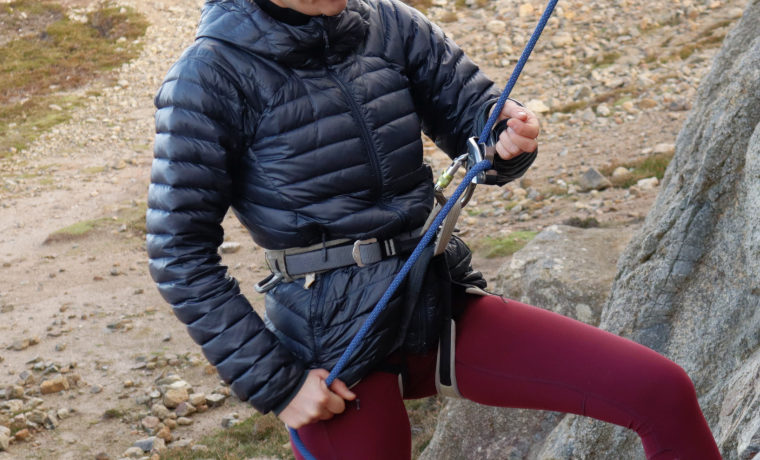
Two key terms before we begin: the part of the rope that runs from the climber to the belay device is known as the live end; the dead end is on the other side of the belay device, and is the part of the rope held by the belayer.
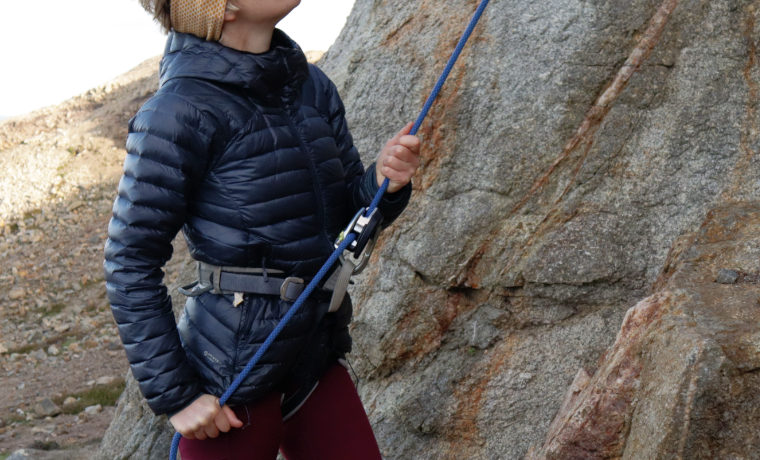
Top rope belaying with an ATC
Step 1:Connecting you and your partner to the belay system
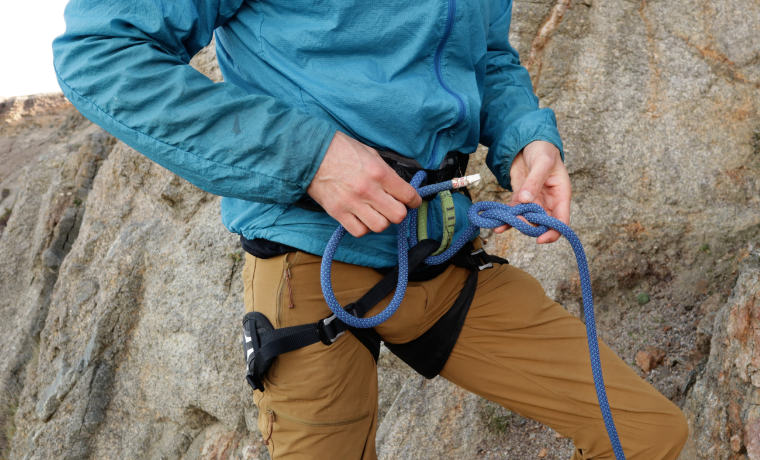
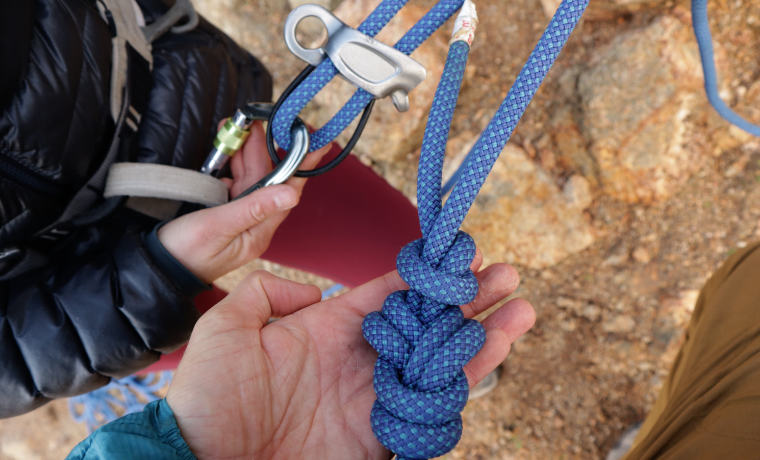
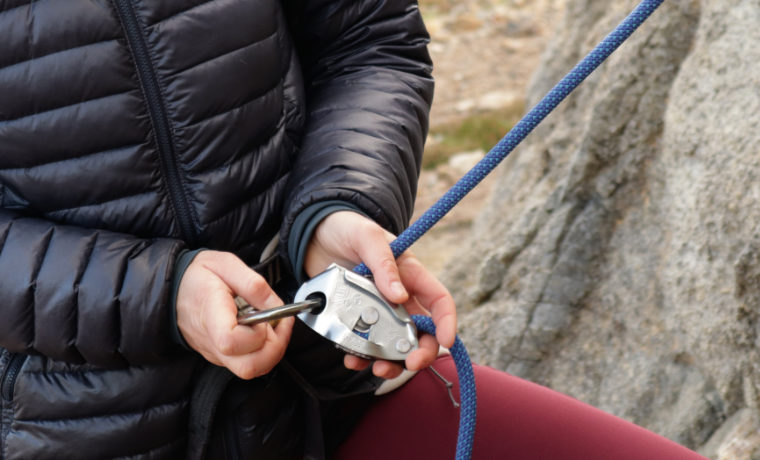
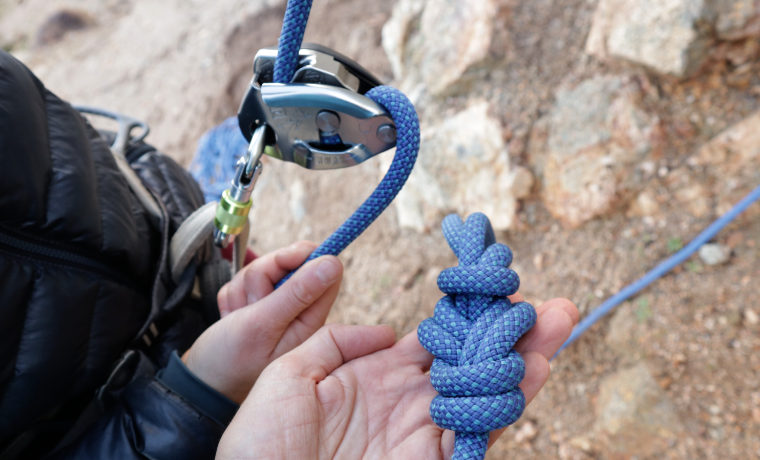
- Your climbing partner will first tie herself in to one end of the rope, traditionally using a figure of eight knot to attach the rope to her harness.
- Next you will pick up the slack rope and pinch it into a bight, which is a tight loop.
- The bight is then fed through one half of the ATC and clipped into a screwgate karabiner along with the attachment loop.
- The karabiner itself is clipped into the harness belay loop, then locked.
Step 2:Belay safety check and belay commands
- You should now check that all the above has been done correctly. That both you and your climbing partner are tied in properly.
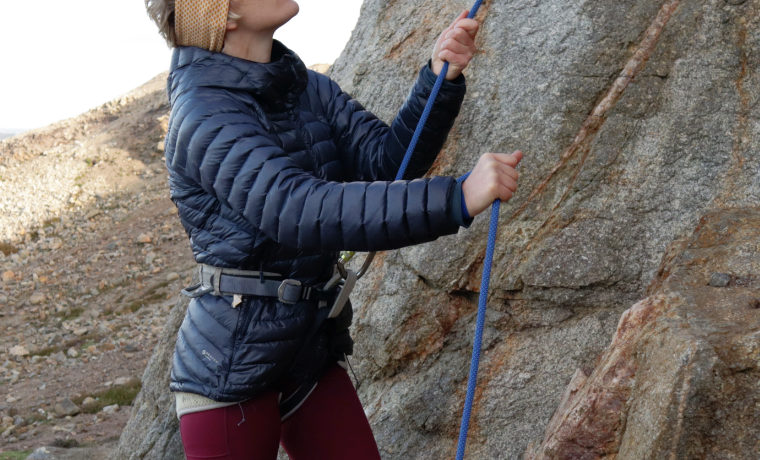
- Then tell your climber to, ‘Climb when ready’. When she’s ready to start, she will say, ‘Climbing’, which is your cue to move to Step 3.

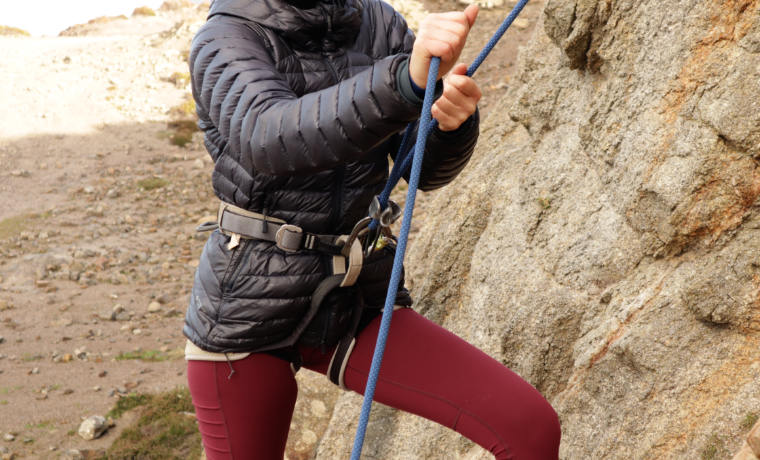
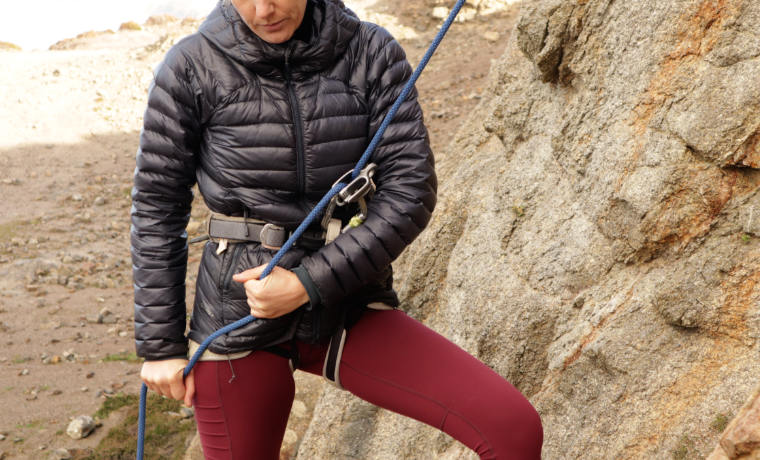
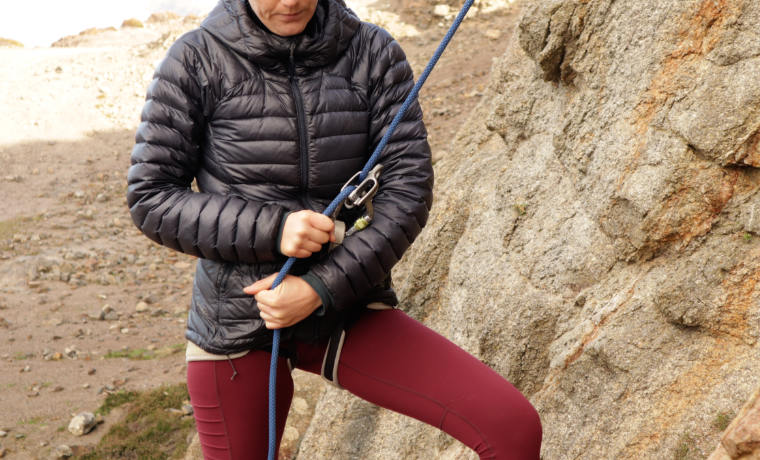
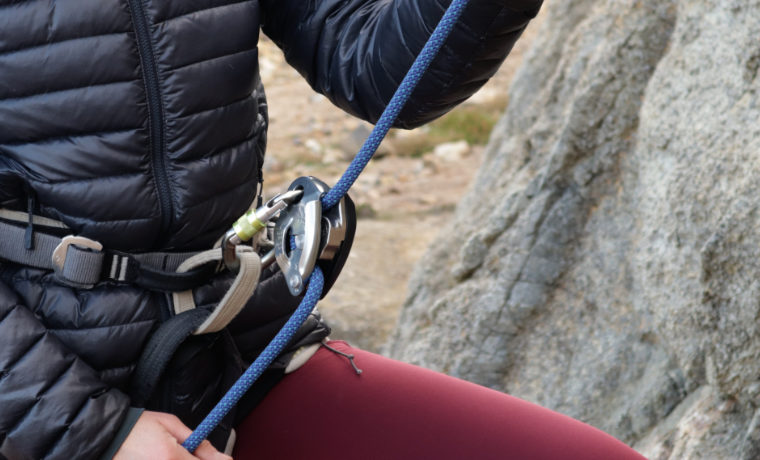
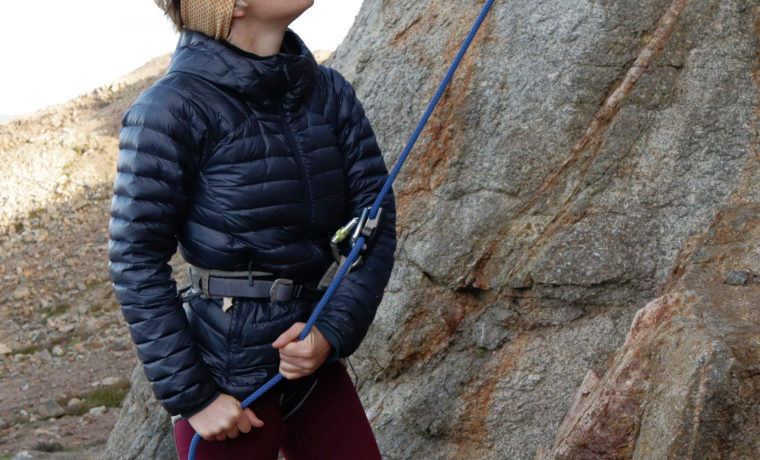
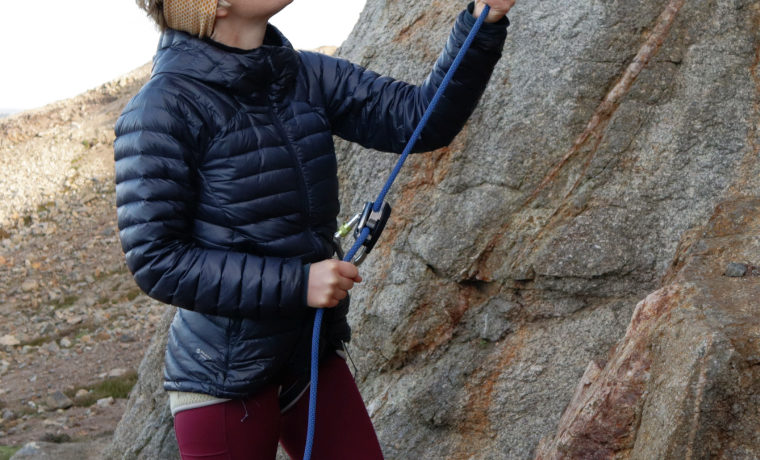
Step 3:Taking in the rope and safe hand positioning
- As the climber climbs, you need to take in the rope to reduce the slack.
- This is done by pulling down the live end of the rope with one hand, and lifting up the dead end with the other.
- But straight away, you need to lower the dead end so that you are holding the rope below the ATC. That way, you will be able to catch the climber should she fall.
- Also, anytime the climber isn’t moving upwards, the hand holding the rope (or both hands for extra safety) should be positioned below the ATC.
- Finally, the most important thing to remember is you never let go of the dead end of the rope.
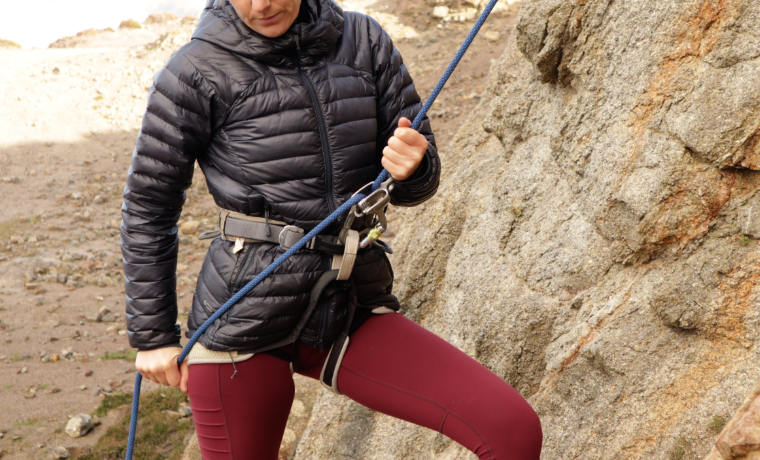
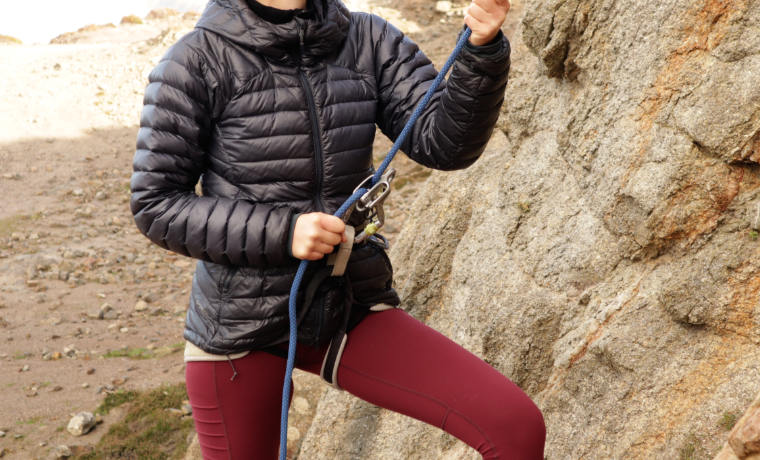
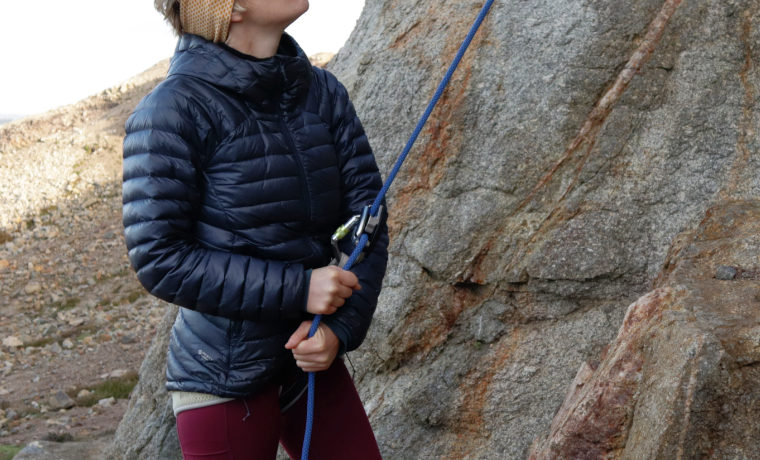
Step 4:Catching a fall and locking off the rope
- Catching the climber is easy as long as you’ve followed the instructions in Step 3; i.e., holding the dead end of the rope below the ATC.
- All you then have to do is grip the rope … and let friction do the rest!
- The tight s-bend in the rope will mean you can easily hold the climber.
- Bending your legs and leaning backwards will help, especially if the climber is heavier than the belayer.
- It is also advisable to have both hands gripping the dead end of the rope, especially if you are holding the climber for an extended period of time.

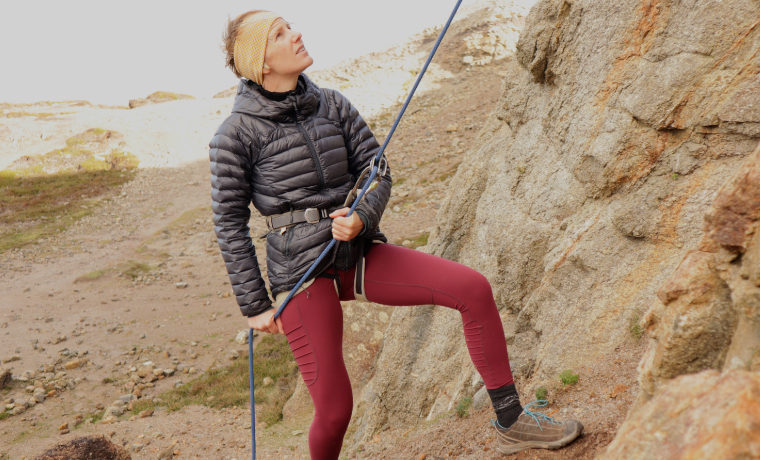
Step 5:Lowering the climber
- The final stage is to lower the climber back down to the ground.
- You do this by keeping your hands in the locked position, but reducing your grip so that the rope moves through them.
- But to avoid rope burn or losing control of the rope, it’s best to do it slowly.
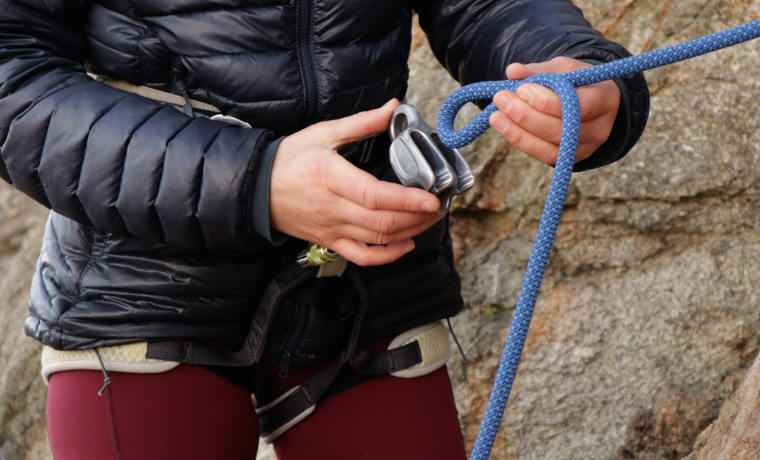
Top rope belaying with a Grigri
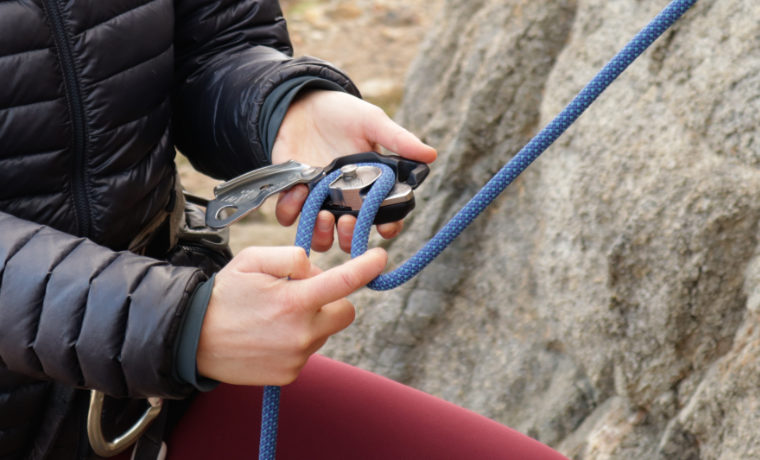
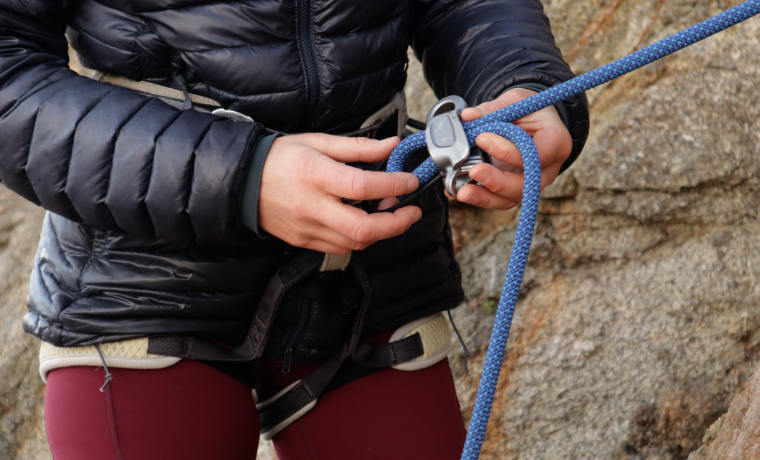
Step 1:Connecting you and your partner to the belay system
- Once your climber has tied in to the live end of the rope, you need to open the Grigri.
- Then pick up the slack rope and feed it into the Grigri following the directions etched on the device. The etching includes a helpful image of a climber and hand holding a rope so you’ll know which way to feed the rope.
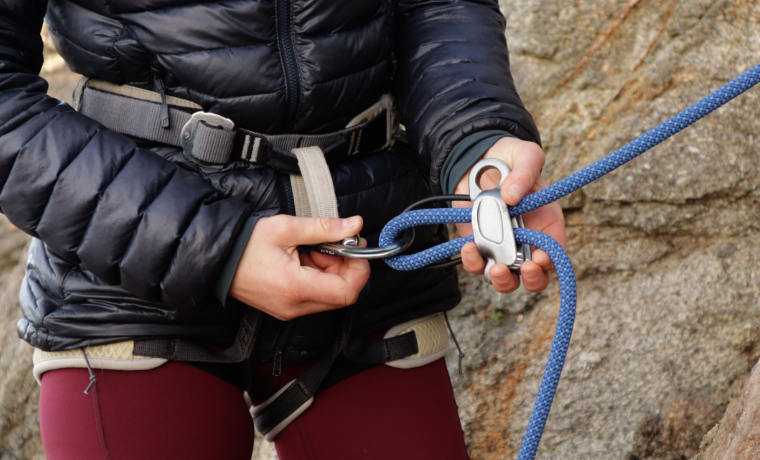
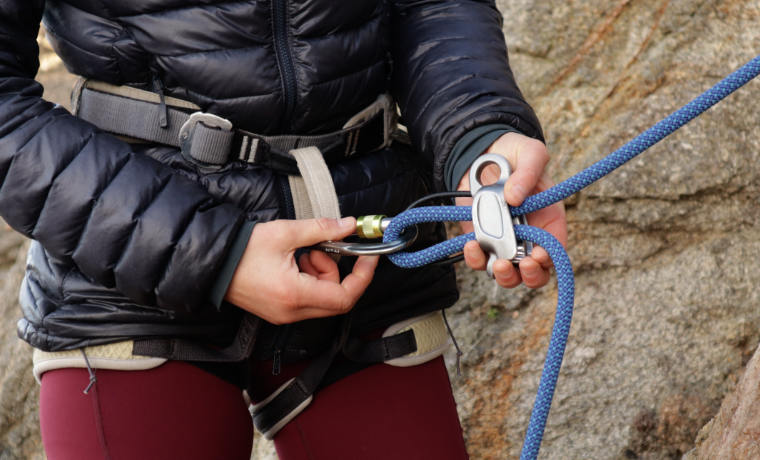
- Close the Grigri, and put a screwgate karabiner through the hole.
- Then clip the karabiner to your harness, and lock it.
Step 2:Belay safety check and belay commands
- The same as belaying with an ATC, it is crucial to check that the climber and belayer are correctly attached to the belay system.
- The live end of the rope should be nearer to you, while the dead end will be further away.
- Also communicate clearly when the belayer is ready for the climber to climb.

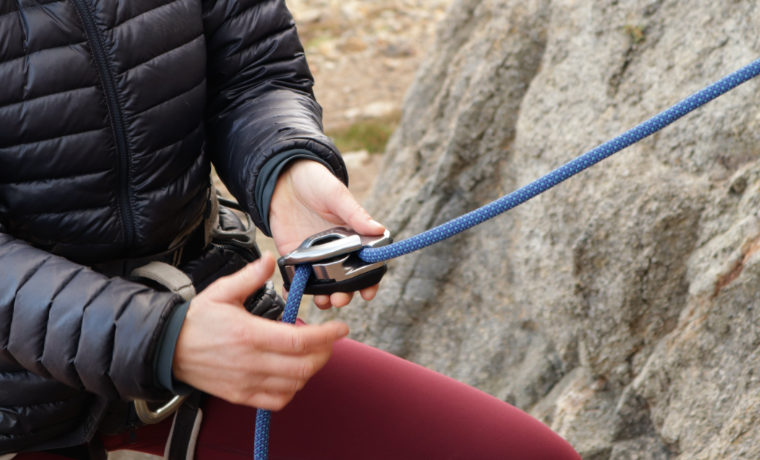
Step 3:Taking in the rope and safe hand positioning
This is the same as belaying with an ATC: pulling down the live end of the rope with one hand, and lifting up the dead end with the other.
And always keep hold of the dead end of the rope, and position your hand below the Grigri.
Step 4:Catching a fall and locking off the rope
When a climber falls, the live end of the rope tightens, forcing up one side of the Grigri and locking the rope in place. But it is still necessary to grip the dead end of the rope and, as with an ATC, hold your hands below the belay device.
Step 5:Lowering the climber
- First, lock off the dead end of the rope by holding it in one hand below the Grigri.
- Then with your other hand, slowly pull the handle of the Grigri towards you, and the climber will start to lower.
- But do not pull the handle all the way back as the climber will descend too quickly.
- As you’re pulling the handle, let the rope slide through the hand holding the dead end.
- To stop lowering the climber, or when she reaches the ground, just let go of the handle and it will automatically spring forward and shut.
Belay certification
You can turn up to a crag outdoors and no one will ask you to fill in a form and check your competence. This is a good thing and it’s what’s liberating about the great outdoors. But it does mean it’s even more important to know what you’re doing, to know how to belay and how to climb before you start climbing outdoors.
Belaying indoors though is different. Climbing centres have to worry about liability. When you first go to an indoor wall you will have to complete a form to prove basic knowledge of climbing and belaying, and sign to say you are aware of the risk of the sport. You will also have to demonstrate to an instructor that you know how to tie into a rope and how to belay properly. The more closely you have read the above, the more easily you will become belay certified at your local climbing wall. I also recommend learning by watching experienced belayers, whether in person or on YouTube.
What is belaying – final thoughts
So now you should know what belaying is, and how to do it. It might seem quite complicated to start with, but it will quickly become second nature, and always remember the number one rule of belaying: never let go of the rope.
Finally, I said at the start that belaying lacks the fun of climbing itself. That’s true, but you can still take pleasure from doing it: from knowing that you’re safely supporting your partner, enabling her to climb and offering encouragement as she does so. It also gives you a chance to rest your arms; climbers tend to alternate between climbing and belaying. And when belaying outdoors, even though you’re not climbing at that moment, you’re still out on the hills, in the mountains, perched on a ledge at the bottom of a sea cliff … which is always a good place to be!
