No matter how much training for hiking you may put in before a big trek or backpacking trip, you’ll still have some niggles, aches and pains on the trail. And although another half hour of being physical at the end of heavy day of hiking may be the last thing you feel like doing, yoga for backpackers and hikers can make the world of difference to how you feel.
It’s not just post-hike that a yoga routine for backpackers is useful to stretch out the body and prepare the mind for a restful night. Some poses are ideal to bust out in the middle of the day to prevent or ward off any potential niggles that the repetitiveness of walking can sometimes cause. And of course preparing the body and mind at the beginning of a big day on the trail, with a simple hiking yoga sequence, can seriously help spur you along, too.
Yoga for backpackers and hikers
There are a ton of reasons why yoga is so good for backpackers and hikers. But don’t just take my word for it. Let’s see what the pros have to say about it!
I’ve asked this wonderful bunch of yogis (who also happen to love spending time on the trail), to share their favourite yoga poses for hiking and backpacking.
- Pigeon Pose
- King Dancer
- Toe Breaker!
- Warrior 2
- Crow Pose
- Eagle Arms
- Crescent Lunge
- Legs Up The Wall Pose
- Half Lord of the Fishes Pose
- Mountain Pose
10 Yoga poses for backpackers and hikers

Pigeon Pose
Recommended by: Jane Forster — Yoga teacher, massage therapist and natural nutritionist
Pigeon (Eka Pada Rajakapotasana)
This pose will help stretch your external hip rotators and hip flexor muscles helping your hips to remain flexible by relieving tension after a day of hiking.
The breakdown of the Sanskrit name is: Eka – One, Pada – foot, raja – King, kapota – pigeon, asana – pose. So one legged pigeon pose, and this version is a sleeping pigeon pose, as it’s a forward fold variation.
Best done: After hiking
How to do Sleeping Pigeon
- From downward facing dog bring your right knee to touch your right elbow. Then lower the right leg to the floor with the shin bone touching the mat. Your right heel is up and the top of your ankle joint is touching the mat. Your heel will connect to your left hip crease. Depending on your level of flexibility you may be able to bring the heel away from the hip crease enabling the shin to come parallel to the front/short end of your mat as you walk your right food forward. This will give a more intense stretch. Listen to your body and only do this variation if you body allows.
- Bring your left leg down to the mat and let the top of the foot meet the mat. Ensure that this is straight. You can press the top of the left foot into the mat to make the stretch deeper. Wait here for 5 breaths with your arms straight and palms or fingertips into the mat beside your hips. Observe any sensations here and use your breath to help let go of any tension.
- When you feel ready you can slowly walk your hands forward so that you can press your palms into the floor and push the ground away. Stay here for 5 breaths and then gradually walk your hands forward until your arms are outstretched. Your forehead may reach the floor or you may use a block/thick book to rest your forehead on. Breathe here for 1-5 minutes. As you exhale feel gravity draw you deeper into the pose.
- Repeat all of the above on the other side.
Tips:
- If anything feels painful move out the way you came in nice and slowly.
- If you keep your elbows off the floor you will feel it deeper.
- If you root through your shin and back foot you will feel it deeper.
- Remember to relax your jaw as the tension we hold in the jaw is similar to that held in the hips.

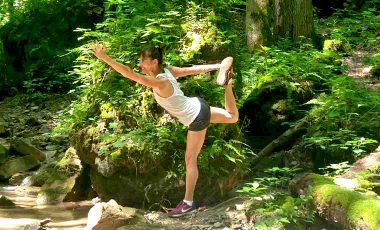
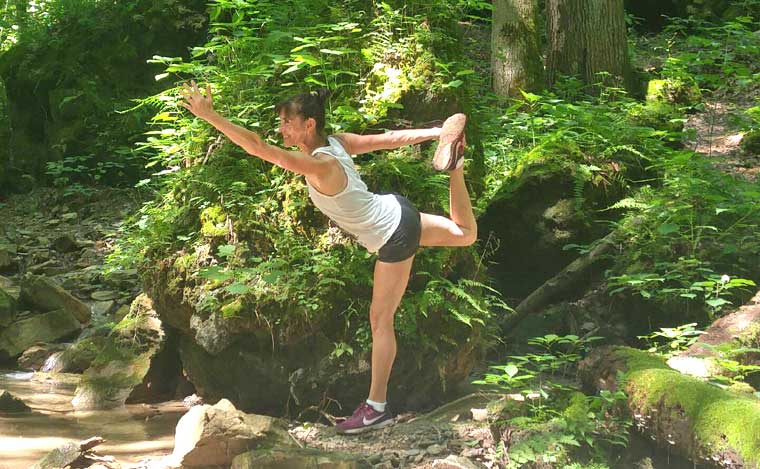
King Dancer
Recommended by: Gretchen Graham Lightfoot — Yoga Teacher: Yoga Alliance RYT-500
King Dancer (Natarajasana)
Because King Dancer is an asymmetrical standing backbending and balancing pose, it has something for everyone. This beautiful pose/asana requires strength, flexibility and balance, not to mention a laser-like focus.
It improves posture by counter-acting our tendency to collapse the chest and round the shoulders. This asana/pose strengthens the muscles of the spine and shoulders, as well as the legs, back, and arms. It stretches the front of the body—the chest, belly and—most importantly for hiking—the hip flexors.
When we hike, breathing is extremely important. Natarajasana stretches the intercostals and the pectorals, creating space in the chest and relieving pressure on the diaphragm created by “slumping” from driving and sitting too much.
King Dancer is a stimulating type of yoga pose and is a good antidote for sluggishness and lethargy, so it goes hand-in-hand with the experience of an elevated mood created by spending time in the great outdoors.
Best done: During or after hiking
Because this is an advanced posture, I wouldn’t recommend starting off a hike with this stretch. It is better to perform this standing balance pose when warmed up a bit, perhaps mid-way through the hike. King Dancer feels particularly delicious at the end of a hike.
How to do King Dancer
- From standing (mountain pose/Tadasana), bend the right knee and draw the heel toward the bum, holding the top of the foot or the inner/outer ankle with the right hand. Keep the thighs together and find your focal or gazing point (drishti).
- Once you’ve firmed your foundation in the standing leg, begin to flex the right foot and lift the sole of the foot toward the ceiling. You can also think of this as lifting the back of the right thigh toward the ceiling which may better result in the pelvis becoming more parallel to the floor.
- Open the shoulders drawing them away from the ears as you lift your left arm either forward or straight up toward the ceiling; this lifted left arm serves to counterbalance the weight of the lifted right leg.
- Subtly contract the ribcage and draw the belly button to the spine in order to prevent a deep bend in the low back. Hold the pose for 15-30 seconds, breathing smoothly and steadily.
- Inhale as you come out of the pose, and exhale as you lower the leg and arm. Repeat on the other side.
Tips:
- Draw shoulders away from the ears.
- Keep the shoulder firmly in the shoulder socket.
- Keep the hips and shoulders squared; the tendency is to turn the body out in the direction of the lifted leg.
- Protect the standing leg knee by NOT hyper-extending it; if your tendency is to hyper-extend, keep a micro-bend in the standing leg knee.
- Stability in this pose comes from a strongly engaged core and a steady focus on your drishti.
- Advanced students can hold the lifted foot with both hands, resting it on the head while balancing. Newer students can try using a yoga strap to catch the foot.

Toe Breaker!
Recommended by: Helen Clare — Yoga teacher
Toe Breaker
After a good, long hike, having spent a lot of time on the feet, it’s great to stretch them out! Especially if you’ve been wearing big, heavy boots. Releasing foot tension can be hard to do, so this pose makes use of our body weight. Releasing foot tension, in addition to strengthening the feet, helps to prevent plantar fasciitis.
Best done: Soon after hiking, with shoes and socks off.
How to do Toe Breaker
- Start on your hands and knees, with toes tucked under.
- Slowly slide yourself back, gradually taking more weight into the feet.
- Stay there if it already gives you a plantar stretch, or bring your hands onto your thighs.
- If comfortable, sit tall and breath slowly up and down the spine, allowing your body weight to sink into the soles of the feet.
Tips:
Do this often, especially if it feels difficult, but go gradually – each time sitting a little taller. Do also take time to strengthen your feet. For more informatuon on this read article on yoga for healthy feet.
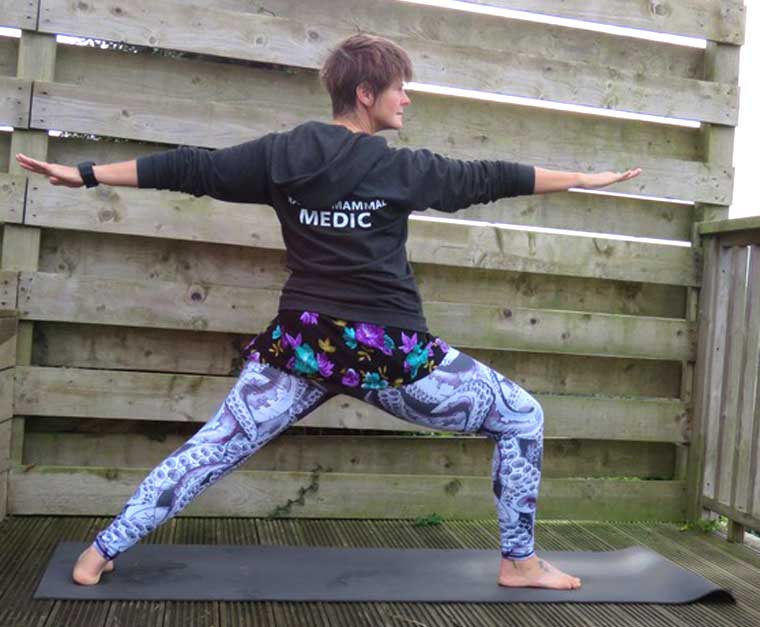
Warrior 2
Recommended by: Lizzi Larbalestier — Yoga teacher and professional coach
Warrior 2 (Virabhadrasana II)
This strong pose works on all major muscle groups and is great for focusing the mind.
Lower body benefits include hip opening whilst toning and strengthening hips and thighs. Grounding the feet and drawing the inner thighs towards one another draws up the arches of the feet and strengthens the ankles, providing stability and aiding balance. The core is active, the abdomen engaged and the chest expansive aiding back strength and full yogic breathing. Warrior 2 is an expansive pose that is the ideal antidote to carrying a backpack. Arms extended, muscles of the arms engaged and chin lifted this is a pose that fosters a state of strength and resilience.
Best done: Before or during hiking
This pose is great to do before hiking whilst setting intention. It energises and focuses the mind and body. It is also fun to do on top of a hill with friends… for those team instagram moments hahaha!
How to do Warrior 2
- From forward bend, step left foot back into a deep lunge. Turn the left foot outwards 90 degrees glancing back to check the arch of the left foot (now the back foot) aligns with the heel of the right foot. The (right) front knee should be above the ankle at around 90 degrees and should not move forwards over the front ankle.
- Lift the hands from the floor to raise the upper body, leading with the left arm like hands of a clock allowing the right side of the body to follow drawing your body upwards and take both hands to the sky. Your upper body is now upright and facing the same direction as your left toes – aim to have flow in the transitions between poses, this flow is as important as the end pose itself.
- Take your right hand forwards and left hand backwards keeping your hands level with your shoulders pals facing downwards and drawing your shoulder blades down the back of your body and towards one another. Engage the muscles of the arms extending the hands take your gaze forwards towards your right hand keeping your chin raised.
- Draw backwards with your left hand to ensure your upper body is vertical and ground down with the outer edges of the feet and toes to raise the arches of the feet from the floor drawing the muscles to the bones of the legs.
- Transition gently by bringing hands to the floor rocking on the back foot to step forwards to forward bend and repeat on the other side.
Tips:
- Remember to engage the pelvic floor and core drawing the abdomen back to avoid arching the lower spine.
- Rotate the inner left thigh backwards and the outer left thigh forwards tucking the tail bone under. Rhis is called spiralling and really activates the hips.
- Your inner thighs should also draw in towards one another creating stability in the pelvis.

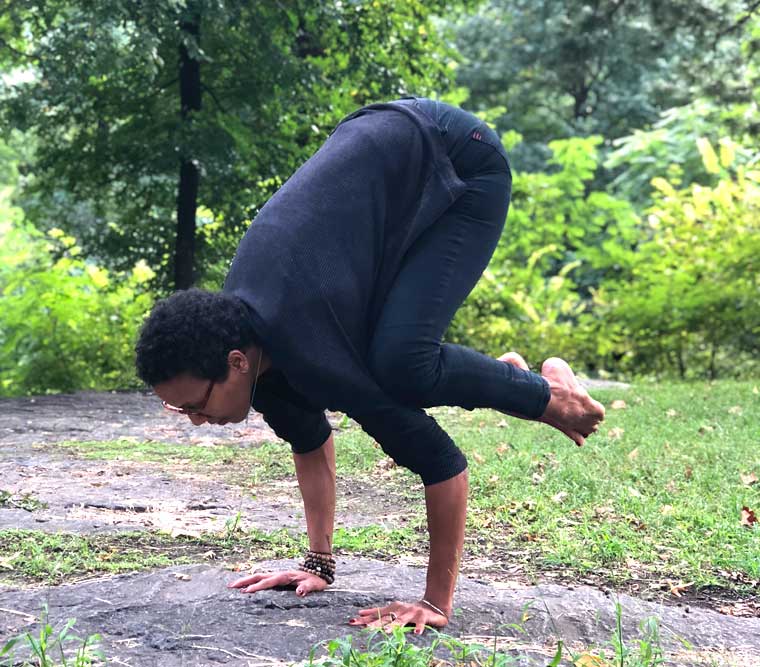
Crow Pose
Recommended by: Jade Alexis Timol — Yoga student and instructor
Crow Pose (Bakasana)
As far as physical benefits go, this posture stretches the upper back and groin. It’s also great to do on a hike because you can get a cool pic with an awesome background and a natural high for a moment while you “take flight.” It’s good for the ego! But there is no ego in yoga.
Best done: During or after hiking
How to do Crow Pose
- From a standing position (feet hip-width apart), squat down, place your hands flat on the ground just in front of your toes, about shoulder-width apart and spread your fingers wide.
- Keeping your hands and feet where they are, lift the hips way up toward the sky. Bend at your knees and lift the heels off the floor so just the balls of your feet are down.
- Gently press your knees in to the backs of the triceps or armpits and begin to shift your weight into the fingertips (keep your gaze forward). Pick up one foot off the ground and then the other. Remember to breathe!
Tips:
- Let go of any fear.
- Believe in yourself.
- Practice makes perfect.
- Breathe!
- Keep your head up, looking forward (don’t look down).
- Draw your navel into your spine, lift your hips high and engage your core.

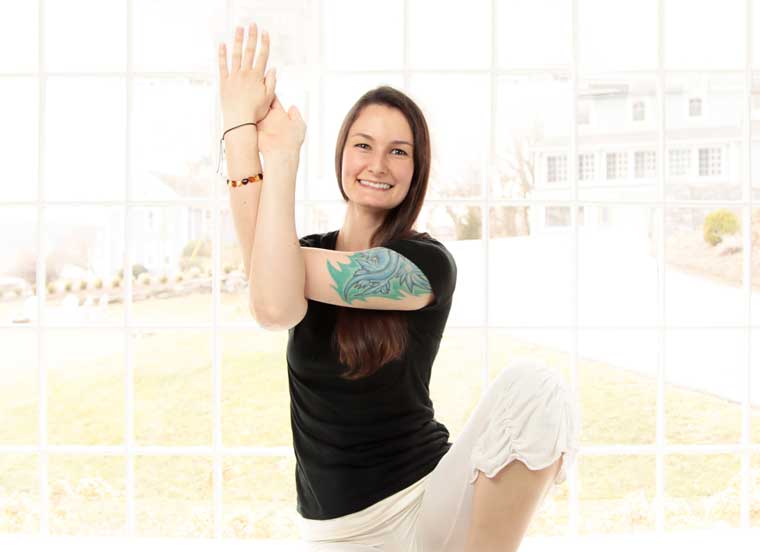
Eagle Arms
Recommended by: Katie Ziskind — 500-hour yoga teacher and family therapist
Eagle Arms (Garudasana)
Eagle Arms help stretch your middle and upper back. From carrying a heavy pack, I tend to feel hunched over and then get tension between my shoulder blades and upper traps. Eagle arms allows the back of my neck to soften and release.
Best done: I enjoy doing this pose after hiking to open up and wind down.
How to do Eagle Arms
- To modify, give yourself a body hug and hold for 3-5 deep ujaiee breaths. Gently lift your elbows up to shoulder height.
- Once you are comfortable here, try wrapping your upper arms, above the elbows, together with your fingers to the sky.
- Gently press your forearms away from your face. Hold this pose for 3-5 breaths.
- For both versions, take your breaths and then switch sides, bringing your other arm on the bottom.
Notes:
Eagle arms can also be combined with eagle legs. Note, when you open your middle back, this area corresponds to your heart and heart chakra. Your heart charka is an energy center that relates to giving and receiving love, loving yourself, anger/pain/loss, and what love means to you. If you are working through healing a broken heart or have been going to a life transition for instance, this pose may bring up emotions. These emotions may want to be released, so breathe into the let go and know that it is okay to cry, if that happens. Be gentle and loving toward yourself and you breathe into your memories around your heart in eagle. Imagine you are flying like an eagle to your wildest dreams, to a positive future, and know that you are on a spiritual journey like an eagle! Some people don’t have any emotional releases, but some do- that is why I mention it!

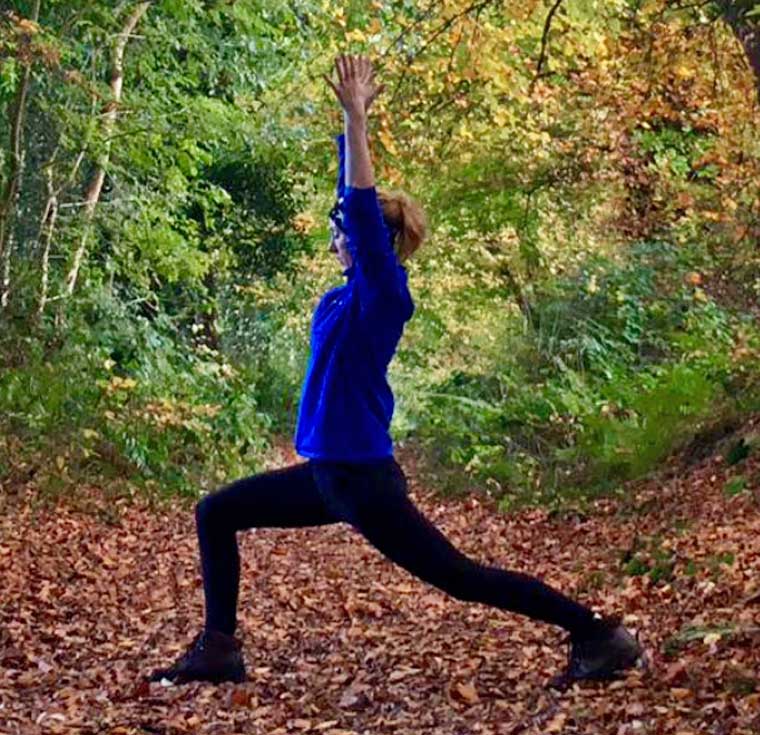
Crescent Lunge
Recommended by: Maebh Spillane — Yoga teacher
Crescent Lunge (Anjaneyasana)
This is a great pose to stretch out the hip flexors but also strengthens the quadriceps, hamstrings and glutes to make hiking easier. Crescent lunge opens the front torso, chest and shoulders providing relief if you’re carrying a heavy backpack or watching your step for much of the hike. The balance required for crescent lunge also targets the same strength and flexibility required for hiking.
Best done: Before, during or after hiking
This stretch can be used to gently warm your muscles in preparation for a hike. It can also be used during and after a hike to stretch out your tightening muscles. You may wish to modify this pose by placing your back knee and upper foot to the floor, especially if tired after a hike or if balancing is a challenge.
How to do Crescent Lunge
- From downward dog exhale and step your right foot forward between your hands.
- Bend your right knee to 90 degrees.
- Leave your back heel up, so you are on the ball of the left foot.
- Both hips are facing forward, you may need to draw your right hip back and your left hip forward a little. Pushing back through your back heel, lift your left knee and straighten your back leg.
- Tuck your tailbone under and inhale as you sweep your arms upward, palms facing and fingertips stretched toward the sky.
Draw your shoulders down away from your ears as your spine, sternum and arms reach upward. - Hold for at least five slow inhalations and exhalations and repeat on the other side.
Tips:
Keep your feet about four inches apart, or even a little more, to widen your base and make balancing easier. The front knee tends to collapse inward, push this out toward your pinkie and ensure you can see your front big toe inside your knee. Feel the strength in your lower body and the length in your upper body!

Legs Up The Wall Pose
Recommended by: Alex Tran — Yoga teacher
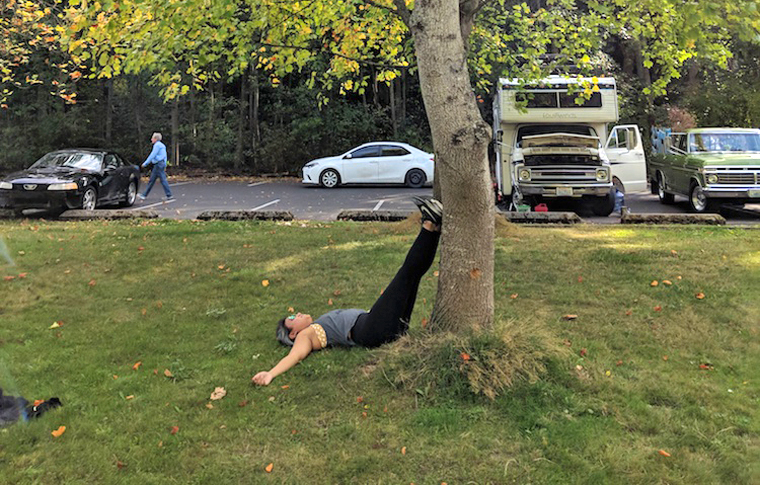
Legs Up The Wall Pose (Viparita Karani)
This pose is great for post hiking. It allows you to invert your body and take effort and weight off your legs and feet. After a long hike, it’s a great way to send your legs some TLC. The spine connected to the floor is also calming and grounding. Feel free to do this outdoors after your hike or when you get home on an unobstructed wall to prop your legs up.
This pose reduces weight off the legs and allows the blood to flow into the upper part of the body. When you’re upright, fresh blood will flow back down the body and heal you. I just love this pose because we’re on our feet all day and although the bottom half is strong, it still needs some TLC too.
Best done: After hiking
How to do Legs Up The Wall Pose
- Find a tree with a clear ground around it. You can also do this at home if the ground is wet or if your car is big enough, doing it by laying down in the trunk area
- Get your left/right hip (doesn’t matter which one) as close to the tree or wall as possible. Begin to swing your legs up and against the tree and your back will be on the ground. Wiggle around until you feel comfortable.
- Stay here for 30 breaths. I usually stay here for about 5-10 minutes.
Tips:
- Cover your eyes with a shirt or towel to help you relax.
- Repeat a mantra (example: a-ham) or just listen to your breath going in and out.

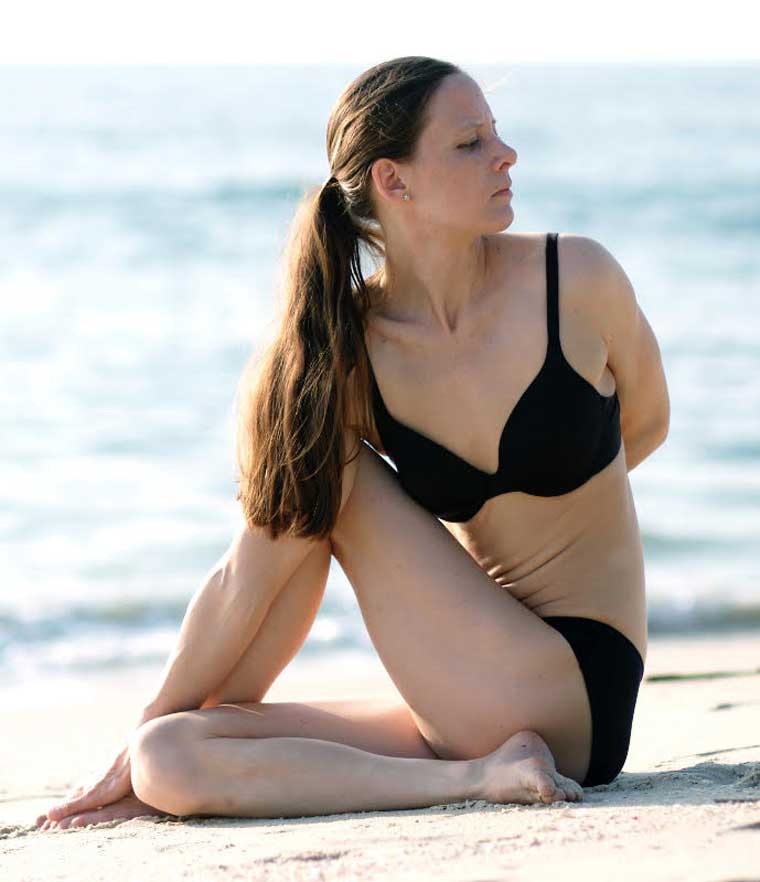
Half Lord of the Fishes Pose
Recommended by: Caroline Klebl — Yoga teacher
Half Lord of the Fishes Pose (Ardha Matsyendrasana)
This classic yoga pose stretches the hips, glutes and thighs and provides a twist to the spine and neck. Additionally it stretches the shoulders and bicept on the twisting arm, if practiced with a straight arm. Beginners can keep the arm used to twist the torso bent, if they can’t reach the foot or knee.
Best done: Before or after hiking
How to do Half Lord of the Fishes Pose
- Sit with a straight back and the legs stretched out in front of you.
- Bend the legs and place the outside of the left foot to the right of the right hip, with the knee down.
- Step the right foot over the left knee and place the sole of the right foot to the left of the left knee.
- Inhale raise the left arm, exhale twist to the right and reach the left elbow toward the left knee down the right side of the right lower leg.
- Straighten the left arm and try to reach the inside of the right foot. If the right foot is out of reach, keep the elbow bent and press the elbow against the right leg to deepen the twist.
- Rotate the head to the right and look to the right. Breathe deeply for 5 to 10 breaths.
- Inhale release the twist and straighten the legs.
- Repeat on the other side.

Mountain Pose
Recommended by: Donna Melanson — Yoga teacher
Mountain Pose (Tadasana)
Mountain Pose seems like such like an effortless pose, simply standing with your hands by your side, but it’s the basis from where all standing yoga poses begin. It’s my favourite yoga pose to do before my hike/walking meditation.
I practice it for the grounding and balancing aspects os the pose. Linked with a slow and steady breath it has the effect of calming the mind and the body as it grounds you to the present moment., so that when you begin your hike or walking meditation you not only feel your connection to yourself but your connection to all things; to the trees, to the birds, to the air we breathe. Reducing stress and leaving you with clarity, insight and understanding.
I stop about halfway through the hike and practice Tadasana again. Pausing in the silence and stillness of the moment. Grateful for all things, again feeling my connection to nature and to all things. I continue walking with awareness. Mindfully noticing how my body is moving. How my feet touch the earth. The rhythm of my breath. The breeze that caresses my face.
At the end of the hike I again stop, pausing in the moment I stand tall in Tadasana one more time. Grateful for the time spent in nature. Then I tilt my head just slightly up to the sky and feel the grateful energy of being alive. I take a deep breath and continue on my way feeling totally refreshed and renewed.
Best done: Before, during and after hiking
How to do Mountain Pose
- Root your feet onto the earth using the outer edge of your feet, then around to your toes, as you slightly bend your knees and engage your thighs.
- Lift the kneecaps and externally and energetically rotate the thighs outward. Almost feel as if your pushing the earth away from you.
- Tuck your tailbone under slightly, engage your core so that you lengthen up through the spine.
- Bring your shoulders back and down, and tuck your chin slightly in.
- Bring your palms by your side facing forward. Muscles are engaged by relaxed. Notice how strong and grounded your feel in this pose. This is how all yoga poses should feel – steady and comfortable.
Namaste, happy hikers!
