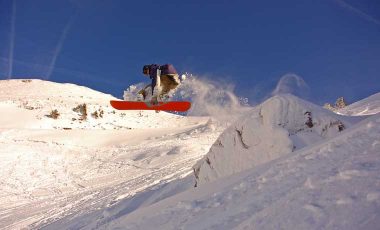
You’ve got your snowboarding vacation all booked up, gathered your gear and are ready and raring to hit the slopes. But are you really ready? Will your body stand up to the demands of throwing yourself down steep, snowy slopes for a whole week? Will it deal with hucking yourself off cliffs, splitboarding in the backcountry or overshooting kicker landings? Even if you’re already in good shape, it’s likely that you’ll need to add a snowboarding workout into your fitness routine to properly prepare yourself. And if you’re not in good shape, then you should definitely start training for snowboarding at least a couple of months prior to your trip.
Though I’m not currently qualified as a fitness instructor, I spent many years, in a past life, as a personal trainer. I’m also well acquainted with the snow, having spent 5 full seasons worshipping it! With this in mind, and with some advice from strength and conditioning coach, Rocky Snyder, I’ve put together a snowboarding workout to get you ready to ride!
- The benefits of training for snowboarding
- How to train for snowboarding
- Snowboard training: at home circuit
- Exercises for snowboarding – with videos
- Balance exercises for snowboarding – with videos
- Flexibility and mobility work for snowboarding – with videos
The benefits of training for snowboarding
Being fit and strong is a no-brainer if you want to get the best out of your time on the slopes. But it’s an easy thing to put off or assume you don’t need to do specific training for snowboarding. Even if you’ve only got a few weeks before you go snowboarding, it’s well worth doing a few snowboarding workouts a week to get yourself ready.
Aside from just feeling more able to stand up to the demands of life on the slopes, there are other benefits to training for snowboarding:
- To prevent injury: There are few other sports that you do for a super intensive week, once per year, and then don’t do again! Maybe surf holidays? Either way, hitting the slopes after long periods of not going near them can be a big shock to the body. And without sensible preparation, the risk of injury is very high. Start your snowboard training at home before you head for the hills and your chances of avoiding painful and trip-ruining injuries are much higher.
- To strengthen and stabilise your joints (knees and ankles especially): These joints are put through a lot of stress when snowboarding. Your joints are constantly adapting to the snow beneath you, switching from the predictability of corduroy groomers to the chaos of chopped up slush. And if you’re partial to some air time, landing on these often hard and tricky surfaces makes joint stability all the more important.
- To improve your cardiovascular endurance: Cruising slowly down the slopes won’t put too much stress on your cardiovascular system. For off-piste riding and backcountry missions, having good fitness is essential. You’ll be able to hike further and ride those long descents without having to consider your fitness. However, if you Your lungs need to be able to deal with tackling steep and prolonged ascents.
- To strengthen your muscles: Strong muscles enable you to go harder for longer. They help to prevent injury and make you more stable. They also help your body deal with crashes much more effectively than untrained muscles.
- You’ll have more fun: Snowboarding without training can mean that every turn fast becomes difficult, uncomfortable or even painful, taking all the enjoyment out of it. Get into shape, however, and you’ll minimise the risk of injury, won’t get too fatigued, will power through your turns, run after run, and have a great time! ‘No pain, no gain’ thinking might work for some people, but if it leads to injury and misery when out snowboarding then it kind of defeats the point!
How to train for snowboarding
In an ideal world you’ll have plenty of time to build up your fitness – 8-12 weeks is ideal! But odds are, you’ve put it off and suddenly you’ve only got a few weeks left before you go snowboarding.
First of all, do what you can. Anything is better than nothing, and although doing a full training programme is best, you’ll certainly gain some benefits from just doing a handful of snowboarding workouts before you go.
Secondly, there are lots of things you can fit into your daily routine, like standing on one foot while you brush your teeth! This will help improve your balance as well as work the stabilising muscles in your knees and ankles.
Take the stairs whenever you can. Better still, take them two steps at a time! The major muscles in your legs and glutes will be worked hard.
Finally, you don’t need to go to the gym to train for snowboarding. Of course, there’s loads of extra stuff you can do there. But, if you don’t have access to a gym, or would rather not join one, then the below snowboard training schedule can be done with minimal equipment at home or in the park.
Snowboard training schedule
If possible, try to start your training 8-12 weeks before your snowboarding trip. But if you haven’t got that long then just do what you can.
| Day 1: | Strength and fitness circuit — see below |
| Day 2: | Run/cycle/swim |
| Day 3: | Balance exercises — see below |
| Day 4: | Strength and fitness circuit |
| Day 5: | Balance exercises, flexibility and mobility – see below |
| Day 6: | Strength and fitness circuit |
| Day 7: | Balance exercises, flexibility and mobility |
Snowboard training: at home circuit
I’m a big fan of circuits. They’re short, sharp and highly effective — ideal for fitting into a busy life.
As mentioned, strength training for snowboarding is also super important to prevent injury and improve endurance. This circuit includes some excellent strength exercises to prepare for snowboarding. And when done as a circuit, it will also improve cardiovascular endurance.
Snowboard training circuit
The circuit can be done at home, in the garden, at the park, or at the beach, and with very little equipment. All the exercises in the circuit are explained in the section below with videos to accompany them.
Try to rest as little as possible between each exercise:
Squat thrusts x 10 done in between each exercise
- Triceps dips x 10-15
- Squat jumps – sumo to narrow x 10-20
- Plank pushes x 5-10 per side
- Skaters x 10-20
- Side plank with raises x 5 side raises, x 5 leg raises + hold for 10 secs
- Squats to wall squat hold x 20-30 + hold for 30+ secs
- Spiderman crunches x 20
Rest for 2-3 minutes once you have completed each exercise in sequence.
Do 2-3 sets of the circuit. Build up to 4 or 5, the fitter you get.
NOTE: If you want make this circuit less cardio intensive, do it without the squat thrusts.
Exercises for snowboarding
Each of the above circuit exercises is described in detail below. They can also be done individually with rests between each set, doing 3 to 4 sets of each exercise.
Wide leg squat thrusts
This is a great snowboard training exercise to get your lungs working as well as your muscles. Jumping forwards with wide legs is more realistic to your snowboarding stance than jumping forward with your feet together.
- Start in a high plank position with your shoulders directly above your hands.
- Jump both feet towards your hands transferring all your weight into your arms.
Land with your feet wider than your hands and try to bring your hands off the floor at the same time, or just before, your feet hit the ground. - Once your feet are on the ground, stand up straight contracting your glutes.
- Reverse the movement, driving your feet back to their original position at the same time as bringing your hands back to the floor.
Triceps dips
It’s easy to underestimate just how much you use your arms when you’re snowboarding, especially beginner and intermediate riders. This exercise will help to make getting yourself from standing to sitting much more easy when you’re on the slopes.
- Sit on the edge of a chair, sofa or low bed.
- Place your hands on the chair next either side of your hips.
- With your feet placed on the floor out in front of you, raise your butt off the chair and shift your weight forwards slightly.
- Keeping your feet where they are, slowly lower your butt towards to floor by bend your elbows back behind you.
- Once your elbows have reached 90º, or your butt has reached the floor, straighten your arms to raise back up to the chair.
- To make this harder, place your feet as far out in front of you as you can, keeping your legs straight for the duration of the movement.
Squat jumps – wide to narrow
This is an excellent exercise for snowboarders who like to spend more time in the air than on the snow. It helps to promote control when landing jumps and drops. Plus, alternating between narrow and wide squats will work a greater range of muscles in your legs and glutes.
- Start in a narrow squat position with your arms out in front of you.
- Drive your arms backwards and simultaneously straighten your knees and hips to jump off the floor. Tighten your glutes at the highest point of your jump.
- As you start to come back down, bring your arms out in front of you and widen your stance so that you land in a sumo squat position.
- Repeat the above but this time jump from a wide squat and land in a narrow squat.
Plank pushes
Planks are one of the best, and hardest, ways to really get those deep core muscles firing. Add in some arm and shoulder strengthening at the same time and you’ll get a whole lot more out of your time.
- Start in a low plank position with your elbows on the floor directly below your shoulders.
- Shift your weight onto your left arm slightly and replace your right elbow with your right hand.
- Straighten your right arm and as you do, replace your left elbow with your left hand so that your weight is on your hands and you are in a high plank position.
- Reverse the movement, leading with your right hand.
- Once you have completed your set of reps on one side, rest for a few seconds and then repeat all of the above, leading with your left hand.
Skaters
Skaters combine balance, control and power. All things you will need on the slopes. They are also excellent at strengthening your small joint stabilising muscles, as well as your more powerful leg muscles.
- Start with your your weight on your left leg and your arms in sprinter position (both arms at 90º – left one back behind you, right one in front of you).
- Push off your left leg and leap sideways landing on your right leg. At the same time switch the position of your arms.
- Try to nail your landing without putting your foot down, then leap back to the left and continue.
Side plank with raises
Like regular planks, side planks work your deep core muscles wonderfully. But they also focus more on your obliques – the muscles that aid torso rotation. This variation is a double whammy as the leg raises work your glutes like a treat.
- Start on your side with your elbow on the floor directly below your shoulder.
- Raise your hips off the floor so that your weight is distributed between your elbow and your feet.
- Once stable in this position, raise your top hip upwards away from the floor and lower it. Repeat 5-10 times.
- Next, raise your top leg away from your bottom leg and lower it down with control. Repeat 5-10 times.
- Finally, come back to your original side plank position and hold it for 10-20 seconds.
Squats to wall squat hold
Yep, it’s another thigh burner! You’ll be thankful that you persevered with this one on those long traverses where it’s virtually impossible to switch from one edge to the other. This is also a great exercise for those who like to cruise the slopes on their skies as well as their board.
- Start with your feet around shoulder width apart. Engage your core and keep your chest up.
- Bend your knees to around 90º, keeping them from coming forward of your toes. Drive your butt backwards if you need to.
- Straighten your legs and as you come back up to standing, push your hips forward and squeeze your glutes.
- On your last rep, remain low and lean your back against the wall and hold for 30 secs or so. Feel the burn!!
- Keep your back flat on the wall by pulling your belly in, and keep your shoulders back too.
Spiderman crunches
This is another great core exercise that will aid twisting and turning. It will also help stabilise your shoulders and simulates those occasions when you need to lean on your arms to jump your feet (strapped to your board) up hill.
- Start in a high plank position with your shoulders directly over your hands.
- Draw your right knee up towards your left elbow, touching it if possible. Turn your head to look toward the left.
- Lower your foot back down to its original position, switch sides and repeat.
Balance exercises for snowboarding
If you have a balance board, bosu ball or swiss ball then there are a load of balance exercises for snowboarding that you can do as often as you are able. However, if you have no equipment then here are a few options to do at least a couple of times a week, if not everyday.
Single leg sofa squats
- Stand with one leg on the edge of your sofa or bed. This may be challenging enough to start with!
- Once standing on one leg becomes easy, bend your standing leg and lower your free foot so that it gets as close to the floor as possible.
- Keep your weight into your heel and your core engaged and upright. Then slowly straighten your knee back to standing.
- Do this 5-10 times on one leg, then swap to the other side and repeat.
Tiptoe stand with squat
- Place your feet flat on the floor in roughly the same position as your snowboarding stance.
- Raise your heels off the floor so that all your weight is in your toes then bend your knees.
- Keep your heels raised initially and your torso upright then lower your heels to just above the floor.
- Hold this position for as long as you can, and then a little bit longer!
- The key is to replicate being on your toeside edge on your snowboard. So be sure that your body position is similar to how it is when you actually snowboard!)
Heel stand with squat
- Place your feet flat on the floor in roughly the same position as your snowboarding stance.
- Raise your toes off the floor so that all your weight is in your heels. This is super challenging and you may need to use a wall to correct yourself.
- Once you feel somewhat balanced, bend your knees keeping your torso engaged.
- Hold this position for as long as you can.
Single leg clock squats
- Start with all your weight on your right leg and ned it slightly.
- With control, move your left leg back behind you touching the floor with your toe.
- Draw your left knee up towards your chest before pointing your foot out to your side.
- Again, bring your knee to your chest then point your foot out in front of you.
- Finally, bring your knee to your chest once more before stepping your left leg behind your right leg and to the right.
- Repeat the process then switch legs.
Lunge step-throughs
- Bring your arms out to the side and up to shoulder level, like an aeroplane!
- Step your right leg back into a lunge position.
- From here, push off your right leg and slowly straighten it as you bend your torso forwards, straightening your left leg at the same time.
- Pause here for a moment before stepping your right leg in front of you into a forward lunge position.
- Reverse the movement and repeat.
- Switch legs so that your left leg is stepping back and forward.
Flexibility and mobility work for snowboarding
Working on flexibility and joint mobility is another hugely important element to training for snowboarding. Certified Strength and Conditioning Specialist and author of Fit to Ski and Snowboard, Rocky Snyder, suggests adding these exercises into your snowboarding training:
Wrist circles
Cervical spine matrix
Downward Dog
If you’re feeling super inspired to get fit for all your outdoor activities then you might find the following articles useful: how to train for trail running and how to train for hiking.
