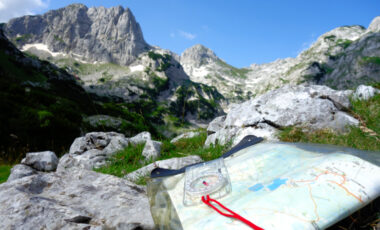
Knowing how to use a compass is an essential skill all walkers, hikers, ramblers, backcountry skiers, trail runners and mountain bikers should have. Unfortunately, it’s also a skill that’s in decline.
Technological advancements mean that most of us have easy access to global positioning systems (GPS) on our phones or on dedicated handheld GPS devices. This makes navigation as easy as pressing a few buttons.
Most navigation apps also show your location and track your progress in real time, with many giving audible signals if you stray off your proposed route.
And while these devices are very straightforward to use and usually accurate to within a few metres, they are not 100% reliable. Batteries lose their charge, apps crash, and satellite signals can be disrupted by mountains and other natural phenomena. You could even drop your phone in a peaty bog when trying to take a selfie!
Needless to say, getting lost in the great outdoors with no means of navigation can lead to serious problems.
A compass is usually much more reliable. Knowing how to read a compass means you’re less reliant on technology, so if your GPS fails, you’ll still be able to navigate safely to your destination. Compass reading is a skill, but it’s one you can learn relatively quickly with a bit of time and practice.
In this article, we’re going to teach you the basics of reading a compass.
What is a compass?
A compass is a navigational device that points to the magnetic north. The face of a compass, called a compass rose, is divided into 360 degrees. Moving clockwise from north, you’ll find east at 90 degrees, south at 180 degrees, and west at 270 degrees. The numbers on a compass are known as bearings.
Degrees are subdivided into minutes, with 60 minutes to a degree. However, it’s rare that you’ll need to be so precise.
Types of compasses
There are several different types of compasses, and most work in the same way. These include:
- Button/survival compass – often carried on a keychain
- Sighting compass – commonly used in the military
- Baseplate compass – the most widely used type of compass and the type we’re discussing in this article. Baseplate compasses are transparent which makes them easier to use with maps.
Beleive it or not, there are also at least 9 other types of compasses out there! For more information on these take at look at our article on types of compasses.
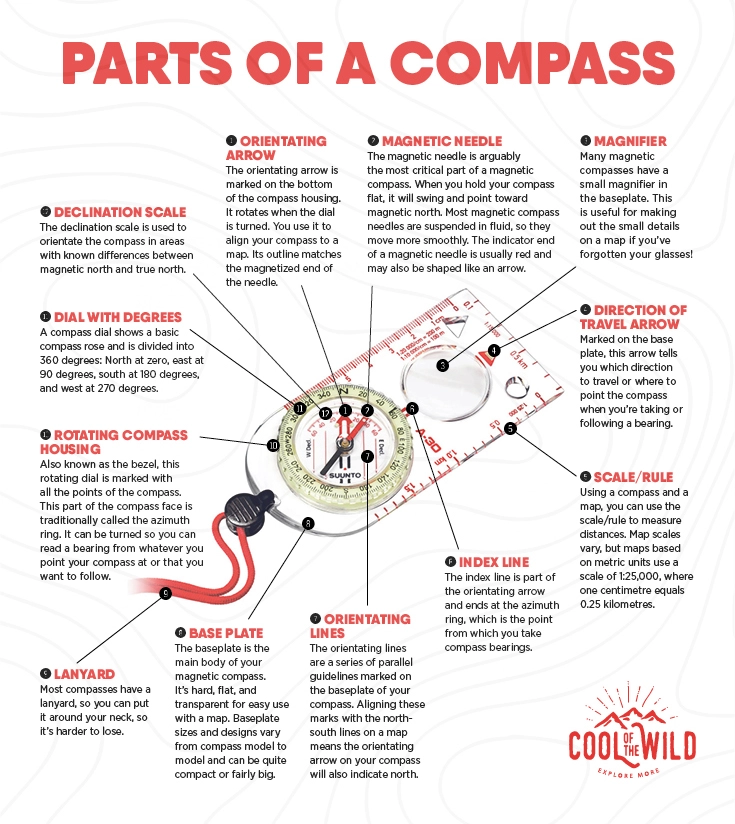
Compass anatomy
Before you try and use a compass, it’s worth familiarising yourself with some basic compass anatomy. The main parts of a baseplate compass are:
Compass needle
– the red end points north
- Direction of travel arrow – what you are pointing the compass at
- Orientating arrow – a non-magnetic arrow aligned with the directional arrow
- Orientating lines – so you can line your compass up with the markings of a map
- Degree dial – a rotating ring that displays the 360 degrees of the compass
- Index line – fixed point on the degree ring from which you take a bearing
- Scale – a handy tool for measuring distance on a map
If you’d like more information about the above features of a compass and more, then take a read of our guide to the parts of a compass.
Important map features
There are also a few things to know on a map that will affect how you use your compass to create an accurate direction of travel.
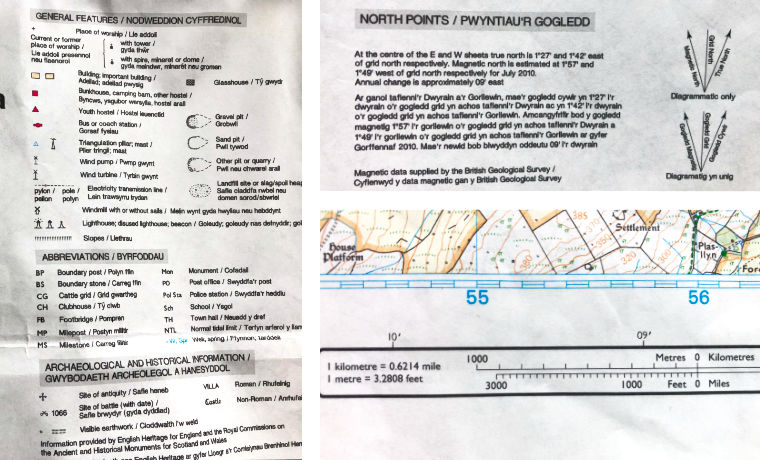
Legend
On the inside fold of your map, you will find what is called the legend. This area of your map holds lots of useful and important information which will allow you to read your map accurately. While all of the information held here is important, we will be talking about two key bits when it comes to using your compass.
Scale
The scale of your map will allow you to accurately calculate distances and time taken to walk your route.
Magnetic declination / variation
This is the difference in angle between magnetic north and true north. This figure will vary depending on where you are in the world and will change over time. Most maps will carry this information in the legend, but it is worth finding out to up-to-date figure when planning your trip. You can do this online.

Using a baseplate compass for basic compass navigation
If you have a compass now is the time to grab it along with a map and pencil to follow along with the instructions below as we take you on a beginner’s guide to using a compass.
How to take a compass bearing
Now you know the parts of a compass, you’re ready to use it. Firstly, we are going to look at taking a compass bearing.
But, what is a compass bearing? A compass bearing is what is used to help us navigate from one position to another in relation to the North direction.
Step 1
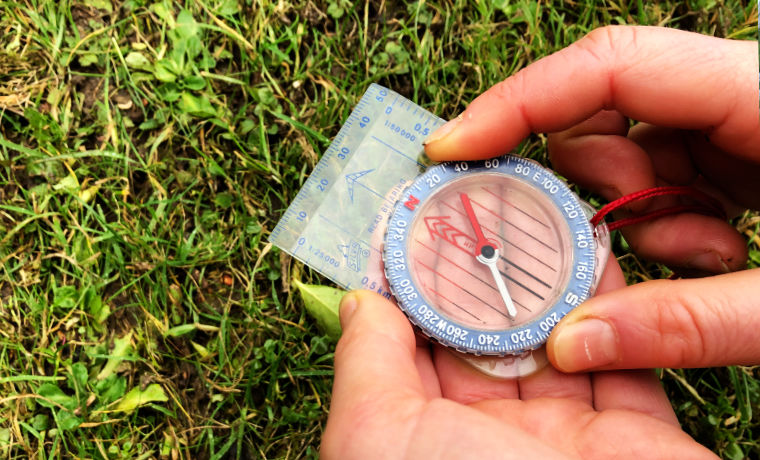 The first thing I like to do is zero my compass. This means aligning the lines inside your compass dial with the north grid lines of your map.
Step 2
 Next, open up your map on a flat surface and determine your starting point and where you want to get to. You can see that I have marked these on my map 1 and 2. With 1 being the starting point and 2 where I want to end up. I always draw a line between the two reference points with a pencil here to help me align my compass as accurately as possible.
Step 3
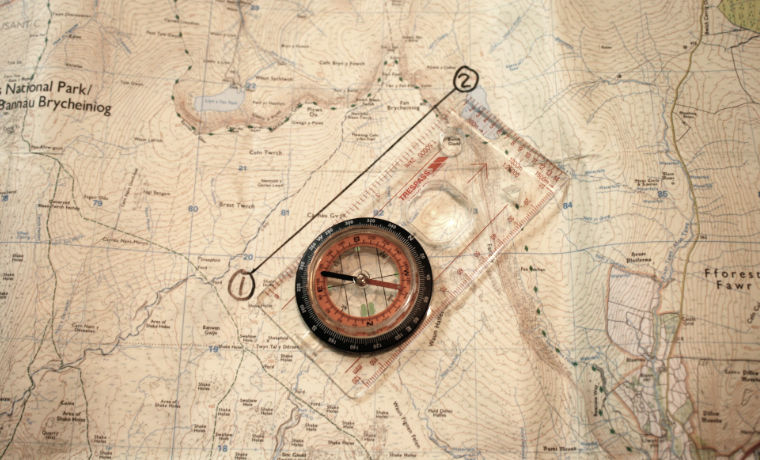 Next, take the long edge of the compass and lay flat it on the map so that the edge lines up with the line drawn between position 1 and 2.
It is very important here that you have the direction of travel arrow of the compass lined up in the direction you want to travel.
Step 4
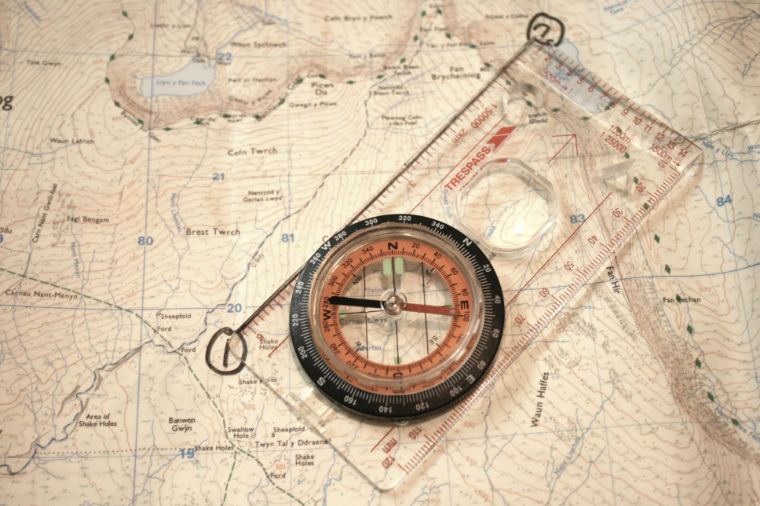 Once you are happy that the edge of the compass is lined up it’s time to line up your compass dial with your map.
Inside the dial of your compass you will see 4 or 5 vertical lines. On your map you will notice faint grey lines running vertically from the bottom right to the top.
Making sure to keep the edge of your compass in line with reference points 1 and 2, you now turn your dial so that the lines inside the dial are parallel with the lines on your map. The housing arrow and N should always be pointing up.
Being careful and accurate at this stage is crucial. Any slight degree variation here could cause you to go way off track when using your bearing.
Step 5
 You can now lift the compass from the map, and we have our basic bearing. This is the point that the Magnetic variation figure we found earlier comes into play.
Using this figure, now make a plus or minus adjustment on your compass dial to account for the difference between magnetic north and true north.
Failing to do this step, depending where you are on the planet, could cause huge variants in your direction of travel.
You now have your first compass bearing, congratulations! So, what do I do with this bearing now?
How to use a compass bearing to navigate
Now you have your bearing it is time to put it to use and get you to your destination.
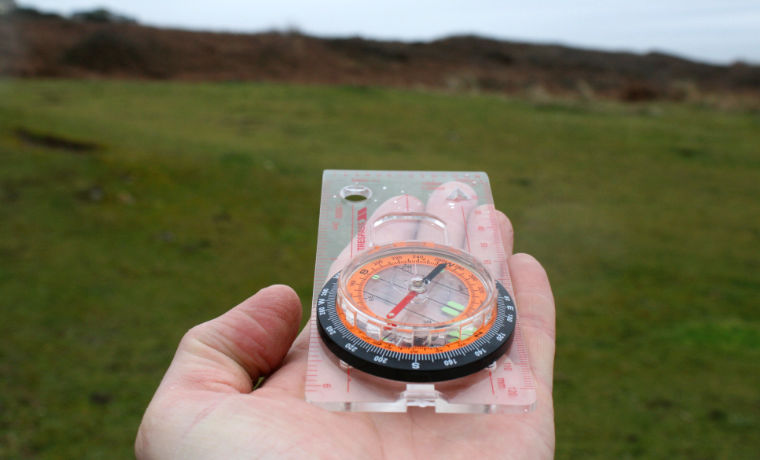
Step 1
Firstly, lay your compass as flat as you can in the palm of your hand.
Step 2
Next turn your body left or right until your red compass needle is neatly lined up inside your red housing arrow or as some may say ‘get the red in the shed’.
Once the red is in the shed, we want to hold the compass flat and bring it up to eye level so we can look down it to see our direction of travel arrow.
Step 3
Using this arrow, line it up to a fixed landmark for us to start walking towards. Don’t pick something far away here, we want to break this down into small chunks so we reduce the possibility of drifting a few degrees off course.
Step 4
Once you reach your fixed landmark, raise your compass flat in your hand again to eye level and line up the direction of travel arrow to pick out another landmark to head for. Keep repeating this until you reach your final destination!
Now that you have learnt the basics of compass navigation, the trekking world is your oyster. Grab your compass and map, plan some routes and get out on the trails. Practice makes perfect.
Whenever you head out to do a route remember to use your map and compass to make a good route plan.
Using the scale on the map against your compass will allow you to determine distances you are looking to cover. Adding in the elevation and using Naismiths Rule will enable you to calculate the time it will take for you to complete your route.
It is important to then pass these details onto a friend or family member so they have an idea of your plans should something go wrong.
Get out there, enjoy the trails and be safe.
