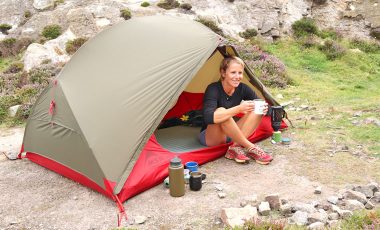
Everyone has their preferred way of taking their coffee, and in everyday life we’ve got our coffee making methods dialed. From brew time and pouring temperature to your milk of choice (or lack of it), and even the type of mug you prefer to sip from. But when it comes to camping coffee, things aren’t quite as straightforward and you may need to go a little off-piste to get as close to your usual brew as possible.
Thankfully, there are LOADS of ways to make excellent tasting coffee when camping.
In this article you’ll learn all the different camping coffee making methods and even a few camping coffee hacks. You’ll discover some new methods, how to adapt your current methods to the campground, and which methods are best for your preferred style of camping. Either way, one thing’s for sure: you’ll come away knowing how to make coffee while camping!
10 ways to make camping coffee
Disclaimer: We use affiliate links and may receive a small commission on purchases.
- How to make Aeropress coffee
- How to make camping coffee in a percolator
- How to make cowboy coffee
- How to make camping coffee in a moka pot
- How to make instant coffee
- How to make espresso with a Nanopresso
- How to make camping coffee with a Jetboil coffee press
- How to make camping coffee with coffee bags
- How to make camping coffee with a French press mug
- Camp coffee making accessories
- Filter and Javadrip camping coffee
01Aeropress coffee
Best for: Backpacking, car camping, espresso and Americano
Serves: 1-3
Campfire compatible: Yes
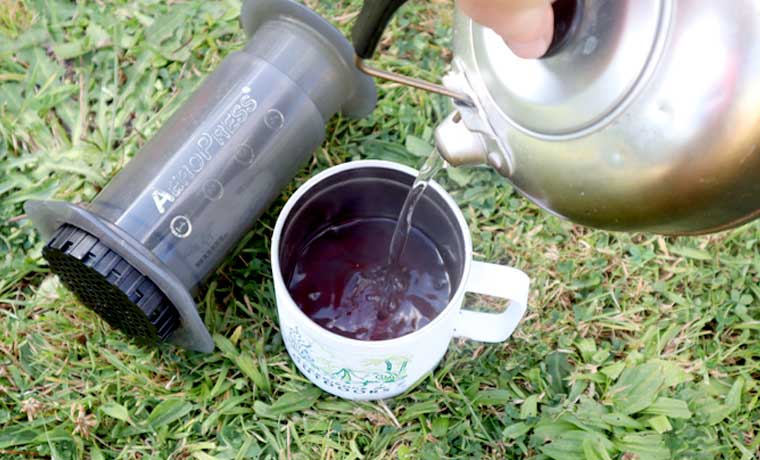
Making Aeropress coffee has become somewhat of a science in recent years. Weighing the coffee, testing the water temperature and even pouring the water into the Aeropress chamber for a specified amount of time are all essential elements to perfect Aeropress coffee. But unless you’re a coffee connoisseur, it’s unlikely that you’ll notice whether you poured the water for 10 or 40 seconds, especially when you’re out in the wild and you just want your caffeine kick, now!
That said, even everyday coffee sippers can appreciate the quality of the coffee that you get from an Aeropress: it’s smooth, full-flavoured and refined. The device is also very lightweight and is easy to clean out the grounds.
| Pros: | Excellent quality coffee, lightweight device, serves up to 3 people, easy to clean. |
| Cons: | Not as compact as other camp coffee making options, not a versatile piece of kit (can’t be used for cooking other stuff), uses a throw-away filter (though metal filters are available). |
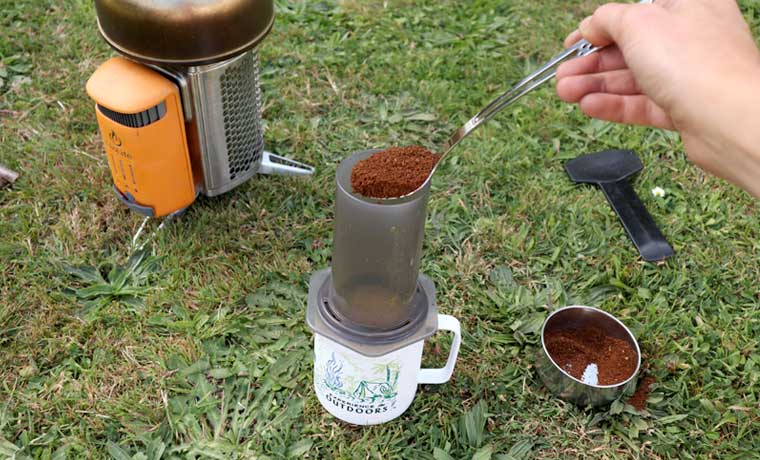
How to make camping coffee with an Aeropress
Equipment needed: Aeropress, ground coffee, hot water
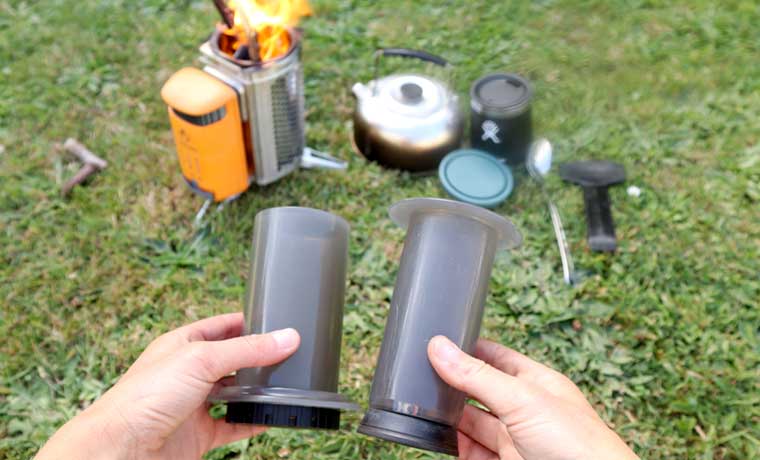

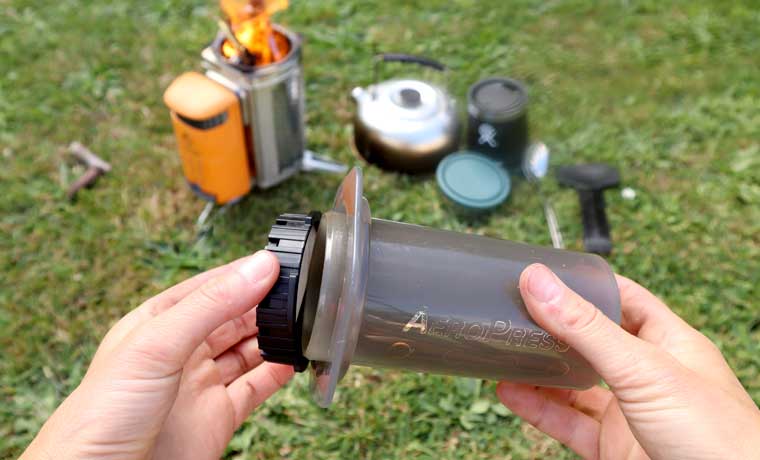
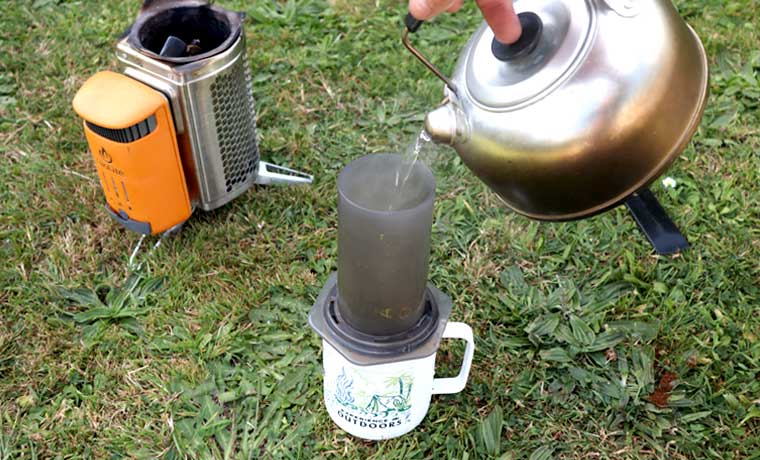

There are a couple of ways to use an Aeropress to make coffee. However, if you’re not switched on then the inverted method has the potential to go rather wrong: you have to flip the whole thing over once it’s filled with hot water. I prefer the below method for ease and low risk.
- Remover the plunger from the main chamber.
- Place a filter into the filter cap.
- Screw the filter cap onto the bottom of the main chamber and place over your camping mug of choice.
- Add one tablespoon of coarsely ground coffee per person to the main chamber.
- Pour hot water into the main chamber up to the “1” indicator. If making coffee for 2 or 3 people then increase the amount of coffee (1 tablespoon per person) and increase the volume of water to correspond with the numbers on the side of the Aeropress.
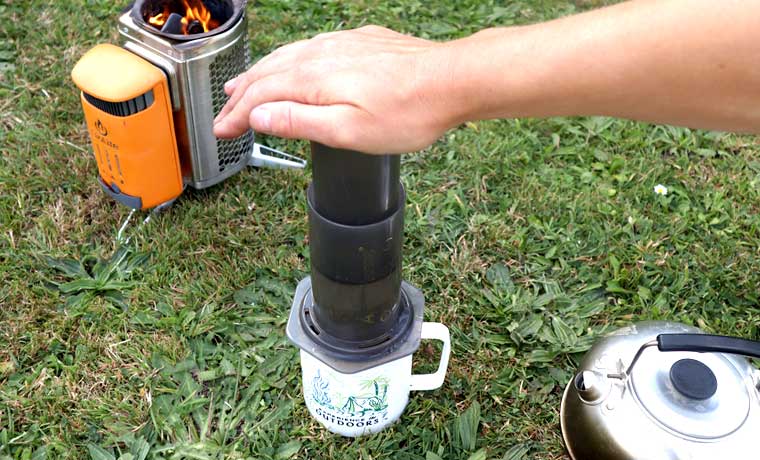
- Stir the contents of the Aeropress for around 10 seconds.
- Place the plunger into the top of the main chamber and slowly start to press it down.
- If there is resistance then take a pause and then continue pressing until all the liquid has filtered into your cup.
- For an Americano, add hot water to your desired strength.
02Percolator camping coffee
Best for: Car camping
Serves: 1-6
Campfire compatible: Yes
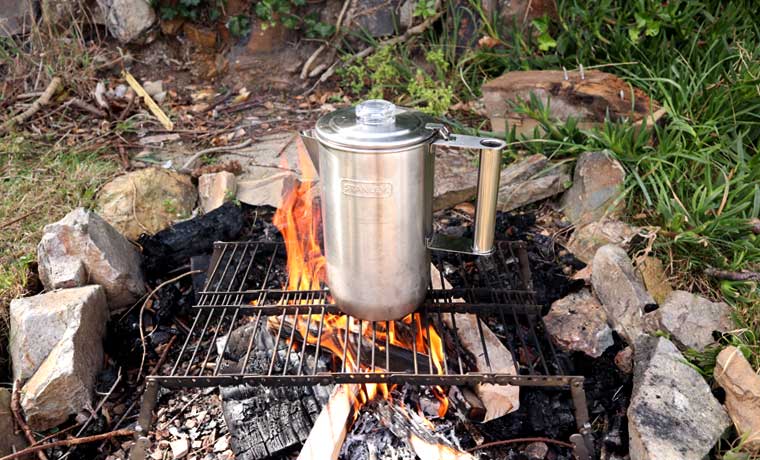
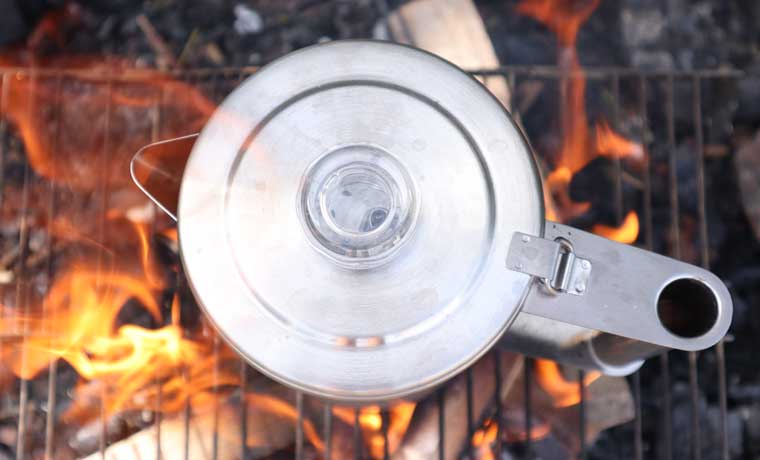
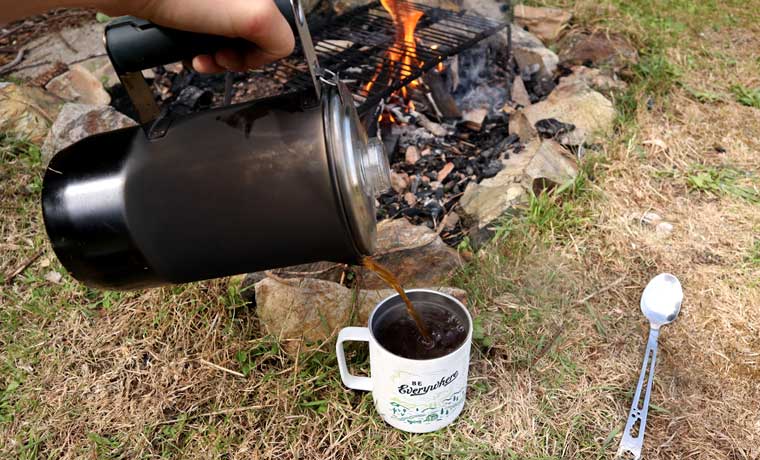
In theory, making camp coffee with a percolator should be a straightforward affair. Just fill with water, add some coffee, put it on the stove and you’re good to go. Well, yes. But if you’d rather not have to endure burnt, bitter coffee then you may want to take a little more care over brewing with a percolator. You’ll need to keep a close eye on it so that the coffee doesn’t ‘perk’ for too long on a high heat. Then you’ll need to turn the heat down and leave it to simmer. This change in temperature means that using a percolator over a campfire is a bit of an art. But it’s most certainly doable, and all the more satisfying when you get it right.
All that said, once you’ve got to grips with it, percolator coffee is a superb choice for large groups at camp. Plus, most percolators can be used for other cooking processes as all the components can be removed from the pot.
| Pros: | Good tasting coffee, good for groups. |
| Cons: | Takes some practise to get it right, uses more fuel than most camp coffee methods. |
How to make camping coffee with a percolator
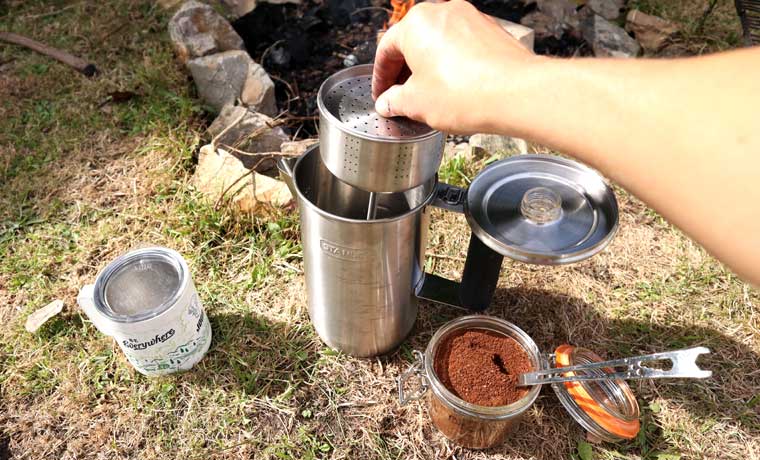
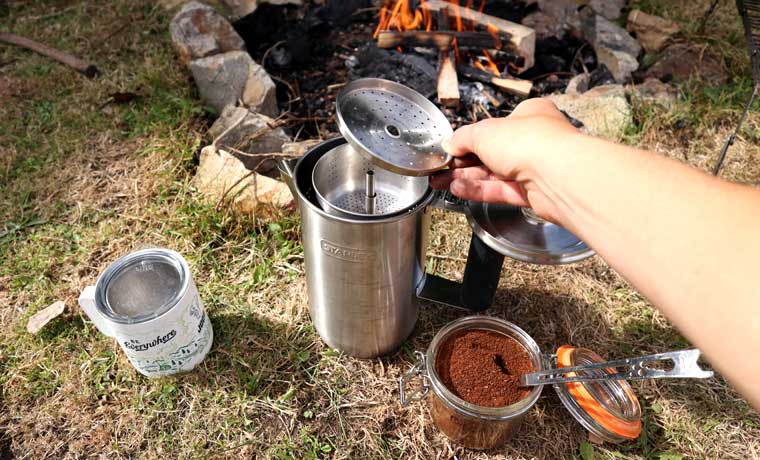
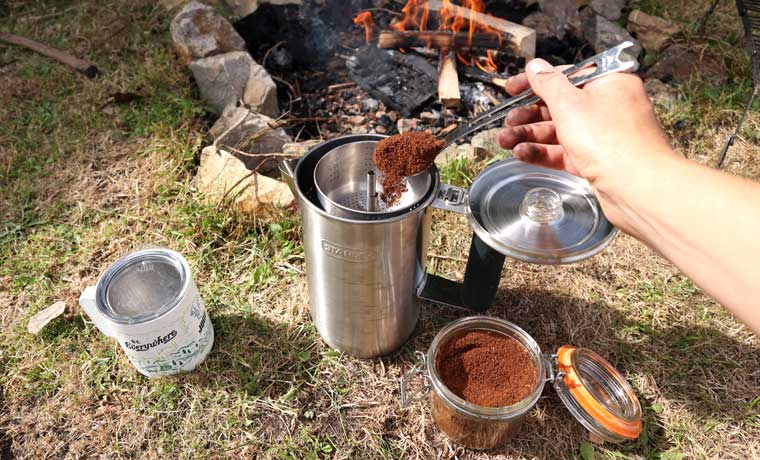
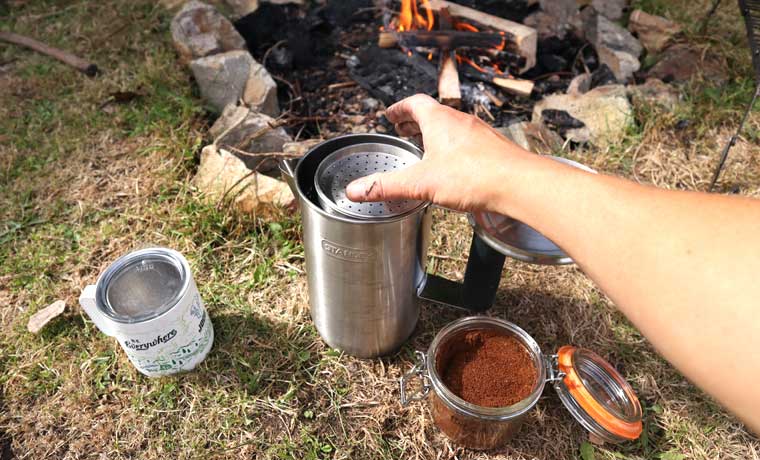
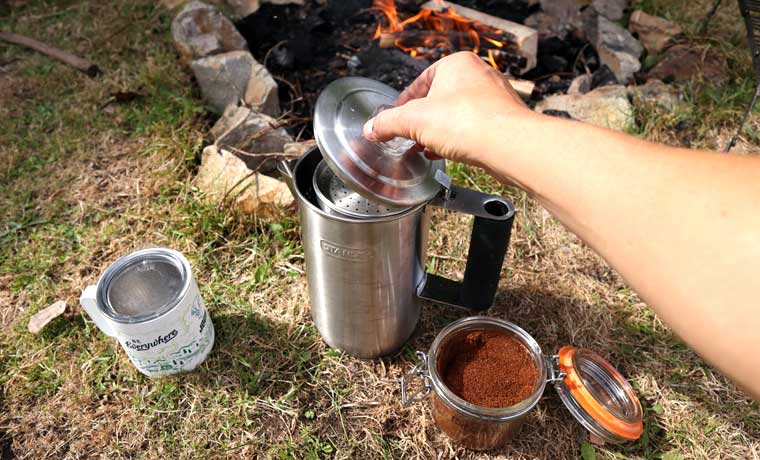
- Fill the pot with the desired amount of cold water (1 cup per person).
- Place the tube and coffee basket into the pot.
- Add ground coffee to the coffee basket (1 tablespoon per cup of water) and cover with the lid.
- Place the pot over a medium heat until liquid starts to bubble into the transparent globe on the lid.
- Turn down the heat and leave to simmer for up to 10 minutes. If you want a weaker brew then simmer for less time.
- Leave to cool for a minute or two before serving.
03Cowboy coffee
Best for: Car camping, backpacking, picnics and emergency coffee situations!
Serves: Depends on your pot, pan or kettle size
Campfire compatible: Yes
Cowboy coffee is one of the more simple ways of making coffee at camp and one of the most crucial camping coffee hacks you should know about. That is unless you’ve managed to strike gold and have discovered instant coffee that competes with the taste and intensity of coffee made with fresh beans. Otherwise, nothing beats mixing hot water with coffee grounds and pouring it into a mug! I mean, the cowboys managed pretty well with this method before percolators, presses and filters were invented.
Making cowboy coffee that actually tastes good does require a little more finesse than just chucking it all together. However, it’s a highly useful skill to have up your sleeve to pull out on those occasions when you have no other choice.
| Pros: | Easy to make, doesn’t require specialist equipment, great as a backup coffee making method, and tastes better than you might expect! |
| Cons: | It takes a little practise to serve it without having coffee grounds floating in your mug, and you need to use more coffee grounds per serving than normal. |
How to make cowboy coffee
Equipment needed: Ground coffee, pot, pan or kettle, hot water.
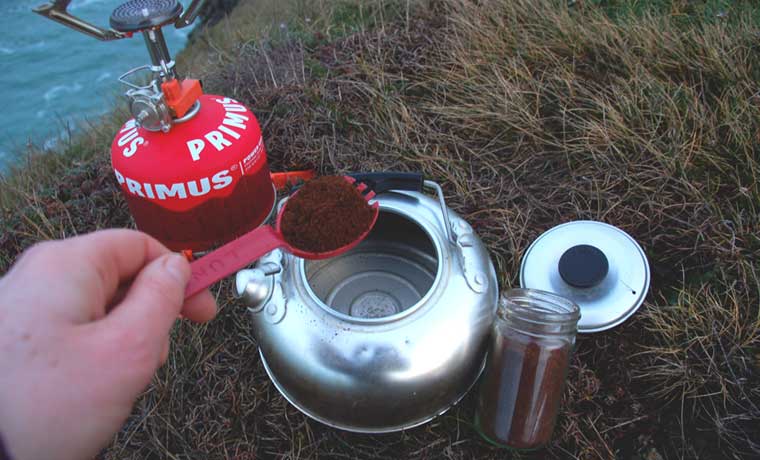
- Add about 480ml / 16oz of water (per person) to your cooking pot or kettle and bring to the boil.
- Take the pot off the heat and leave it to sit to cool for 30 seconds or so.
- Add four tablespoons of finely ground coffee (per person) to the water and give it a good stir.
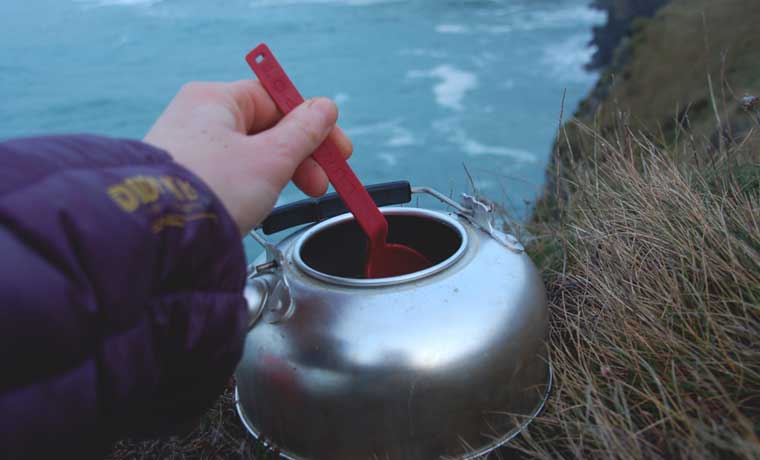
- If your pot has a lid, then put it back on (or use a plate or chopping board if it doesn’t), and leave it to sit for two minutes.
- Stir again, and leave it to sit for a further two minutes with the lid on.
- If the grounds are floating at the top of the pot then sprinkle some cold water over the top to encourage them to the bottom of the pot.
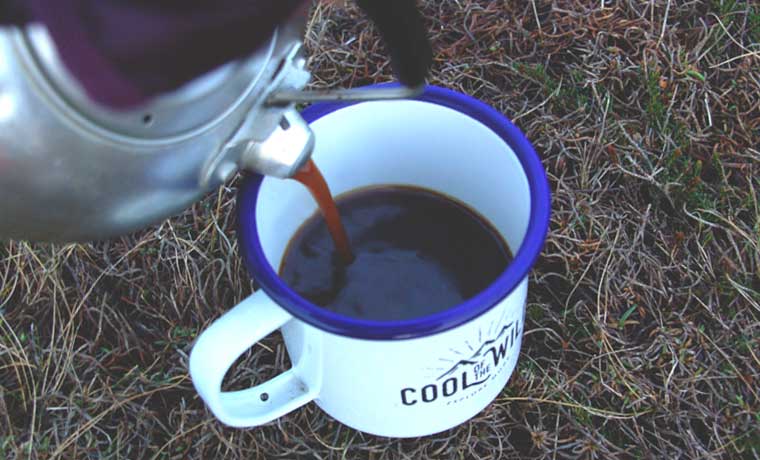
- As soon as the grounds have drifted (miraculously) down to the bottom of the pot, gently and slowly pour your brew in a mug. Being gentle is key to not disturbing the settled grounds.
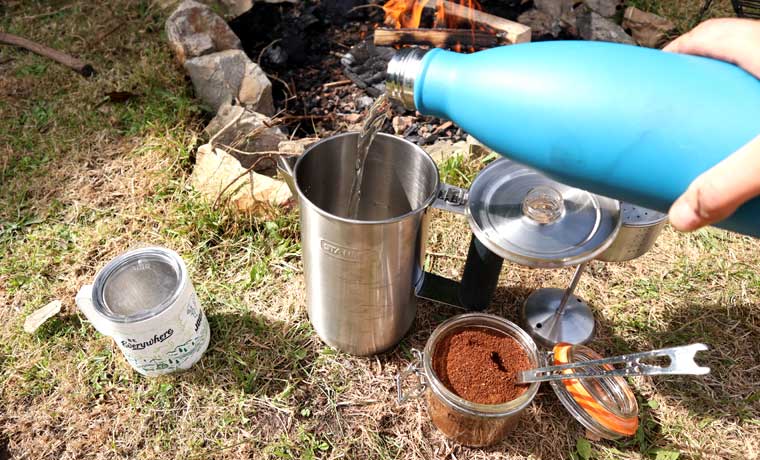
04Moka pot camping coffee
Best for: Car camping, strong coffee / espresso
Tasting notes: Creates espresso strength coffee that you can dilute with hot water as desired
Serves: 1-6, depending on the size of the pot
Campfire compatible: Yes, depending on the handle material
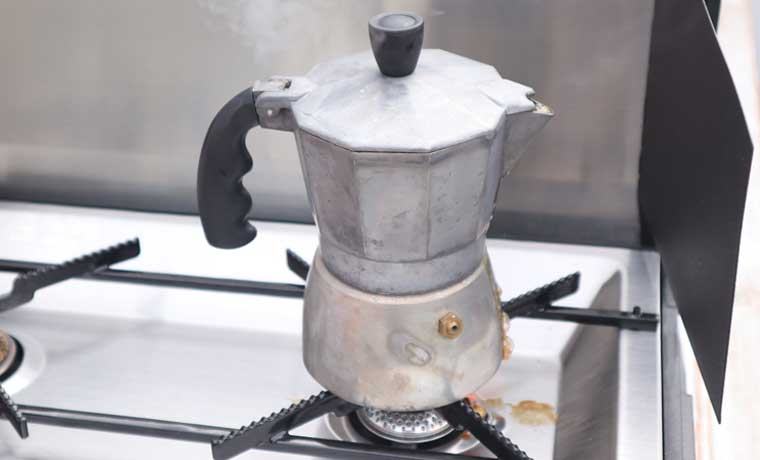
Invented in Italy in the 1930’s, moka pots have since been the go-to method for making coffee in much of Europe and Latin America. It’s a rather clever method that relies on a build up of pressure from heat to push the water up from the lower chamber. The water passes through the coffee basket full of grounds and fills the top chamber with liquid coffee. Hey presto!
Making camping coffee in a moka pot is as much about the ritual as it is about the results. Nothing beats the gurgling sound of a brewing moka pot, swiftly followed by a waft of the strong stuff. It just looks lovely too! Plus, if you like espresso strength coffee it’s a real winner.
| Pros: | The coffee tastes great and is especially good for espresso-lovers. |
| Cons: | You can only brew a full pot, so unless you want three cups of strong coffee out of a three-cup pot all to yourself, you’ll need to find some mates to share it with, or buy a smaller pot in the first place. Additionally, you need to use your stove twice: once to boil the kettle of water and once to make the coffee. |
How to make camping coffee with a moka pot
Equipment needed: Moka pot, ground coffee, hot water, heat source
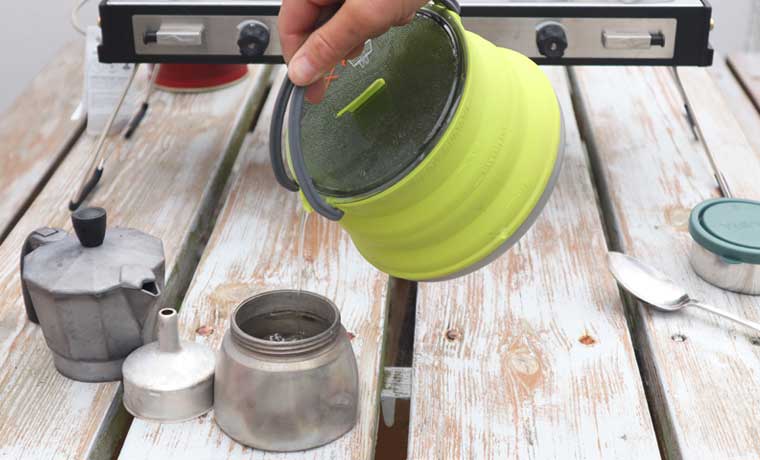
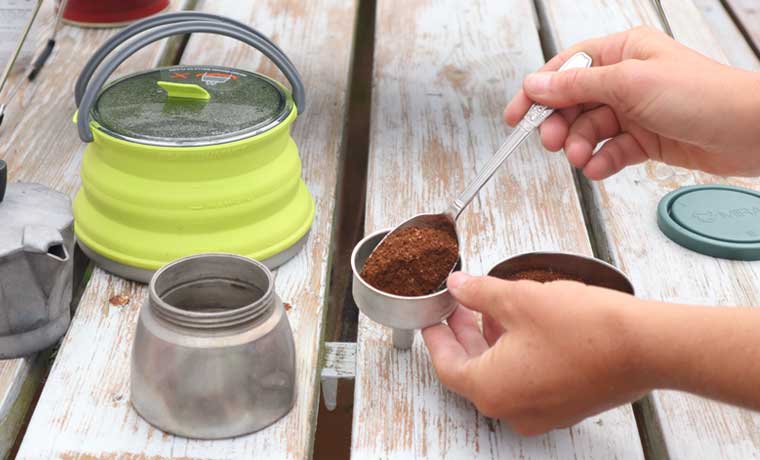
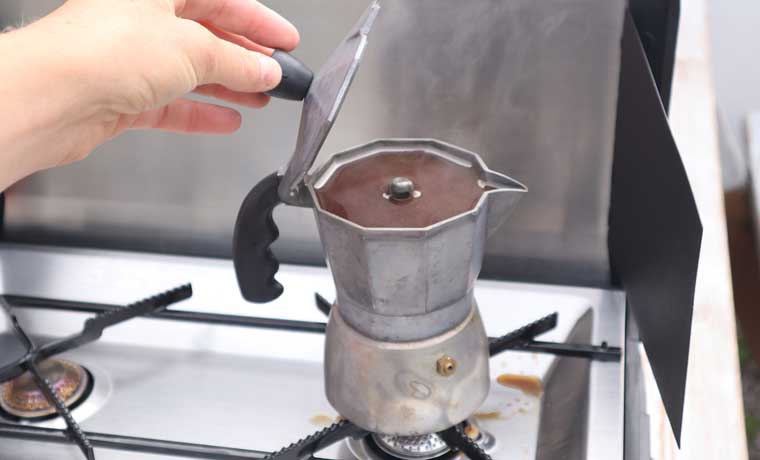
- Fill the bottom chamber almost to the top with hot water.
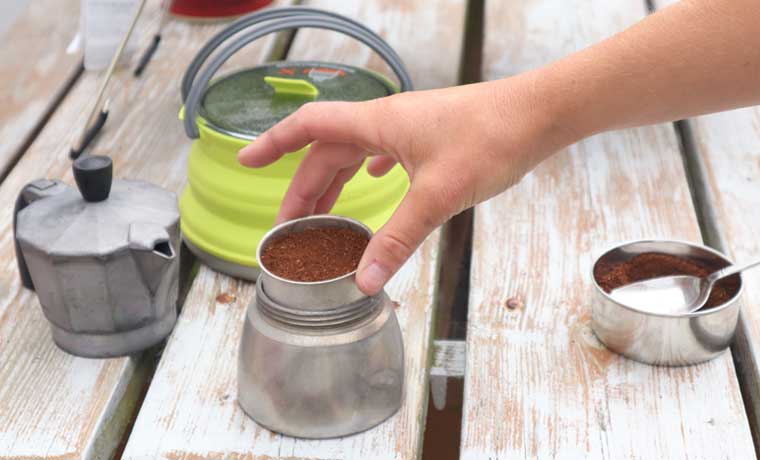
- Fill the coffee basket with ground coffee and place it in the bottom chamber.
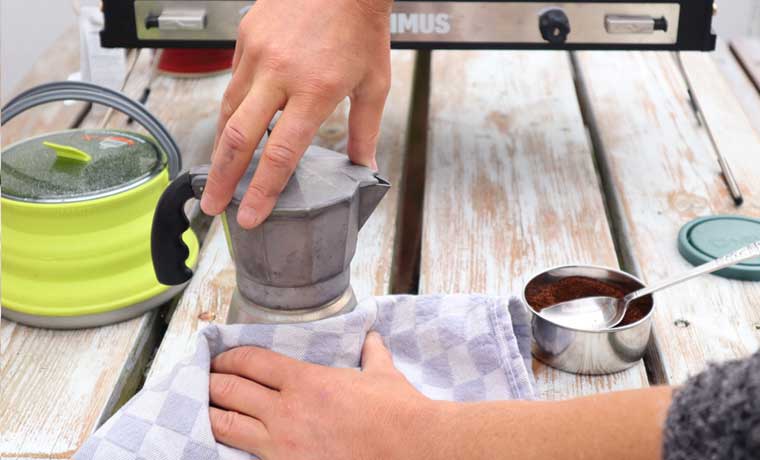
- Screw the top section onto the bottom, holding the bottom with a cloth as it will be hot.
- Place the whole pot onto your stove or fire and heat until the top chamber is filled with coffee.
05Instant camping coffee
Best for: Backpacking, hiking, lightweight camping
Serves: 1+
Campfire compatible: Yes
The best coffee brewing method for backpackers has to be instant coffee. Nothing compares with its simplicity and, assuming you don’t use single serve sachets, it creates no waste that you have to deal with or pack out. Yes, historically instant coffee doesn’t taste anywhere near as good as freshly brewed coffee. But if you shop around there are actually some pretty decent options out there which may just make you rethink hauling a moka pot out into the backcountry.
| Pros: | Lightweight, quick, easy, doesn’t require specialist equipment, no grounds or filters to deal with. |
| Cons: | Taste doesn’t compare to fresh coffee, and there’s no enjoyable ritual associated with making instant coffee. |
How to make instant camping coffee
Equipment needed: Instant coffee, hot water
- Place a teaspoon of instant coffee into your mug (or empty out your single serve sachet).
- Fill the mug with hot water and stir.
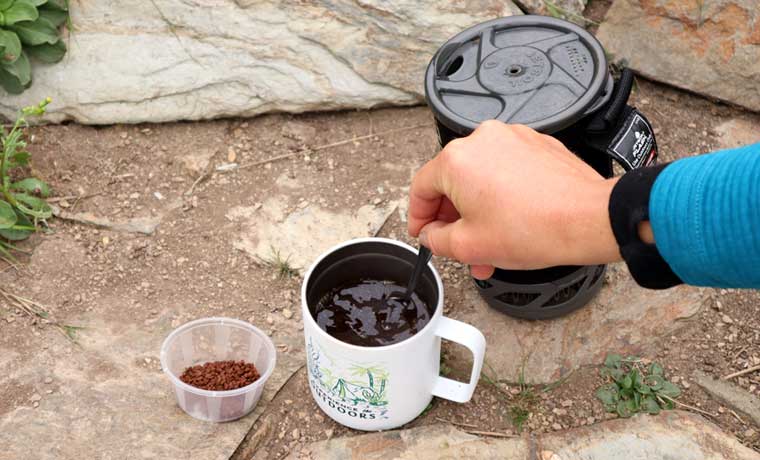
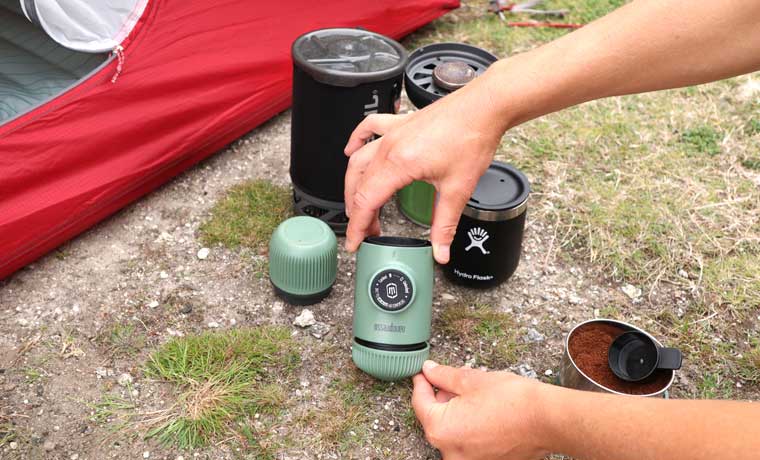
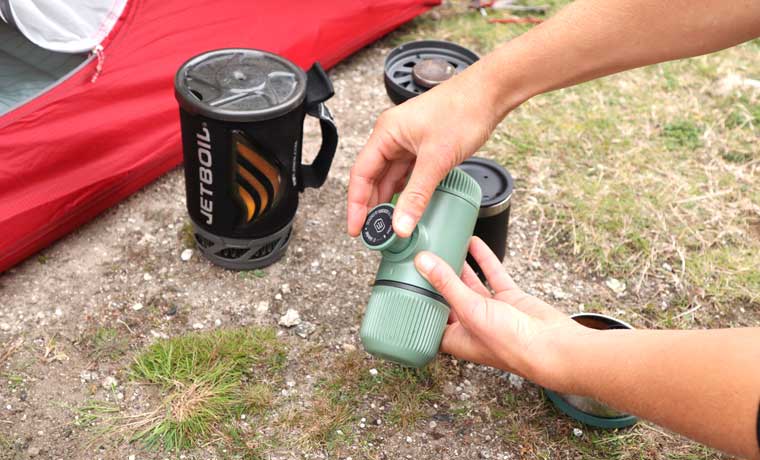
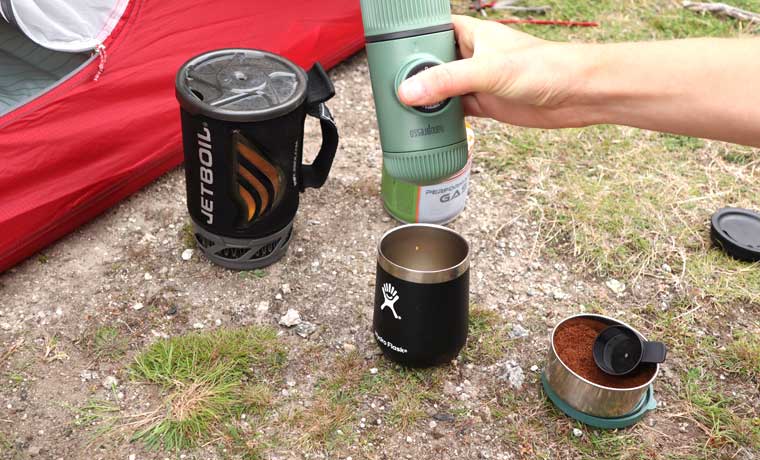
06Nanopresso camping coffee
Best for: Picnics, backpacking, car camping, espresso drinkers
Serves: 1
Campfire compatible: Yes
The dawn of portable espresso makers has been something of a game-changer for espresso sippers who are always on the move. These pocket-sized inventions are lightweight, easy to use and highly portable, making them a superb choice for camping and backpacking (and if you can’t find a good cafe!). They work at very high pressure by pumping hot water through the filter basket and directly into your coffee mug. The result is a delicious espresso (crema and all) that will impress even the most fanatical of espresso drinkers. The Nanopresso is one of the best on the market.
If you prefer a longer, less strong coffee then simply add hot water to the espresso to dilute it.
| Pros: | Creates excellent tasting espresso coffee, is easy to use and is very portable. |
| Cons: | Only serves 1 (even if diluted). |
How to make camping coffee with a Nanopresso
Equipment needed: Nanopresso machine, ground coffee, hot water
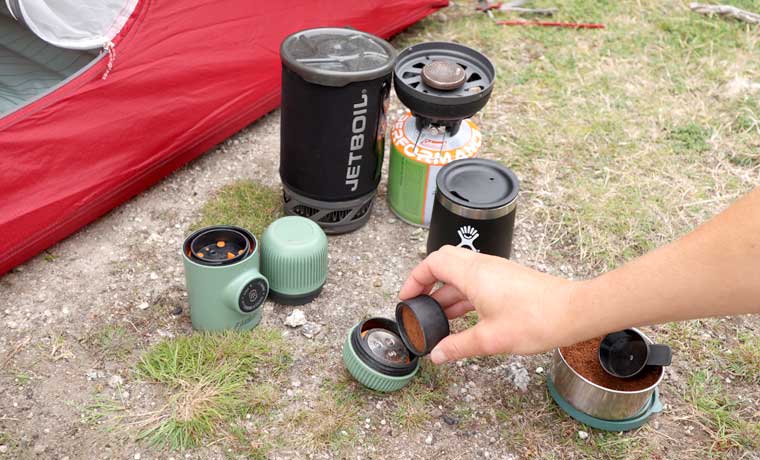
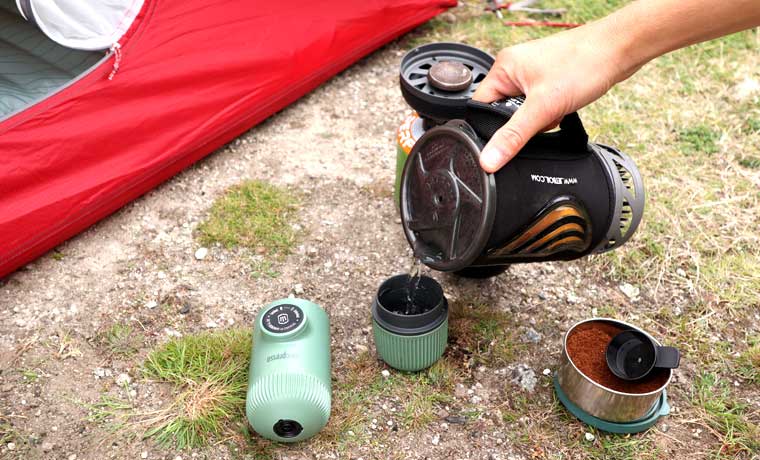
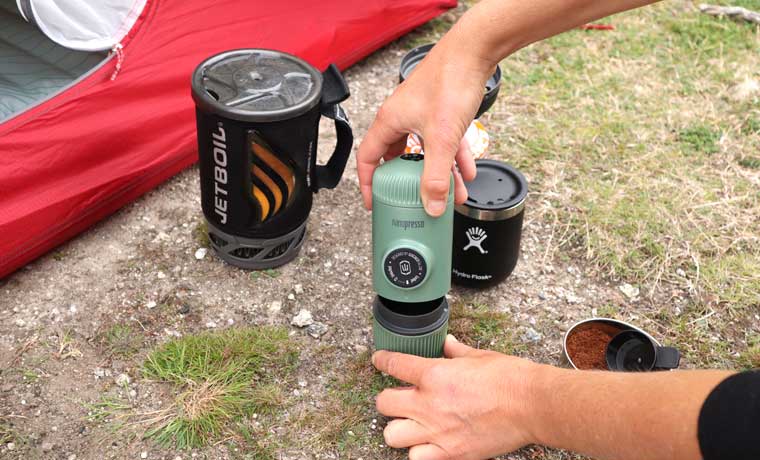
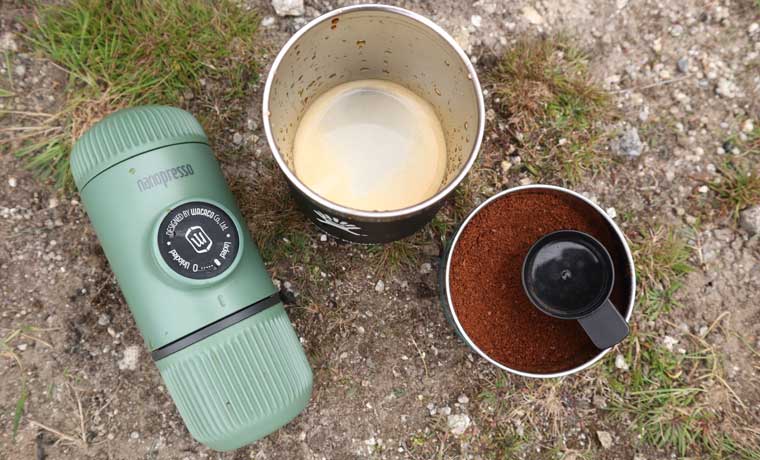
- Disassemble the Nanopresso.
- Using the scoop, fill the filter basket with coffee grounds.
- Place the nozzle head over the filter basket and screw onto the main body of the machine.
- Fill the water cup with hot water and screw the main body of the machine onto the cup.
- Unlock the pressure button and flip over the machine so that the nozzle head is over your cup or mug.
- Slowly compress the pressure button to release the coffee. Repeat until all the coffee is pumped through.
NOTE: If you like your espresso piping hot then it pays off to preheat the machine by pumping hot water through it before brewing.
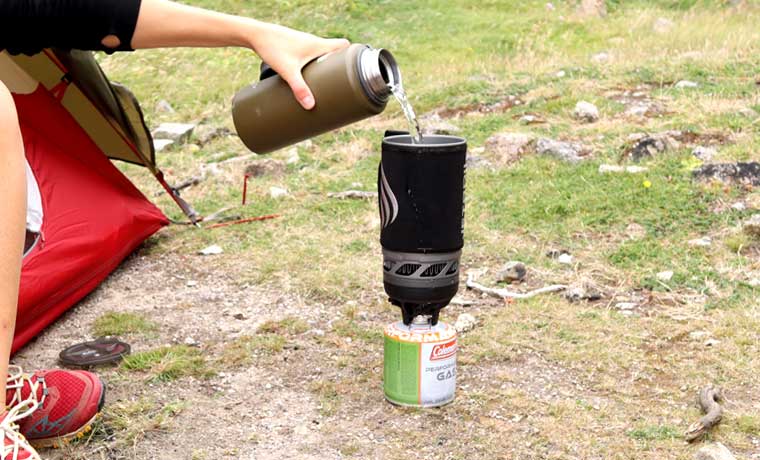
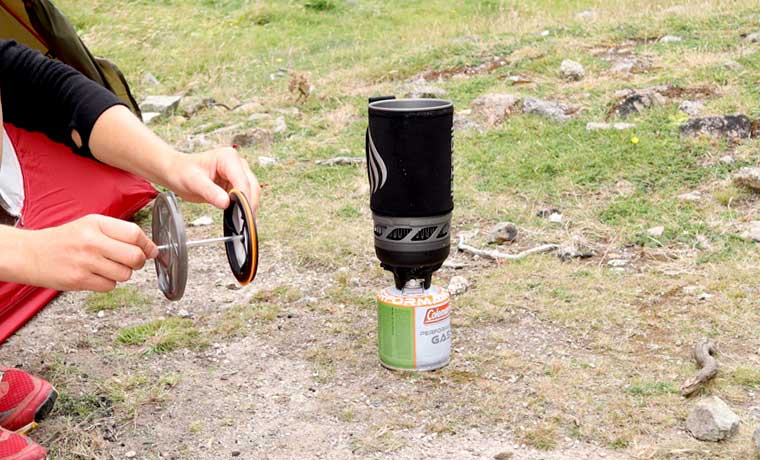
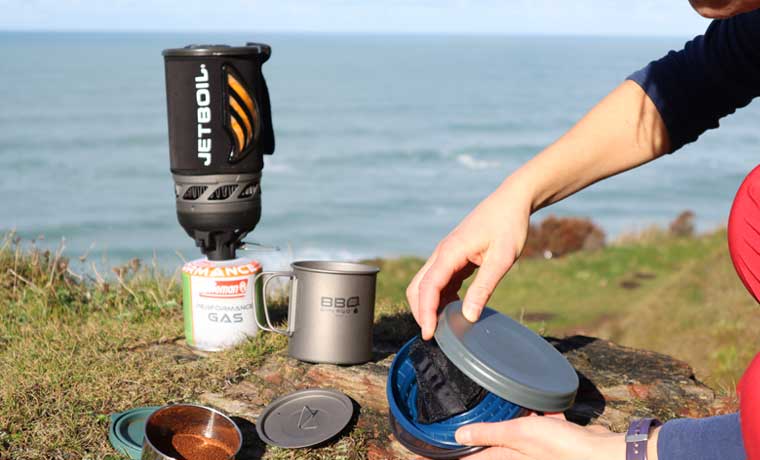
07Jetboil coffee press
Best for: Backpacking, car camping, Jetboil owners,
Serves: 1-4
Campfire compatible: No
If you’re used to brewing your coffee in a good old-fashioned (and straightforward) cafetiere, then you’ll love the Jetboil Silicone Coffee Press. Yes, this example is a rather specific piece of kit that is only useful for Jetboil owners, but there are other brands working on the same principle of using what cookware you already have and adapting it to make great coffee. The Jetboil coffee press is compatible with the Zip, Flash, and Micromo 0.8 and 1 litre cooking pots.
It’s a simple method of making camp coffee that’s ideal for backpacking; the silicone press weighs only 36g / 1.3oz and fits into your existing pot easily.
| Pros: | Mega lightweight and small to pack, simple coffee making method, produces good coffee. |
| Cons: | Only compatible with Jetboil cookware, can leave coffee flavour in your cooking pot. |
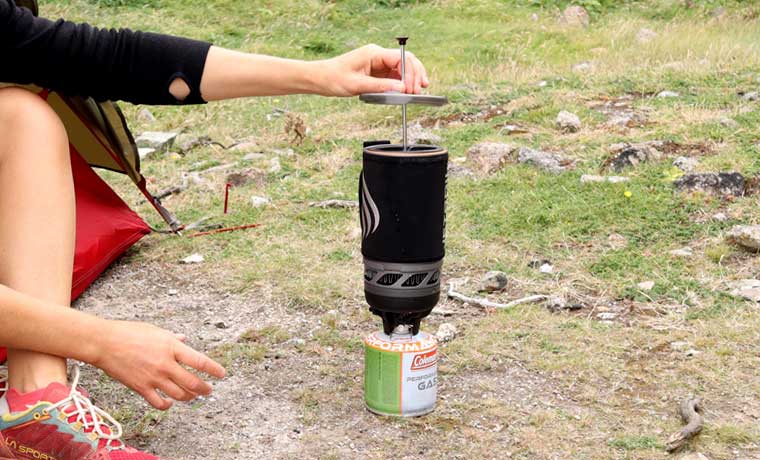
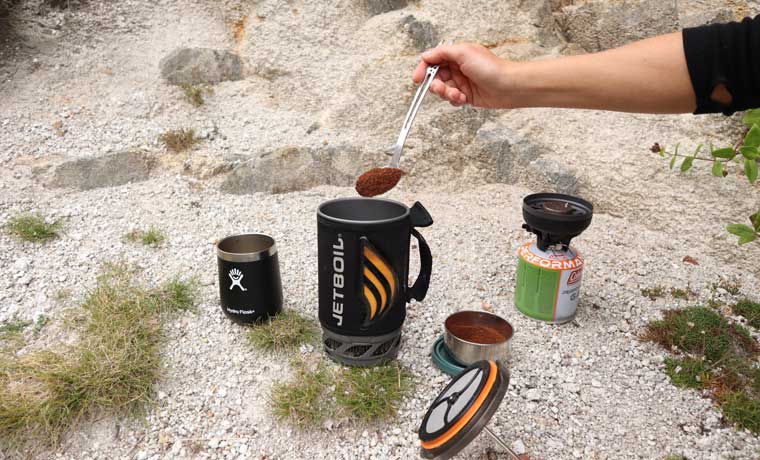
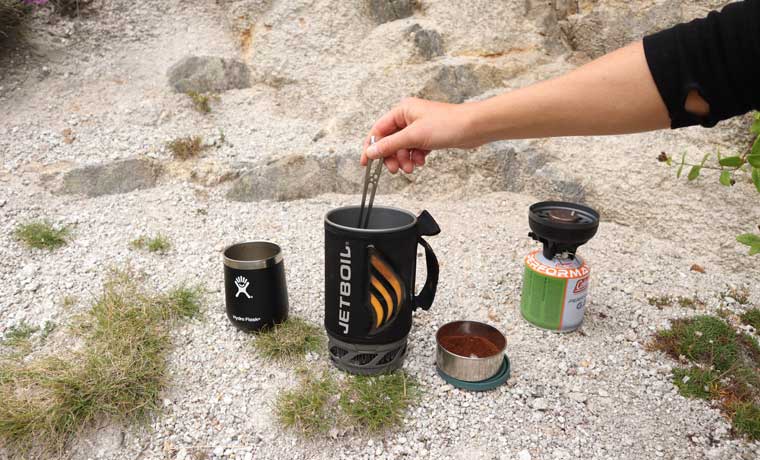
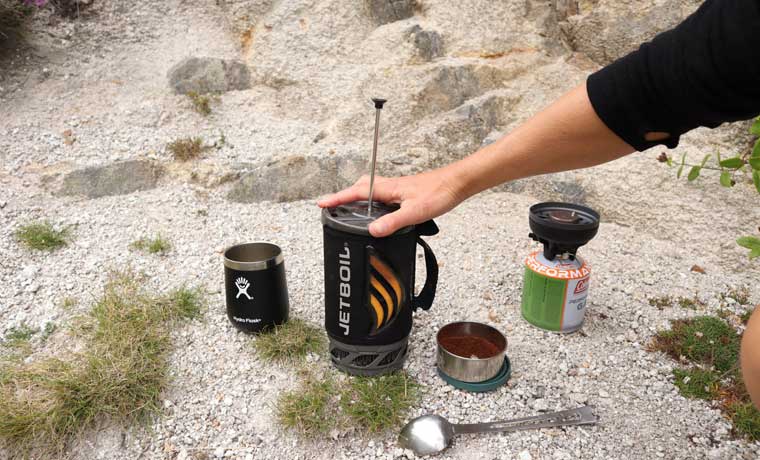
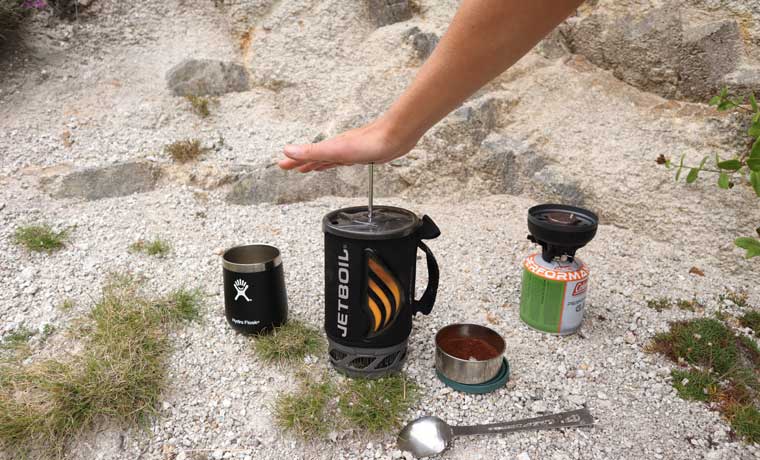
How to make camping coffee with a Jetboil coffee press
Equipment needed: Jetboil Silicone coffee press, Jetboil pot, ground coffee, hot water.
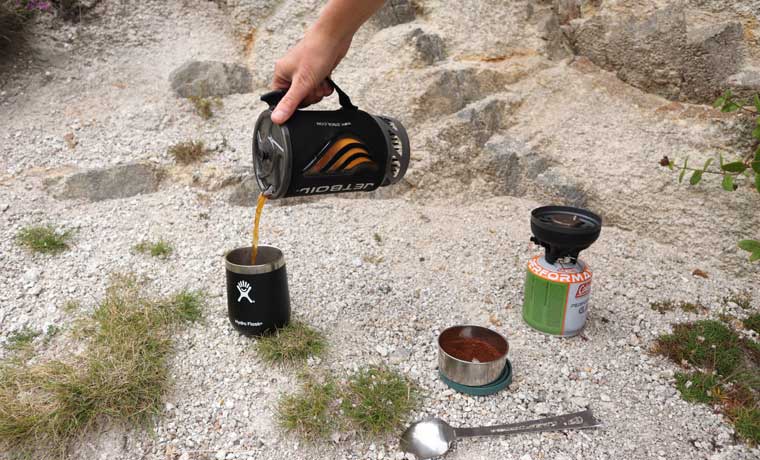
Buy a Jetboil Silicone Coffee Press
- Boil the desired amount of water in your Jetboil pot. Leave to cool slightly for a minute or two.
- Put together the press including attaching it to the lid of your Jetboil pot.
- Add a tablespoon of ground coffee per person to the water and stir.
- Place the press over the pot with the lid securely in place.
- Leave to brew for 3 or so minutes.
- Push the top of the press down and serve.
08Coffee bags
Best for: Backpacking, bikepacking, short overnight camping trips
Serves: 1 per bag
Campfire compatible: Yes
Coffee bags are a bit of a revelation when it comes to wild camping and lightweight backpacking trips. You get great tasting coffee without needing to carry any specific coffee making kit. I only recently tried coffee bag coffee and was very pleased with the result. However, I hate the wastefulness of them, from their individual wrapper to the bags themselves. Despite their convenience, I decided to make myself a reusable one! It’s essentially a mini drawstring bag made of thin cotton fabric (I used an old hankerchief!). And although the fabric gets stained after one use and doesn’t look that appealing, the results are just the same: excellent coffee with minimal waste and minimal effort.
If you’re already in the know with this simple camp coffee making method, then why not up your eco-game and replace your throwaway coffee bag habit with DIY coffee bags?
| Pros: | Lightweight, easy, doesn’t require specialist equipment, great tasting coffee. |
| Cons: | You have to carry out a soggy coffee bag. They are wasteful, unless you make your own bags. |
How to make camping coffee with a coffee bag
Equipment needed: Premade coffee bag or DIY coffee bag and coffee ground, hot water
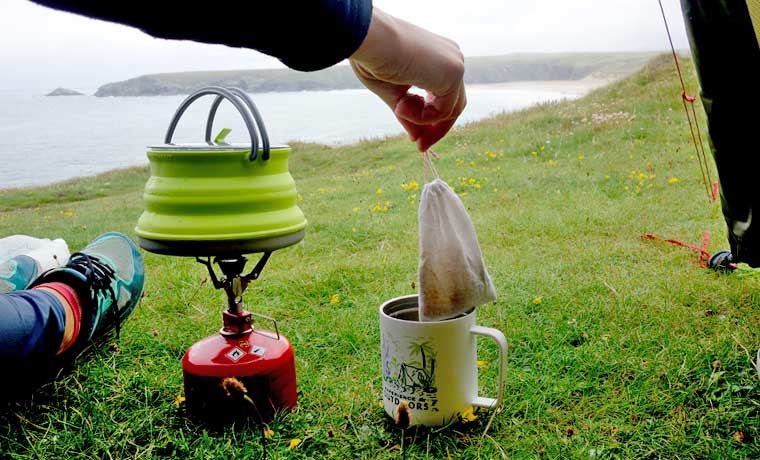
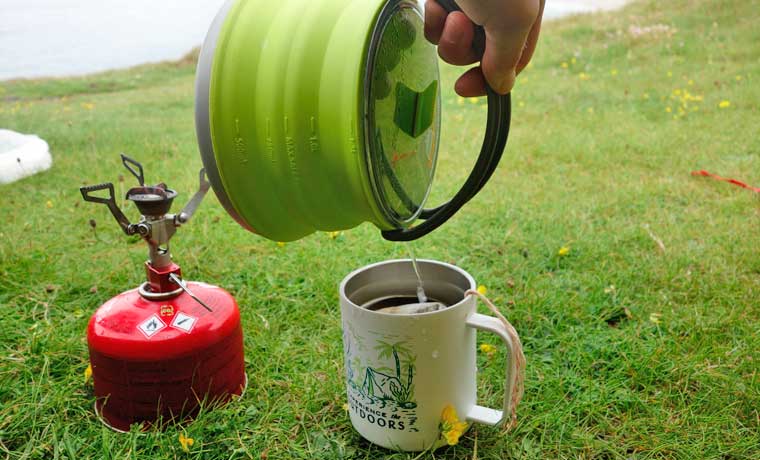
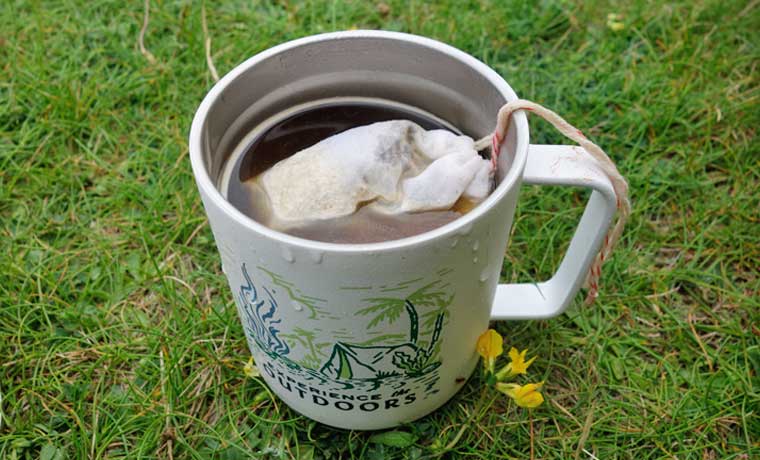
- Place your coffee bag into your mug.
- Pour hot water into the mug and leave to brew for 4-5 minutes.
- Remove the bag from the mug, squeezing the excess liquid out.
- For a strong coffee, leave the bag in the mug for as long as you like and drink your coffee with it still in there.
09French press mug camping coffee
Best for: Backpacking, car camping with non-coffee drinkers
Serves: 1
Campfire compatible: Yes
For the longest time I used a french press-style mug to make camping coffee. I live with a coffee hater – yes, they do exist! – so cross-contamination with other pots, kettles and mugs is an absolute no-go. Using a coffee press mug meant that I didn’t need any extra coffee making equipment as the mug was also used for other drinks and soups etc. I loved how simple it was and it ticked all my camping coffee needs. That is, until I started getting a bit particular about my mug!! I realised how much more pleasurable it is sipping from the fine lip of a metal cup instead of a fat-sided, plastic thing. So I moved away from this method to pasture new!
All that said, this method of making camping coffee is really simple and straightforward, and if I weren’t so picky about my mugs I’d probably still opt for it above other methods.
| Pros: | Very easy to make good tasting coffee, lightweight, and versatile for other camp cooking and drinking. |
| Cons: | Mug isn’t very enjoyable to drink out of (if you’re picky!) |
How to make camping coffee with a french press mug
Equipment needed: Press mug, ground coffee, hot water
- Take the press filter out of the mug and place 1 tablespoon of ground coffee in the mug.
- Fill the mug with hot water.
- Place the press on top the mug and leave to brew for a few minutes.
- Press the filter down to the bottom of the mug and drink up!
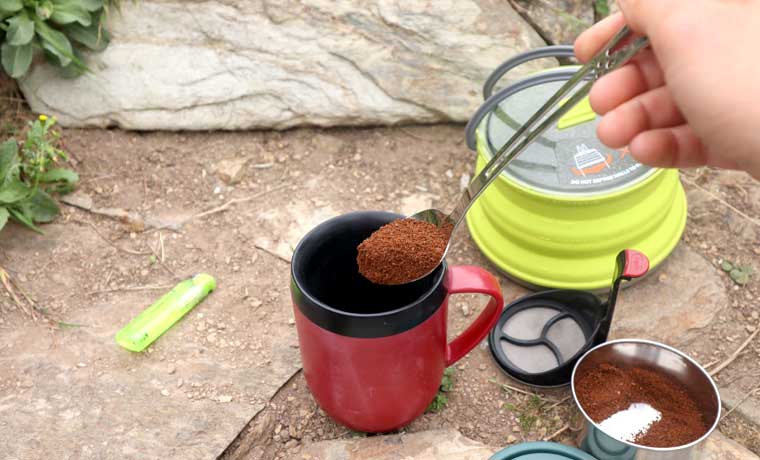
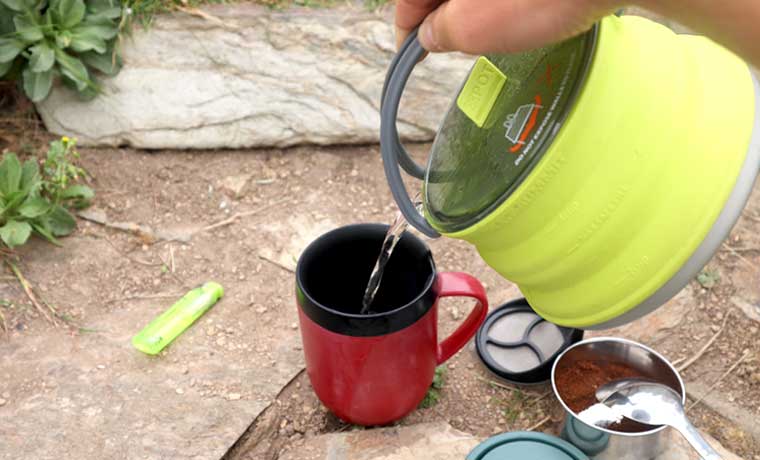
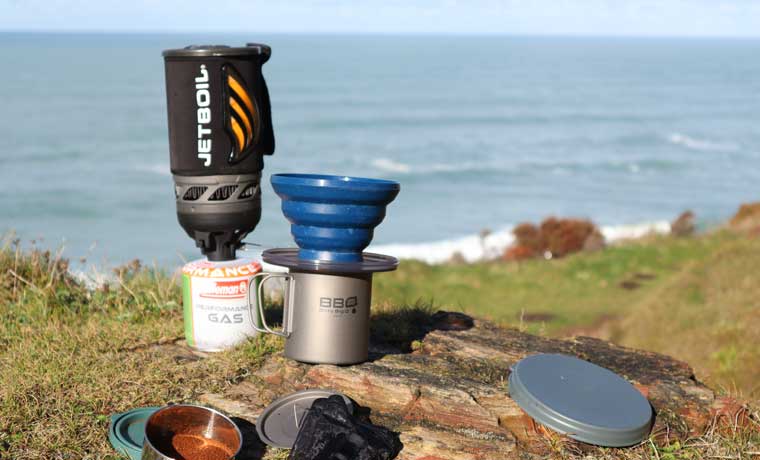
10Filter and Javadrip camping coffee
Best for: Backpacking, lightweight camping, fast coffee
Serves: 1+
Campfire compatible?: Yes
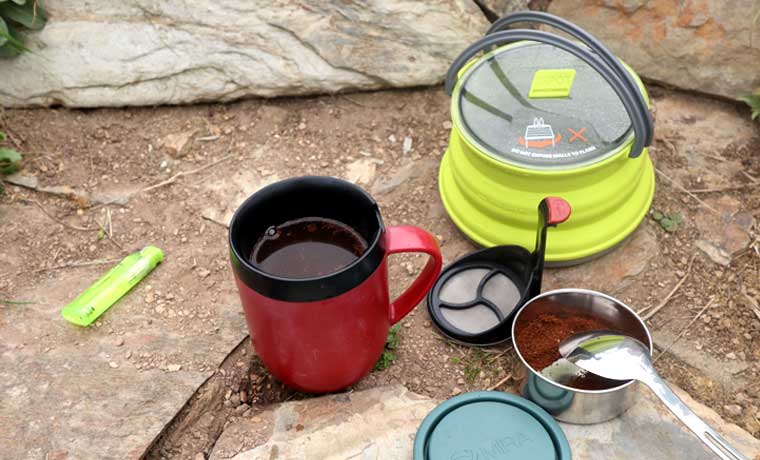
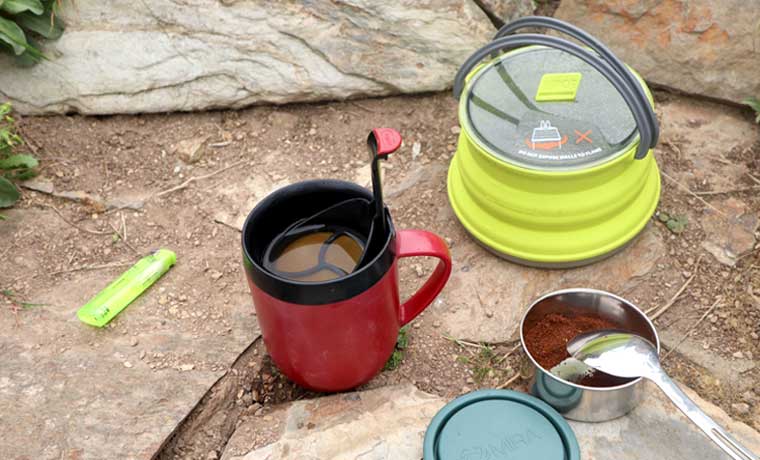
Impatient coffee drinkers are a rare breed, I think. However, there are times, especially when you’re backpacking, when dilly-dallying over your coffee rituals is neither practical nor possible. When you need a coffee and you need it fast, instant coffee is probably your best bet. But if there ain’t no way you’re going near the stuff (and I get that), then using a filter and drip method may just be the next best thing. Though the dripping process sounds like it could take an age, it takes under 30 seconds to be ready, if you use relatively finely ground coffee. The downside of a fine grind is slightly weaker coffee, so you may need to use more coffee. Otherwise, use coarsely ground coffee and allow a little more time.
The GSI Outdoors Collapsible Javadrip is an ideal option for backpacking. You can use paper filters with it. However, I use a reusable nylon java filter to save waste. The Javadrip features a silicone cone that collapses down to only 1 inch, and a transparent base so that you can see how much water you need to add to your container of choice. Additionally, it comes with a lightweight lid that holds the used filter and keeps everything clean and contained after use.
| Pros: | Super quick to make once you’ve boiled the water, no wasteful filters, lightweight and packable device. |
| Cons: | Need to use a lot of coffee to get a strong brew, requires extra water to clean off the filter. |
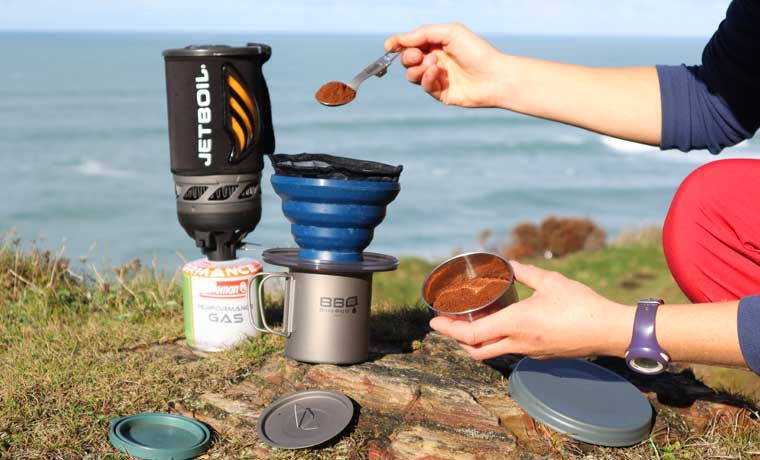
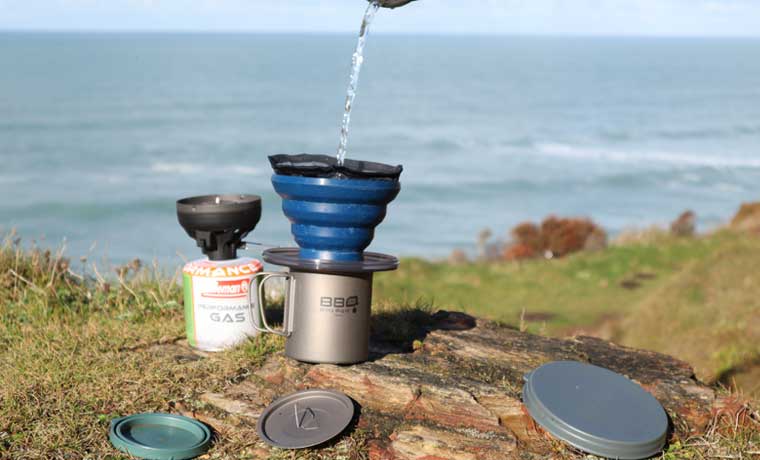
How to make camping coffee with a filter and Javadrip
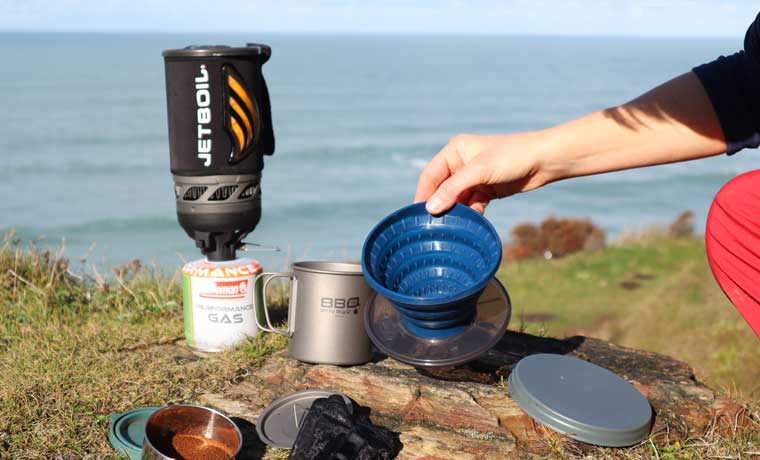
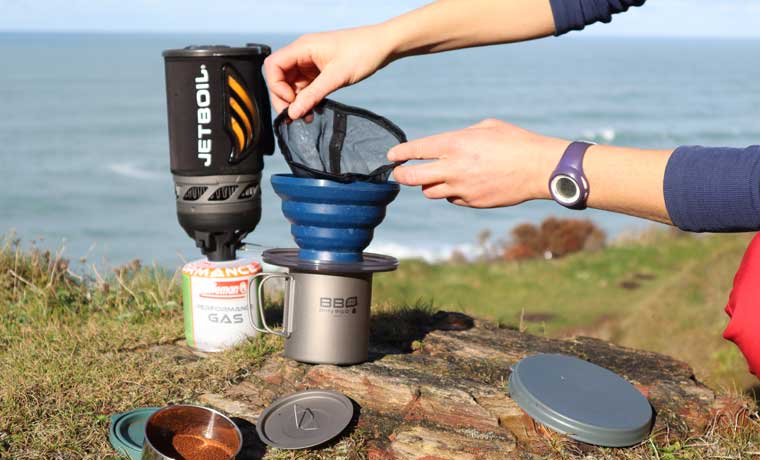
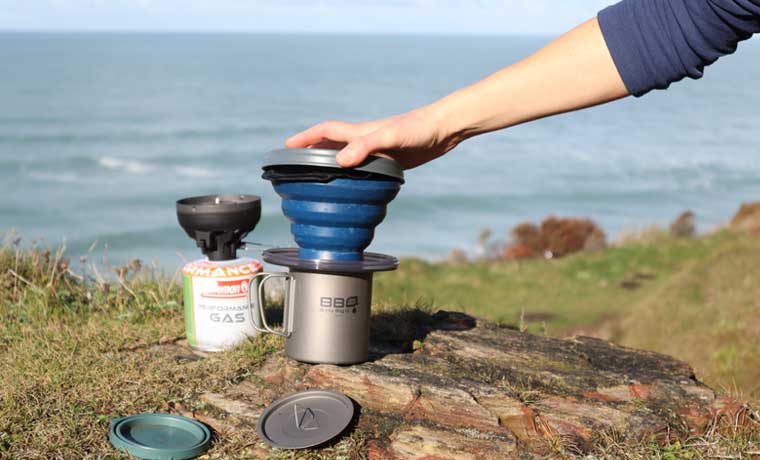
- Place the drip cone over your mug.
- Put the filter into the cone and add the desired amount of coffee (1 heaped tablespoon per mug).
- Pour hot water over the coffee grounds and cover the Javadrip with the lid to prevent heat loss.
- Leave to drip through. This takes less than 30 seconds, depending on your filter.
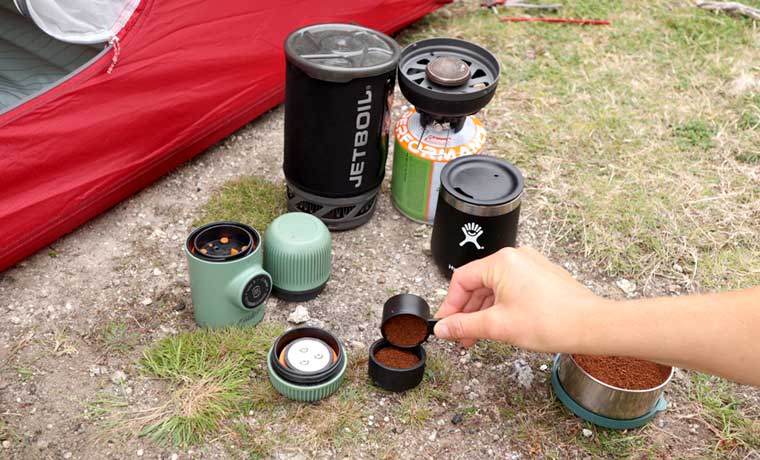
Camp coffee making accessories
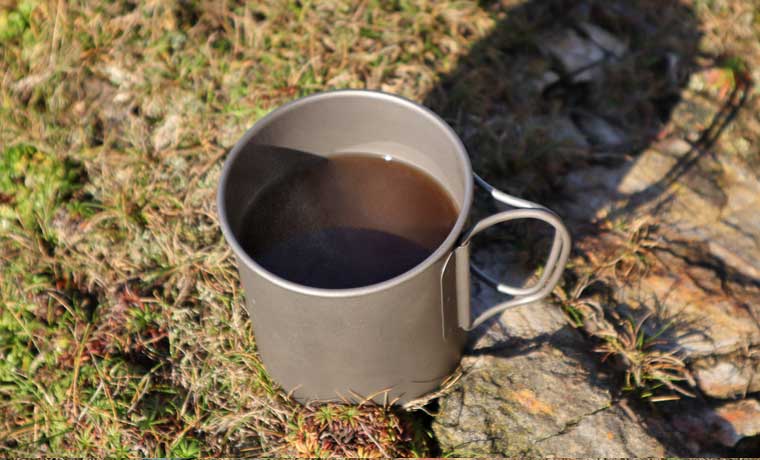
If you’re like me, then much of the enjoyment of camping coffee is more than just a quick caffeine hit and an enjoyable flavour. Sipping from an elegant mug changes the whole experience, for example. As does pouring it from a pot that doesn’t spill everywhere and is comfortable and easy to hold. With this in mind, here are some of the things we use to make camping coffee.
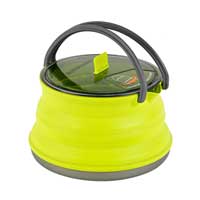
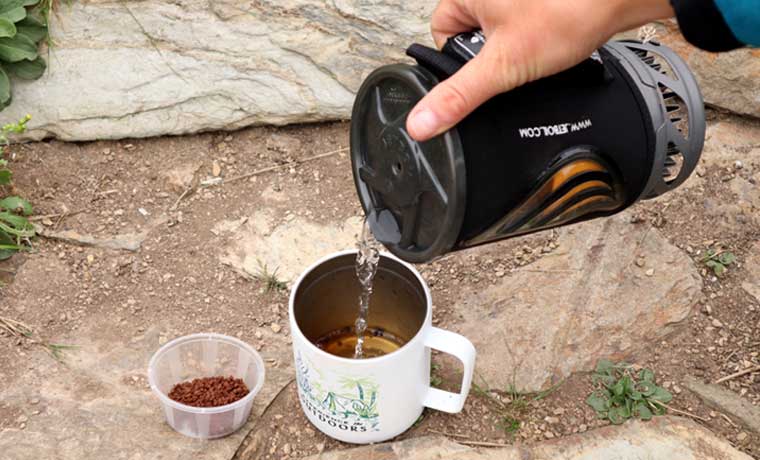
Sea to Summit X-Pot Kettle
It’s lightweight, collapsible and the ideal addition to your camping coffee making setup if portability is important. To be honest, it’s our go-to car camping kettle too, as we rarely have the need to boil more than 1.3 litres of water at a time. It’s not campfire compatible though. So if you plan on heating over the fire you’ll need to opt for something that is fully metal.
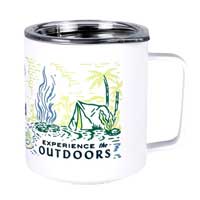
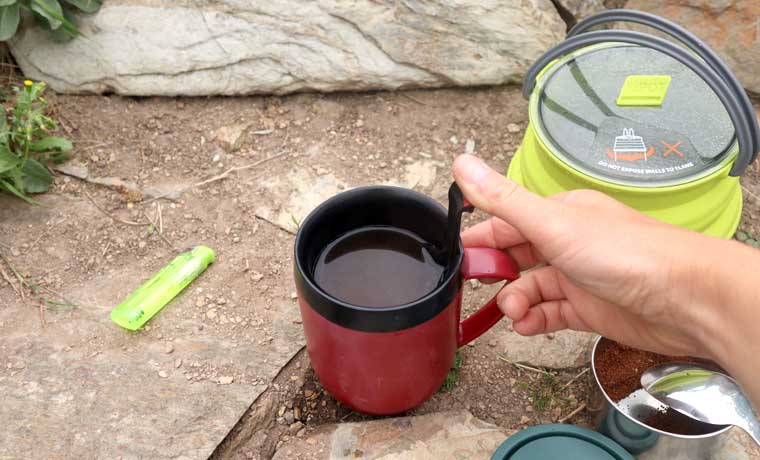
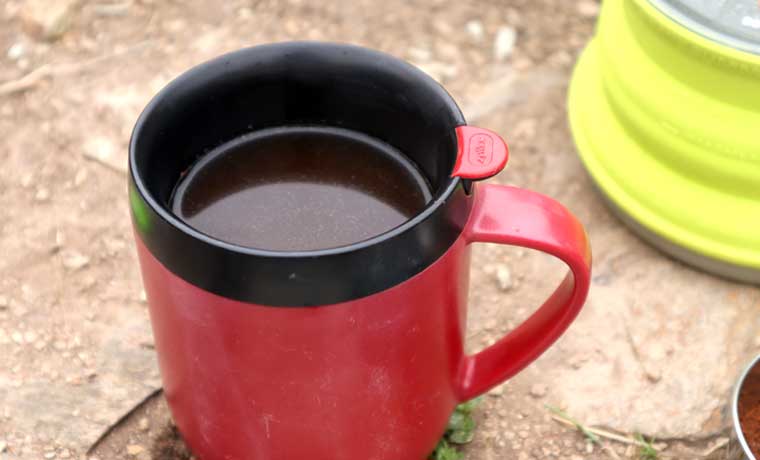
Joob Mug
Not only does this fun looking camping mug ooze outdoorsiness, it also does its job very well. It’s the ideal size for a big strong coffee, sips well, has a lovely feel about it and has a lid (not screw on) that seals in the heat with efficiency. It’s also rather nice to sip ales from, if you’re interested.
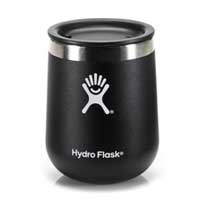
Hydro Flask Wine Tumbler
This is my favourite camping mug for the times when I’m feeling the wine more than the beer. It’s delicate, wonderful to hold, keeps its contents at the right temperature and makes me feel dead posh! Sipping espresso or a strong coffee from it also happens to be equally satisfactory as guzzling (I mean sipping!) a crisp white in the evening.
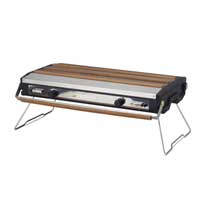
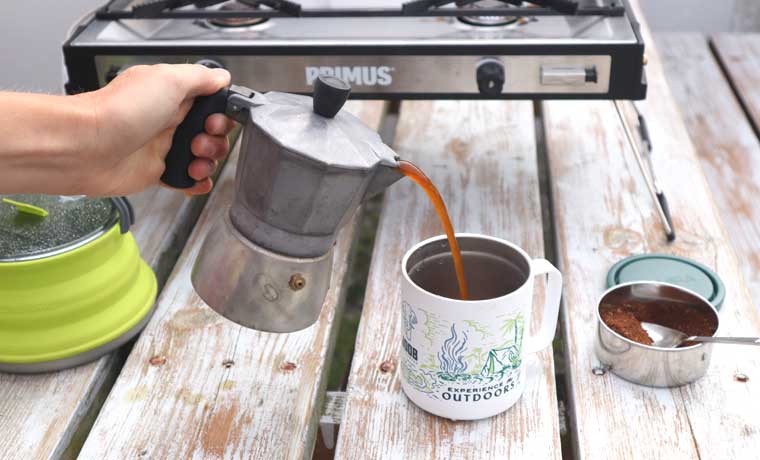
Primus Tupike Stove
This lightweight and highly portable stove means that we can take our camp cooking and al fresco coffee making further afield than normal. It’s compatible with a small gas canister and can be carried in a backpack. Coffee and pancakes at the beach has now become a thing!
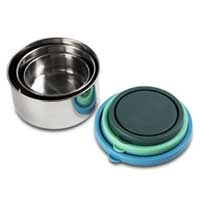
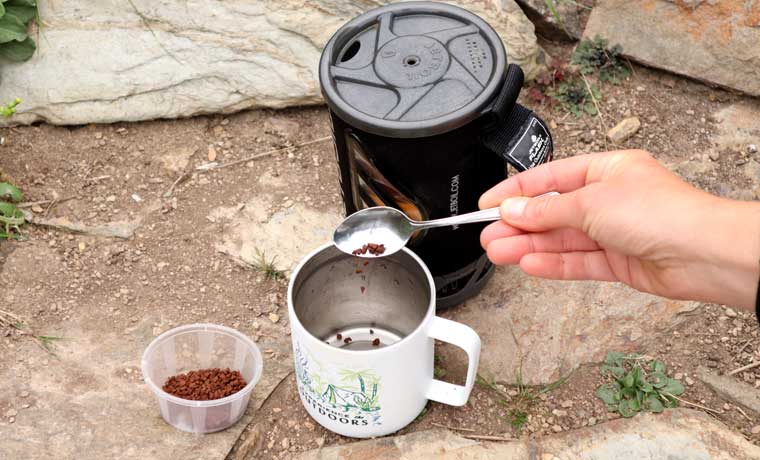
Mira container
One of a set of three, this stainless steel container is ideal for storing coffee grounds in for overnighters or short camping/backpacking trips. It keeps the coffee fresh, seals excellently and when empty can store used coffee grounds / filters / bags in. Take the larger pots for car camping and bigger groups.
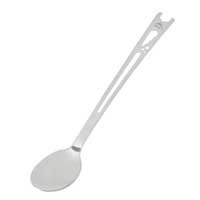
MSR Alpine Long Tool Spoon
The extra length of this stainless steel spoon is useful when stirring or extracting coffee grounds from deep coffee pots. It also features a jet-and-cable tool for servicing your MSR liquid-fuel stoves.
