Everyone approaches their hiking nutrition differently. Some stick to three meals a day whilst others like to fuel up in the morning and re-fuel in the evening. You’ve got to do what works best for you. But what most hikers agree on when it comes to trail food is that hiking snacks are essential!
The best snacks for hiking should contain loads of energy, calories and flavour. Any old energy bar will most certainly tick those boxes. But for those wanting to consume ingredients that you can identify, and snacks that aren’t just full of corn syrup, you’ll be better off creating your own snacks for hiking and backpacking.
With the help of this wonderful group of foodie hikers, we’ve put together a list of some delicious and nutritious hiking snack ideas that will keep you trekking on all day long!
- Trail Granola
- Apple Chips
- Oatmeal Energy Cups
- Backcountry Banh Mi – Vietnamese Sandwich
- Don’t Bonk Bites
- Curried Cashews
- Banana Cakes
- Peanut Butter Trail Mix Bites
- Oven-Roasted Chickpeas
- Matcha Pistachio Energy Bites
- Desert Magic
- Sesame Ladoo
- RDRx Peanut Butter Energy Bars
- Ginger and Coconut Balls
The best snacks for hiking: 14 delicious recipes
Hiking with a backpack for prolonged periods is a sure-fire way to burn some serious calories. You can see just how many in our handy guide to calories burned doing various outdoor activities. As such, hiking snacks need to full and energy and high calorie for their weight. But as well as this, the best snacks for hiking need to be easy to carry in your pack and not messy. Day hiking snacks can afford to be on the heavier, larger side, but for those looking for hiking snack ideas for multi-day trips, portability, weight and size are also really important too.
Get your juices flowing with these drool-inducing hiking snack ideas:
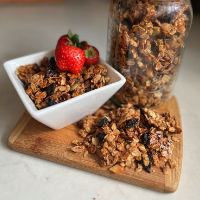
Trail Granola
Recommended by: Leah Isaacs – Nutrition Therapy Practitioner
Many store-bought granolas are high in added sugars and low in protein/healthy fats, but not this homemade version! A perfect hiking companion for those moments when you need an extra boost to the top, a morning breakfast for overnight treks, or a sweet/salty treat after a P,B&J or other portable meal that may or may not have been super satisfying.
I love this recipe because it’s irresistibly delicious and easy to prep, but some additional highlights that make it a perfect option to pack for your next hike include:
- The combination of oats, nuts, seeds, and coconut oil provides a perfect balance of complex carbohydrates, protein, and healthy fat to keep your energy up and avoid a blood sugar crash mid-way through.
- Easily transportable in a sack (no biggie if it gets a little crushed) or lightweight container
- Shelf life of up to 10 days so depending on the length of your hike, you’ll have granola to last you the miles – or extra to enjoy at home!
- Gluten-free (if using GF oats), dairy free, and vegan (if using maple syrup instead of honey)
- Makes about 4 cups so plenty to share with friends!
- The recipe is super customizable so you can include your favorite nuts and seeds, add more if you want the extra protein/fat, and add more cinnamon or other spices to your liking.
Trail Granola Recipe
Beware, once you start snacking, you may not be able to stop, but that’s not a problem-these ingredients are supportive of your immune, cardiovascular, and digestive systems so go right ahead and enjoy!
Ingredients
- 2 cups whole rolled oats
- 1 cup choice of nuts/seeds, chopped pumpkin seeds, pistachios, almonds, cashews
- ½ cup unsweetened coconut, shredded or flaked
- ¼ cup chia seeds
- ½ tsp kosher salt
- 2 tsp cinnamon
- 1 tsp vanilla extract
- ¼ cup coconut oil, melted
- 1/3 cup honey
- ½ cup dried cranberries, cherries, or raisins
Method
- Preheat oven to 300°F and line a baking sheet with parchment paper or silicon mat.
- In a medium bowl, combine the oats, nuts/seeds, coconut, chia seeds, salt, and cinnamon.
- Add vanilla, coconut oil, and honey. Stir until combined.
- Scoop the granola onto the baking sheet and press the mixture into a 1-inch-thick oval or rectangle to encourage clumping.
- Bake for 15 minutes, stir the mixture, and bake for another 15 mins or until golden brown.
- Cool on a rack, break up into pieces & mix in dried fruit.
- Store in an air-tight container for 7-10 days
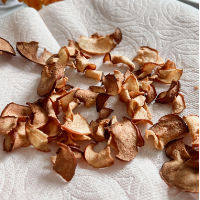
Crispy Apple Chips
Recommended by: Dr. Tammi Kaeberlein – Owner and author of Wander Healthy (health-based travel blog)
The chips are good for hiking because they provide a natural energy boost and have the fresh, satisfying taste that only comes from whole foods. They’re also vegan, gluten free and super easy to make.
I store them in an air-tight container at room temperature for up to three days, but they never last that long as my kids devour them.
They would get crushed easily if you carried them in a plastic bag. I use reusable containers because it’s better for the environment, and the apple chips. If you wanted to pack them in something less protective, I would suggest cooking the apples for only 6 minutes total and they would turn out softer and unlikely to be crushed.
Crispy Apple Chips Recipe
One of the healthiest and tastiest hiking snacks ever!
Ingredients
- 1 T olive oil
- 1 tsp pure maple syrup
- 1/4 tsp cinnamon
- 2 apples
Method
- Combine the olive oil, maple syrup and cinnamon and mix well. Slice the apples extremely thin and coat well with the cinnamon mixture.
- Heat in a air fryer at 350 for 3 minutes, 3 minutes and 2 minutes, shaking well to turn and separate them in between.
- Note – they will crisp a bit more after sitting out for a few hours.

Oatmeal Energy Cups
Recommended by: Amy Margulies — Owner of Nutrition Consulting
These simple and fun oatmeal cups contain all of the energy and nutrients you need while you are hiking – veggies, fruit – fiber, nutrients and natural sugar to burn; almond butter, milk and protein powder – protein to help you power up the hills all afternoon; chips – a sweet taste during your sweet hike; walnuts – some healthy fat to help all of the above digest more slowly, giving your body the energy it needs to keep on moving and cruising!
Oatmeal Energy Cups Recipe
Sugar-free and energy-filled muffins that are naturally sweet and packed full of goodness
Serves 12
Ingredients
- 1 egg
- 1/4 cup almond butter
- 2 medium bananas (mashed)
- 2 small zucchini (shredded)
- 1/2 cup almond milk
- 1 tsp vanilla extract
- 2 scoops protein powder (plain)
- 3 cups old fashioned oats
- 1 tbs baking powder
- 1 1/2 tsp ground cinnamon
- 1/4 tsp salt
- 1/3 cup mini chocolate chips and/or crushed walnuts
Method
- Preheat oven to 375ºF/190ºC.
- Spray muffin tin pan with nonstick spray.
- Mix wet ingredients (egg, almond butter, bananas, zucchini, almond milk, vanilla).
- Add dry ingredients (protein powder, oats, baking powder, cinnamon, salt, chips and/or nuts).
- Mix until smooth.
- Fill muffin cups to the top.
- Bake for 30 minutes or until toothpick comes out mostly clean.
- Store in airtight bag or container; pack in single serving baggies for your next hike!
Per serving: 192 calories, 7g protein, 8g fat, 26g carbohydrate
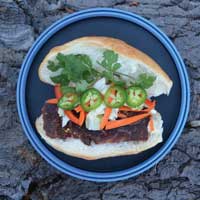
Backcountry Banh Mi — Vietnamese Sandwich
Recommended by: Michelle Shea — Founder of Adventure Dining Guide
Backcountry Banh Mi’s are a harmonious blend of delicious Asian flavors packed in trail-friendly sandwiches. Our version of Vietnamese Banh Mi for wilderness travel lasts up to 5 days without refrigeration (with proper storage), and taste fantastic after bouncing around in your pack all day. French bread and herbs pair beautifully with meat and pickled vegetables to develop bright, balanced flavors. These sandwiches are lightweight, nutritious and a creative twist on a traditional wilderness meal.
Backcountry Banh Mi Recipe
A wilderness inspired recipe for Banh Mi, featuring long lasting adventure friendly ingredients
Makes 4 Sandwiches
Ingredients
Backcountry sandwich
- 4 french rolls
- 2 cup soft jerky or tofu cut in small pieces
- 2 packets hoisin sauce
- 4 spriggs cilantro fresh or dehydrated
Pickled vegetables
- 1/4 jalapeno sliced thin
- 1/4 cup carrots grated
- 1/4 cup cucumber sliced thin
- 1 tsp coriander
- 1/2 cup 5.0 percent cinegar
- 1/2 cup water
- 1/2 tsp sugar
- 1/2 tsp salt
Method
Pickled vegetables at home
- Add jalapeño, carrot, cucumber, coriander and cilantro to a ziplock bag.
- Top with vinegar, water, sugar and salt.
- Remove all air from the bag and tightly seal the container.
Sandwiches in the wilderness
- Slice french roll and pull open.
- Place 1/2 cup of sliced jerky onto bottom layer of bread. Spread evenly.
- Cover jerky with a layer of ziplock pickled vegetables – shake excess pickled juice from vegetables to prevent bread from becoming soggy.
- Top with 1/2 packet of hoisin Sauce and cilantro (fresh or dehydrated).
- Close sandwich, eat and enjoy!
Notes:
For instructions on trail pickling, check out our secrets to successful Ziplock Pickling.

Don’t Bonk Bites
Recommended by: JL Fields — Cookbook Author + Owner of Colorado Springs Vegan Cooking Academy
“Don’t Bonk Bites” are simple to make and easy to eat on the trail. Toss these individually wrapped vegan truffles in a jersey pocket or backpack when hiking and on the move.
Don’t Bonk Bites Recipe
Vegan friendly balls of yumminess!
Makes 9 truffles
Ingredients
- 8 Medjool dates, pitted
- 1 serving vanilla protein powder (110 or higher calorie per serving protein powder)
- 1/4 cup walnuts
- 1/4 cup dry rolled oats
- 2 tablespoons hemp seeds
- Juice of one lime (about 3 tablespoons)
- 3 tablespoons to 1/4 cup water (as needed)
Method
- Add all ingredients – except for the water – to a food processor. Begin pulsing and slowly add water, as needed until you’ve reached a cookie dough consistency.
- Scoop out about 2 tablespoons and roll into a truffle and place on a parchment paper lined baking sheet or pan; repeat, making 9.
- Refrigerate for an hour or two (or overnight).
- Store in an airtight container in the refrigerator for up to 5 days. To freeze, wrap individually in plastic wrap and put each wrapped truffle in a freezer safe container or plastic bag.
Per serving: 123 calories, 4g protein, 4g fat, 20g carbohydrate
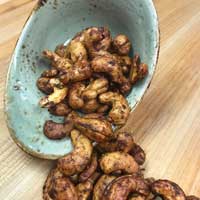
Curried Cashews
Recommended by: Jake Schmidt — Executive Chef at The Swag
Located right next to Great Smoky Mountains National Park, The Swag is well used to preparing their guests for big days hiking in Park with pockets full of this healthy and delicious hiking snack.
Curried Cashews Recipe
A high fat savoury snack for nibbling on as you hike
Ingredients
- 1 pound unsalted cashews
- 2 tbs thai green curry paste
- 1 tbs tamari
- 1 egg white
Method
- Whip one egg white ‘til frothy.
- Whisk in the thai green curry and tamari until fully incorporated.
- Fold the mixture over the cashews and bake on a silicone mat for roughly 45 minutes at 300ºF stirring every five to ten minutes until the crust is fully adhered.

Banana cakes
Recommended by: Kathleen LeSage — Owner of New Life Hiking Spa
The reason I love this recipe is because it is different than your usual granola bar or bag of granola/dried fruit. It wraps up easily when made into muffins and gives a great boost of energy on the trail. It’s moist and sweet without being too sweet. Add the nuts and raisins and/or craisins and it gives a great alternative to all the energy bars that are currently on the market for a fraction of the price. Make in bulk and freeze and just pop them in your backpack when you are getting ready to head out. Great snack for energy.
Banana Cakes Recipe
A good old-fashioned trail cake!
Ingredients
- 2 cups whole wheat pastry flour
- 1/2 cup brown sugar
- 1 tsp baking powder
- 1 tsp baking soda
- 2 tsp cinnamon
- 1/2 tsp nutmeg and salt (optional)
- 1 tsp vanilla essence
- 3 mashed ripe bananas
- 2 eggs
- 3 tbs yogurt, plain or vanilla
Method
- In a large bowl mix the first 6 ingredients (the “dry” ones).
- Add the last 4 ingredients (the “wet” ones) and stir together well.
- Coat a muffin pan with non-stick cooking spray.
- Pour the batter into the muffin pan and bake at 350ºF/175ºC for 35 minutes, or just until a toothpick inserted into center comes out clean.
- Remove from oven and leave to sit for 10 minutes.
- Once cooled invert onto a rack or serving board, cool and wrap individually for your hiking backpack.
Note: Walnuts, raisins, craisins, all make wonderful additions to this recipe. Add about 1/3 cup of your choice.

Peanut Butter Trail Mix Bites
Recommended by: Rachel Winkler — Healthy Food Blogger + Recipe Developer
These Trail Mix Bites are a delicious mix of sweet and salty. I love them because they are packed with whole grain oats and healthy fats from nuts, which help keep you going while you’re on the trail. They’re naturally gluten-free and can be made vegan by swapping the honey for maple syrup.
Peanut Butter Trail Mix Bites Recipe
These Trail Mix Bites should last in the fridge for 10 days
Serves 14-16 bites
Ingredients
- ⅓ cups unsalted almonds
- ⅓ cup unsalted cashews
- 1 tbs flax seeds
- ¾ cup rolled oats
- ¼ cup dates, chopped
- ⅛ cups raisins
- 2 tbs dark chocolate, chopped
- 1 tsp stevia
- 2-3 tbs honey (to taste)
- 1 tsp vanilla extract
- ⅓ cup peanut butter, melted
- salt, to taste
Method
- In a food processor grind the almonds, cashews, and flax seeds for about 15 seconds or until there are still some chunks of nuts. DO NOT grind to sand-like texture.
- Remove the nuts from the food processor and place in a large bowl with the oats, dates, raisins, dark chocolate, and stevia. Stir well.
- In a small bowl combine the honey (start with 2T and adjust to desired sweetness), vanilla, and peanut butter.
- Pour the peanut butter mixture over the nut and oat mixture and stir well. Taste mixture and add a pinch of salt if desired.
- Line a baking sheet or large plate with parchment paper. Using wet hands, roll the mixture into 14-16 balls, slightly smaller than the size of a golf ball. Make sure to pack the mixture tightly.
- Place the baking sheet in the fridge for at least one hour to harden, then enjoy.
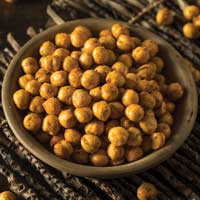
Oven-Roasted Chickpeas Recipe
Recommended by: Sophia Borghese — Consultant for All Inclusive Health
Our vegan clients need to eat enough protein, too. While chickpeas are definitely not allowed for those following keto and paleo diets, they offer vegans and vegetarians at least 6 grams of protein per serving. Since it’s not ideal to carry around a can of chickpeas on a hike, make these legumes portable by roasting them in the oven. To make them flavorful try seasoning them with your favorite spices. We think they taste best with a sprinkle of cumin and olive oil. However you roast your chickpeas, these will keep you feeling satisfied until meal your next meal time.
Oven-Roasted Chickpeas
The ideal snack when you need to replenish your salt stores
Ingredients
- 1 can of chickpeas
- 1-3 tbsp of olive oil
- A few sprinkles of garlic, salt, cayenne pepper, and cumin
Method
- Preheat the oven to 450 ºF.
- Drizzle and massage chickpeas in oil and spices.
- Spread chickpeas on baking sheet and bake for 30-40 minutes till browned and crunchy!

Matcha Pistachio Energy Bites
Recommended by: Grace Derocha — Dietitian, Diabetes Educator, and Health Coach
These tasty energy bites have a nice dose of caffeine from the matcha powder. Matcha powder releases caffeine into the body gradually over a 6 to 8 hour period — the result is sustained energy to keep you going during your hike.
Matcha Pistachio Energy Bites Recipe
Get your caffiene fix from these no-bake power balls
Ingredients
- 1/2 cup raw cashews
- 1/4 cup white chocolate chips
- 1/2 cup raw, shelled pistachios
- 12 pitted Medjool dates
- 1/4 cup unsweetened, shredded coconut
- 2 tsp matcha powder
- 1 tbs coconut oil
Method
- Place all ingredients into the food processor.
- Process for one minute or until well blended and fully combined.
- Roll into about 14 balls.
- Refrigerate for 15 minutes before serving. Enjoy!
Per serving (1 energy ball): Calories 99.8, Total Fat 6.6g, Total Carbohydrate 8.5g, Protein 2g
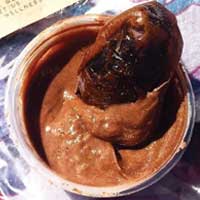
Desert Magic
Recommended by: Stacey Jackson — Founder of NUDA
Traipsing through the trails of Joshua Tree’s National Park enjoying my favorite hiking snack is what I like to call Desert Magic! It is delicious and filling without weighing or slowing me down. It’s energizing without causing blood sugar spikes, while also being muscle repairing to boot, hiking boot that is. This recipe is plant-based-paleo and packed with super foods, while being free of refined sugar, gluten, as well as dairy. It is shelf stable and easily stored, making for the perfect grab and go treat on the run. Dates and cacao are a magical combination for energy and muscle repair. Dates are naturally sweet and because their fiber is intact the body properly assimilates the natural sugars from the fruit without spiking the blood sugar to an unhealthful level, thus providing the energy needed to hike on while tantalizing ones taste buds. Raw Cacao is also naturally energizing in that it encourages the brain to release those feel-good endorphins, which are the equivalent to the endorphins released during “runners high”, elevating ones mood. Both Dates and Raw Cacao have very high levels of magnesium, which is attributed to helping muscles recover quickly. Raw chocolate actually contains the highest levels of magnesium than any other food! And that mineral, in particular, is super helpful in maintaining healthy nerve and muscle function.
Desert Magic Recipe
A dippy trail dessert like no other!
Ingredients
- 3-5 whole Medjool Dates
- 1 cup cashews
- 6 tbs cacao powder
- 3.25 oz deseeded dates
- ¼ tsp wild vanilla bean powder
- ¼ tsp Ceylon cinnamon
- ¼ tsp fine Himalayan pink salt
Method
- Place cashews, cacao powder, deseeded dates, wild vanilla bean powder, Ceylon cinnamon and pink Himalayan salt in a high speed blender.
- Blend on high until completely smooth. You want all the little cashew specs to be completely gone, just creamy smooth butter.
- Place butter in little mason jars or place about 1 to 2 ounces of the Magic Butter into several snack sized baggies if you are worried about hiking weight.
- Place whole Medjool Dates in a separate jar or baggie
- Either dip whole Medjool dates into cashew butter jar OR bite off one tip of the baggie and squeeze butter onto each date bite.
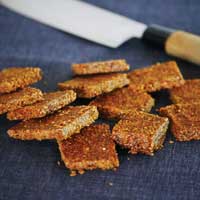
Sesame Ladoo
Recommended by: Anastasia Sharova — Founder of Happy Bellyfish
In season, I go hiking a few times a month, and there is one homemade snack that I don’t leave my house without – sesame ladoo, an energy bar inspired by Indian cuisine.
I love it, because it only consists of two ingredients (sesame seeds and jaggery or molasses) and it can last for weeks without being refrigerated. It doesn’t melt in your hands and it’s a perfect snack on the go. Moreover, from a nutrition point of view it’s a real powerhouse. Sesame ladoo is an iron rich snack, that provides long-lasting energy, unlike sugary sweets which only give you a short-lived energy boost.
Sesame Ladoo Recipe
A super simple snacking sweetie!
Ingredients
- 1 cup sesame seeds
- 1 tbsp coconut oil
- 1 cup of jaggery or molasses
Method
- 1 cup of jaggery or molasses.
- Add the coconut oil to a pan and melt the jaggery or molasses, stirring continuously to prevent sticking.
- When jaggery obtains a structure of uniform liquid add sesame seeds to the pan and mix together.
- Remove the mixture from the pan, put it on baking paper, flatten it with a rolling pin and cool it down for 20 minutes.
- Before the mixture becomes too hard cut it in equal squares.
- If you prefer you can also give your sesame sweet a shape of a ball.
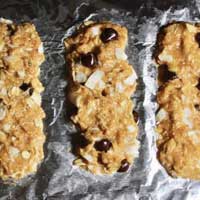
Peanut Butter Energy Bars
Recommended by: Haley Hughes — Dietitian and Diabetes Educator
These bars are super easy to make, have whole food ingredients, are nutrient dense including healthy fats, complex carbohydrates and protein. The taste is amazing and don’t have that protein aftertaste. Gluten-free as well.
Peanut Butter Energy Bars Recipe
A high calorie meal replacement for re-fueling on the go
Makes 4 bars
Ingredients
- 1/2 cup nut butter
- 2 tbsp applesauce
- 2 scoops collagen
- 3/4 tsp baking Soda
- 1/4 cup coconut flakes
- 1/4 cup oats
- 1/4 cup dark chocolate chips
- 2 tbsp sugar 2.0 probiotics (optional)
Method
- Mix together all the ingredients quickly.
- Place the mixture onto foil and mold into 4 bars.
- Refrigerate for 20 minutes.
1 serving: 328 calories, 10g protein, 26g fat, 20g carbohydrate
And finally, a contribution from Cool of the Wild…
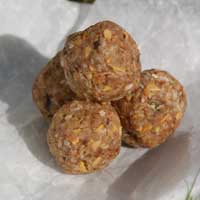
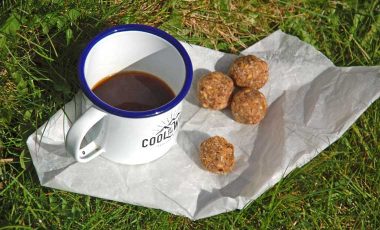
Ginger and Coconut Balls
Recommended by: Joey Holmes — Founder of Cool of the Wild
The uncooked fresh ginger in these balls adds a wonderfully warming flavour that is always very welcome on cold days in the mountains. I love how the naturally sweet dates make these balls taste much naughtier than they are, giving a gentle energy boost. Add that to the combo of healthy fats from the coconut, seeds and nuts and they’ll keep you trucking for hours.
These balls are super easy to make, but be sure to make lots of them as once your hiking buddies get wind of them, they’ll be gone in one sitting!
Ginger and Coconut Balls Recipe
A zingy yet sweet, sugar-free ball of yumminess!
Makes 15-20 balls
Ingredients
- 1 cup of dried fruit (I use a mix of dates and dried apricots)
- 1 tbs of almonds or walnuts
- 1 tbs of mixed seeds
- 3/4 cup of descicated coconut
- 3 tbs fresh ginger
Method
- Place all of the ingredients into a food processor and whizz for a couple of minutes until the mixture is like a sticky batter.
- Scoop out spoonful sized portions of the mixture and roll into a balls with your hands. If the mixture is super sticky it helps to wet your hands a little.
- Store the balls in a lidded container in the fridge and wrap in greaseproof paper to transport.
Note: These can be kept in the freezer for up to a month.
So, there you have it! No excuses to be snacking on processed candy and sugar-filled sweeties. Plan ahead and make your own and you’ll most certainly be saving some pennies (as well as your teeth!).
Want to contribute to this list of the best snacks for hiking?
If you’ve got a cracking hiking snack recipe that you’d like to add to this already scrumptious sounding list, then get in touch — we’d love to hear about it.
